- Popular Post


ADMIN
-
Posts
3,931 -
Joined
-
Last visited
-
Days Won
642
Posts posted by ADMIN
-
-
- Popular Post
OldSquadMU - Inception - Info

⇓
Why to choose US?
- This is a REAL STABLE SERVER - In 1 year I don't know if there are more than 3-5 down-times apart from updates.
- This is a REAL LONG TERM SERVER - We guarantee a minimum of 8 months lifetime (the player count does not matter) up to 12 months lifetime (now depending on player count) - Proved on all of our servers editions that lasted almost 1 year each.
- This is a REAL PLAY2WIN SERVER - I didn't really see until now any top server that doesn't sell items (WebShop) or has CashShop for 3x seals (like 400% exp), panda pets and other shits. And when I say PLAY2WIN, many top players can confirm if they spent more than first VIP donations to be on top - Credits are very easy to be farmed without donating anything but again, you must PLAY for that.
- This is a REAL PROFESSIONAL SERVER - Minimum level of bugs, configured in a Smart & Professional way with a lot of unique features.
- This is a REAL DEDICATED PROJECT - Yes, we aren't here for money, we are here to make a REAL COMMUNITY for this shitty game that has eaten our childhood. We aren't opening and closing servers each month just for money, we aren't changing the name of servers just to "refresh" reputation. We are OldSquad! We are here to stay.
- This is one of the very few servers where the staff is actually supporting any player with any request in the fastest time possible (starting from instant to maximum 1 day - there are some exceptions when we are very busy or not home at all).
- This is one of the very few servers where the Administrator (in this case, me) is actually listening to players suggestions/opinions and is fighting hard to touch anything (good) that players are coming with.
- This is the ONLY SERVER where you find a UNIQUE GAMEPLAY - apart from all the normal boring gameplays - that is constantly improving and adjusting to the players needs.
- This is one of the very few servers that DOESN'T HAVE FAKE ONLINE players: If you check many top servers, they don't even show online players on rankings tab, neither entire top 100 players. This is because they are using artificially online count that is boosted into the website, and they don't show online players so people can't check if it's real or not. Almost all top servers are doing that just to attract players.
- Furthermore, this is one of the few servers that have a limit of ACC per IP+HWID (2).
Basic Info
- Season: 6 Episode OldSquad.
-
Exp: Dynamic Exp [15-25x] - goes down as the game progress.
-
Note: The number of mobs on spots also gets higher as the game progresses.
- Example: Low maps have 4 mobs on spots, high maps have 7-8 mobs on spots.
-
Note2: BC1-5 & DS1-4 also have progressive number of monsters.
- Example: BC1 has lower number of mobs than BC2, DS1 has lower numbers of mobs than DS2, etc.
-
Note: The number of mobs on spots also gets higher as the game progresses.
-
Newbies boosts including exp boosts, damage/deff buffs, drop buffs.
- Note: Newbies boosts are added as game the progresses, usually after stages, never from the start.
- Gameplay: Maximum 25 Resets without End-Game content. 120 days per Sprint, transfers at the end.
- Master EXP: Dynamic 3-5x - starts low & goes higher as you advance in Master Levels.
- Master Level: Maximum 150 ML.
- Drop: 30%.
-
Party Exp System:
-
The following exp rates will be applied no matter the races that are in party:
- Solo = 100%.
- 2 Players = 102%.
- 3 Players = 105%.
- 4 Players = 108%.
- 5 Players = 112%.
-
Now, when there are ONLY 4 people in party, but all of them different races (Perfect Party):
- Everyone gets a "seal" with +5% EXP from the 4 man base exp (108%).
-
If there are 5 people in party, and all of them different races (Perfect Party):
- Everyone gets a "seal" with +7% EXP from the 5 man base exp (112%).
- In order to apply the seal, a player from party must be in the 10x10 range of PM.
-
If PM hasn't at least 1 other player from party in his 10x10 range, he won't get the seal alone.
- So: Leaving from the spot means losing your seal, but others on spot near PM do not lose it.
- If PM leaves spot and he's alone, nobody have a seal anymore, including the PM.
-
The following exp rates will be applied no matter the races that are in party:
- All events working with nice rewards and adjusted difficulties (& custom additions).
-
Guild System: Maximum 20 players in a guild for all classes.
- Note: Level needed to create a guild is 150.
- Note2: Each stage / mini-stage does increase the maximum number of players in Guild.
-
Alliance System: Maximum 2 guilds in an alliance.
- Note: Alliance can join the CS as well with the same rights as main guild.
- Note2: There can only be 25/40 players at CS per alliance, with minimum 10 being from main guild.
- Note3: Maximum amount of players per alliance at CS will be raised after each stage.
- Elf Soldier Buff: Up to level 250 and 1 reset (or higher with VIP).
-
Limited Connections: Maximum of 2 accounts on same IP/HWID.
- Note: Energy Elves are removed from gameplay so you can have 1 main + 1 alt/farmer.
- Note2: The Energy Elf build is made only for Castle Siege using a free stats rebuild before each Castle siege.
- Shops for a low exp server.
- Limited HP & Mana stacks: Maximum of 14 HP (Large) pots stack and 45 Mana (Large) pots stack (for PvP and PvM experience).
- DL, MG, RF Creation Level: Level 200 (or Level 1 with VIP).
- Reconnect System fully working.
- Play2Win System: No Web-Shop, no Cash-Shop, only VIP System (without VIP Server) & Web-Credits for Premium Modules.
- Helper from level 1.
- Party Exp Gap: 70 Levels.
- Max Level to delete a Character: 300 (& 1 reset). To delete chars over level 300 or over 1 reset you need to contact us.
- OFF-Attack: Active for everyone, 5 hours no auto-pick (VIP can boost its duration and can add auto-pick).
Gameplay Info
OldSquad is going to offer you a nice & unique experience with build-base, very interesting PvM and balanced PvP for all classes, that can satisfy any kind of player (passive, farmer, pvp-lover, afk-er, competitive, etc.).
We are introducing for the 9th time into MU Online World a brand new GAMEPLAY based on a progressive style with 3 BIG STAGES and 2 MINI STAGES.
Since 2 years ago, Inception is running under "Sprints". There are 2 Sprints per year, each Sprint lasting 4 months (120 days). At the end of the 4 months, characters are moved to Genesis. Players can choose to either continue the end-game on Genesis (if they want to experiment sockets, w4, quest system, more pvp, etc.) or join the next Sprint from 0 on Inception.
Genesis is our permanent main server, and the location where characters are transferred from the Inception Sprints. A 300~360x resets server focused mostly on end-game content, a server that will remain online without any editions or wipes for as long as OldSquad will remain online.
Info about Transfers
What is transferred:
- Character's Equipment (with all content)
- Character's Inventory & Extended Inventory (with all content)
- Character's Store (with all content)
- Character's Zen
- The jewels and zen that you have in Jewel Wallet & Zen Wallet
-
Main Vault (0) content (including the zen)
- ATTENTION!!!: The Main Vault (0) from Genesis will be REPLACED with the one from Inception, so make sure to have your items moved from Main warehouse (0) to warehouse (1) or (2) on GENESIS before transferring!
-
Character's Master Level will be transferred BUT it will also be reset after transfer.
- ATTENTION!!!: All of your character skills will be RESET after transfer, if you had any ML!
- 100% of your Inception's credits (if you choose to transfer them) - else you can retain 20% of your credits from Inception for the next Inception Sprint (and none will be transferred to Genesis).
What else is included with your character:
- HoFs
- Fruit Points
- Mercenary Squad Stats
What is not included in the transfer:
- Secondary warehouses content (1-5)
- Web Warehouse content
- Market content
- Old "stats" of your character (like PvM Rankings, CS stats, etc.)
- Gens Status & Stats
Observations:
- You need to have at least one free slot on Genesis account (same account) in order to transfer - command will let you know.
- After the transfer is complete, your character & account from Inception will be blocked and the credits/jewel & zen wallets you still have will be set to 0 (the account will be unblocked on the next Inception Sprint).
- You will be transferred with level 400 and the reset based on the transfer table.
-
You will have 25 stats + the sum of points based on your new reset & genesis points as unused points, that you can freely add.
- Note: They aren't 100% accurate but once you do your first reset on Genesis they will be 100% accurate.
Transfer table for Inception:
24-25 resets Inception -> 1 GR, 49 resets and level 400 Genesis.
21-23 resets Inception -> 1 GR, 40 resets and level 400 Genesis.
18-20 resets Inception -> 1 GR, 25 resets and level 400 Genesis.
15-17 resets Inception -> 1 GR, 10 resets and level 400 Genesis.
Under 15 resets Inception -> 0 GR & X3 the resets number on Genesis (14 resets Inception = 42 resets Genesis, etc.) and level 400.Minimum resets (on Inception) that a character must have in order to be transferred to Genesis: 5 resets.
Once you transfer a character from an Inception account, the account will become blocked (just on Inception, unblocked on the next Sprint).
Note: All transfers will include character's equipment, inventory, store, MAIN warehouse & jewel wallet.
Note2: What is not included in the transfer is the secondary warehouses (1-5) content & the web warehouse content.
Note3: You can either choose to transfer 100% of your Inception credits to Genesis or, instead, you can keep 20% of your Inception credits for the next Inception Sprint (which means no credits transferred on Genesis).
Note4: Master Level will be the same as you have it on Inception.
Schedule for 2023-2024:- 13 October 2023 - Inception Sprint #3 release - ends on 11 February 2024.
- 11 February 2024 - Transfers start from Inception's Sprint #3 to Genesis.
- 18 February 2024 - End of the transfers.
- 15 March 2024 - Inception Sprint #4 release - ends on 13 July 2024.
- 13 July 2024 - Transfers start from Inception's Sprint #4 to Genesis.
-
20 July 2024 - End of the transfers.
Another innovation that can be found on Inception is the elimination of Energy Elves as we used to know them (a must-have-secondary-char in order to progress/compete). That means, nobody will have to create a secondary EE now - They are USELESS on normal server!
We're also introducing for the 6th time the Dynamic Characters Balance concept:
At the end of each stage (every 5 resets) we MAY adjust the characters that overperform or underperform in either PvP or PvM, based on public feedback.
In this way we'll try to make sure that none of the characters are too powerful or too weak at any point of the game while keeping the character's pros and cons as they should be.
In terms of Dynamic Characters Balance, this is how we are handling it this edition:
We use our previous 0-5rr balance (which was very good) but with the previous edition's Stage 1.1 (5rr) tweaks applied.
Basically, what is available now on test server is the balance that will be untouched for 0-5rr.
Then, after Stage 1.1 (5rr), we'll put the tweaks that were applied last edition in Stage 2 (10rr):
SUM:
- Increased PvP damage taken from rest of chars by 8-15%.
- Overall PvP damage nerfed with 10%.
- Overall PvM damage nerfed with 6%.
After Stage 2 (10rr), we'll put the tweaks that were applied last edition in Stage 2.1 (15rr):
MG:
- Nerfed Fire Slash damage with 4%.
- Buffed PvM damage with 5%.
DL:
- Buffed PvM damage with 10%.
BK:
- Buffed PvM damage with 16%.
After Stage 2.1 (15rr), we'll put the tweaks that were applied last edition in Stage 3 (20rr):
RF:
- Speed gain from agi nerfed from AGI/43 to AGI/50.
- Dark side damage % nerfed with 5%.
- PvP damage taken from rest of classes increased with 6-20% based on match-up.
- Chain drive damage % increased with 6%.
- Stutter chance reduced.
DL:
- PvP damage reduced with 6%.
- PvP damage taken reduced with 4-8% based on match-up.
ELF:
- PvP damage buffed with 8%
- PvP damage taken increased with 4-10% based on match-up.
MG:
- Stutter chance reduced.
And, at last, after last Stage (20rr), if needed, we'll put a final balance for 25rr, based on public feedback.
Note: We already announced the planned changes so you know exactly what to expect for your characters. If absolutely needed we may do extra tweaks compared to what it is shared, but they should be enough.
In order to discourage "same class stacking" in early game while also keeping the advantage of DL/RF/MG classes for "non-vip" players the following change is added:
Until first "non-vip" player reaches level 200, DL/MG/RF will be able to go in maps at the same levels like rest of classes.
After first "non-vip" player reaches level 200, the restriction will be lifted back.
This is only for 0rr, where restriction is normally disabled. For 1rr+ restriction to maps is always up.
Devias: Minimum level 15.
Elbeland: Minimum level 20.
Rest of 0rr maps: The "by walk" level of normal classes (-10 levels compared to the Move list of normal classes).
Inception - Back to Origins - The server concept remains the same, but with many improvements and new features made to offer an even better balance for all types of players. Inception does represent the starting point of our Community, and will always be a part of it, offering both memories and a great gameplay.Some bonus Gameplay info:
- SM, BK, SUMM & ELF receive 3 points per level and 4 points per level after quest (and after level 220 each reset).
- DL, MG & RF receive 4 points per level.
- First reset is at 350, 2nd at 360, 3rd at 370... from 6th reset until 30th reset level required will be 400.
- Maximum of 25 resets divided in 5 stages (will be explained below).
- After reset, the points won't be burned (they will stay).
- Master Level can be done on any mobs over level 105 (or lower with VIP).
-
Resets cost starts from 8kk and goes up as following:
-
Each extra reset until 6 resets = + 2.000.000 zen per reset.
- The 6th reset = 18.000.000 zen
-
Each extra reset until 10 resets = + 5.000.000 zen per reset.
- The 10th reset = 38.000.000 zen
-
Each extra reset until 15 resets = + 8.000.000 zen per reset.
- The 15th reset = 78.000.000 zen
- Each extra reset until 25 resets = + 12.000.000 zen per reset.
-
Each extra reset until 6 resets = + 2.000.000 zen per reset.
-
There is no reset stats on website! So be careful with how you add your points!
- You can only reset stats with reset fruits farmed ingame.
-
Balanced Map System to make sure that each type of map (low, mid, high, very high) has all styles (gens, non-pvp, normal).
-
6 NON-PVP Maps: Kalima1, Kalima2, Aida, Crywolf, Karutan2 and Kalima7 where you can only KS.
- NON-PVP Maps have 100% exp and 50% drop.
-
5 GENS maps: Atlans, Tarkan, Karutan1, Relics and Vulcanus.
- Gens Maps have +5%/12% exp compared to non-gens maps (5% before Gens Raids are released, 12% after).
- All other Maps are 100% PVP, with free KS (no ban), free PK (no ban) that can also be improved with Mercenary Squad.
-
6 NON-PVP Maps: Kalima1, Kalima2, Aida, Crywolf, Karutan2 and Kalima7 where you can only KS.
- PK clear is off, so if you want to PK you must also wait 20-60 minutes to clear and/or you must kill mobs.
-
Swamp is a level 380+ map designed mostly for Master Level, Medusa & Flame farm.
-
Swamp mobs are boosted in level compared to the rest of default mobs in order to offer the best ML exp from all maps.
- You need at least 10 resets to enter Swamp.
-
Swamp mobs are boosted in level compared to the rest of default mobs in order to offer the best ML exp from all maps.
- There is no ARENA (forget about leveling on the same place for 3 months, that's not how MU is supposed to be).
-
Exp will be raised for lower levels/resets after each stage/mini-stage.
- Note: Exp will usually be boosted starting from 0 resets up to the highest reset/level of the player from 101th place in rankings.
- Note2: Boost will be higher on lower levels/resets and gets lower up to the highest boost level/reset.
Dynamic EXP System Explained:
- We want to make sure that everyone understands how our EXP system works, at the server-level (not taking into account any boosts).
-
There are 3 types of EXP that you will encounter:
-
Linear EXP (means the % of exp is the same for all levels).
- Example: 0rr, 5rr, 10rr, 15rr, 20rr.
-
Dynamic Downside (means the global % of exp is decreased after certain resets).
- Example: 11rr is lower than 9rr (due to stage 2), 21rr is lower than 19rr (due to stage3).
-
Dynamic Upside (means the global % of exp is increased after certain levels).
- Example: 1-4rr, 6-9rr, 11-14rr, 16-19rr, 21-25rr.
-
Linear EXP (means the % of exp is the same for all levels).
-
Linear EXP
- At 0rr you have 112% exp for level 11-350.
- At 5rr (until first 3 players finish the stage 1.1) you have 35% exp for level 11-400. 100% after stage is finished.
- At 10rr (until first 3 players finish stage 2) you have 25% exp for level 11-400. 100% after stage is finished.
- At 15rr (until first 3 players finish stage 2.1) you have 20% exp for level 11-400. 100% after stage is finished.
- At 20rr (until first 3 players finish stage 3) you have 15% exp for level 11-400. 100% after stage is finished.
-
Dynamic Downside
- At 11-14rr and 16-19rr you have 85% exp spread across levels with the Dynamic Upside exp.
- At 21-25 you have 70% exp spread across levels with the Dynamic Upside exp.
-
Dynamic Upside
-
At 1-4rr, 6-9rr, 11-14rr, 16-19rr and 21-25rr the global exp (100%,85%,70%) is spread across level 11-400 by following:
- Starts with 35%/29.75%/24.5% for level 11-30 and it is increased with 10-15% every 20-60 levels up to 157.76%/134.09%/110.43% for level 381-400.
-
The exp points (where exp it is increased with 10/15% compared to previous level) are:
- Levels: 30,50,70,90,120,180,210,250,290,320,350,380.
-
At 1-4rr, 6-9rr, 11-14rr, 16-19rr and 21-25rr the global exp (100%,85%,70%) is spread across level 11-400 by following:
-
Master Level Exp
-
The Master Level Exp does use a Dynamic Upside pattern. It does start low and goes higher:
-
It does raise with +15%/+10% EXP after every 20 levels.
- Levels when it goes UP: 20, 40, 60, 80, 100.
-
It does raise with +15%/+10% EXP after every 20 levels.
-
The Master Level Exp does use a Dynamic Upside pattern. It does start low and goes higher:
-
Current Newbies EXP Boosts:
-
N/A.
-
N/A.
Info about Stages
Every stage will contain limited access to game features and also a very low exp for the last reset.
The stage will be completed when first 3 players will reach the maximum resets + level.
After the stage is completed the new content will be added and the exp of the stage and other lower resets will raise.
After each 'BIG STAGE' the exp is going down for the further resets.At the end of each stage, apart from the first 3 finishers, everyone that progressed through the stage will be rewarded based on the actual progress.
Important: The players that finish a stage won't be able to continue leveling until the stage is officially over for everyone. A stage will be officially over 12 hours after the 3rd player finished it.
Exception: If the 3rd player does finish the stage between 15:00 and 22:00 server time then the stage will be officially over only at 10:00 next day (due to sleep interval).
This is meant to assure the next stage will be more fair in terms of competition. So, by progressing through the stage you'll win both rewards and a better position to compete for the next one.
Info about every stage and a part of what you can access on it (there are more things not written):
Stage 1 - 0-10rr - Big Stage:
- 100% GLOBAL EXP [0-10rr]
- Maximum of 8.000 points in a single stat (like you can't put more than 8.000 points to ene or vit or str, etc.)
- WW.
- Rabbits.
- Death Skeletons.
- Cursed Dragon.
- Kundun.
- Goldens (BoK+1 -> BoK+4) - released gradually as people start to outlive them.
- Derkons (released when BoK+4 is released as well).
- Budge Dragons.
- Old Boxes 1 & 2 (without Rare Items in drop).
- Maximum number of players in guild: 20.
SITE:
- Access to Dealer & Hunter VIP.
- Access to Chaos Machine (on site) only from +9 to +11.
- Access to Add Luck.
- Access to Change Name.
- Access to Transfer Character.
- Access to Change Race (available at any RR).
- Access to Hide Inventory / Location.
- Access to Market but only for 15 items / day.
Stage 1.1 - 5rr - Mini Stage:
When you have 5 resets and level 1 the Stage 1.1 will start and it will have 35% exp from the normal exp, linear exp, no matter the level (compared to 1-4 resets where its lower -> higher %). After the first 3 players will reach level 400 and 5 resets the Stage 1.1 will be over and the stage exp will be back to normal exp (same as 4th reset) for everyone and the 1st newbies exp boost will be released for 0-4 resets.
The first 3 characters that will end the stage will also win 7 VIP-Days (at your choice from Dealer & Hunter).
Each character that progressed through the mini-stage (including the 3 players that finished it) will receive a reward based on their stage progress as following:
Having 5 resets and level 300-329 when stage is over will grant you 3x jewels (1 type at your choice from Bless/Soul/Life/Chaos).
Having 5 resets and level 330-354 when stage is over will grant you 6x jewels (1 type at your choice from Bless/Soul/Life/Chaos).
Having 5 resets and level 355-374 when stage is over will grant you 10x jewels (1 type at your choice from Bless/Soul/Life/Chaos).
Having 5 resets and level 375-389 when stage is over will grant you 15x jewels (1 type at your choice from Bless/Soul/Life/Chaos).
Having 5 resets and level 390-400 when stage is over will grant you 20x jewels (1 type at your choice from Bless/Soul/Life/Chaos).
The Stage 1.1 will also unlock Mercenary Squad System, Gens Raids & Rewards, BoK+5 Goldens, Crywolf Event, Kanturu Event, Illusion Temple 1+2+3, Arena Tournament, Character Market (Website), Maximum number of players in guild: 22, Maximum number of players at CS: 26.
Stage 2 - 10rr - Big Stage:
When you have 10 resets and level 1 the Stage 2 will start and it will have 25% exp from the normal exp, linear exp, no matter the level (compared to 1-4 & 6-9 resets where its lower -> higher %). After the first 3 players will reach level 400 and 10 resets the Stage 2 will be over and the stage exp will be back to normal exp (same as 9th reset) for everyone and the 2nd newbies exp boost will be released for 0-8 resets.
The first 3 characters that will end the stage will also win 7 VIP-Days (Professional) and 1x BoK+5 weapon at your choice (only for the class that finished the stage, not different class) + 13 + luck + 1 option at your choice.Each character that progressed through the stage (including the 3 players that finished it) will receive a reward based on their stage progress as following:
Having 10 resets and level 300-329 when stage is over will grant you 5x jewels (1 type at your choice from Bless/Soul/Life/Chaos).
Having 10 resets and level 330-354 when stage is over will grant you 10x jewels (1 type at your choice from Bless/Soul/Life/Chaos).
Having 10 resets and level 355-374 when stage is over will grant you 20x jewels (1 type at your choice from Bless/Soul/Life/Chaos).
Having 10 resets and level 375-389 when stage is over will grant you 25x jewels (1 type at your choice from Bless/Soul/Life/Chaos).
Having 10 resets and level 390-400 when stage is over will grant you 30x jewels (1 type at your choice from Bless/Soul/Life/Chaos).
Apart from the exp, the BIG STAGE also unlocks new content for all players:
- 85% GLOBAL EXP [For 10-20rr, 0-10rr still have 100%].
- Access to Quest 3.
- Access to Swamp (special zone for ML + Hunt Flame of Condors).
- Maximum of 16.000 points in a single stat (like you can't put more than 16.000 points to ene or vit or str, etc.)
- Maximum ML: 30
- BC 8 (opened the ML BC).
- DS 7 (opened the ML DS).
- CC 7 (opened th ML CC).
- Old Boxes 3 & 4.
- Rare Items from Old Boxes.
- Imperial Guardian.
- Illusion Temple 4 & 5.
- Bloody Witch Queen.
- 380 Weapons from Guild Master Box.
- Maximum number of players in guild: 25.
- Maximum number of players at CS: 27.
SITE:
- Access to Professional VIP.
- Access to Chaos Machine (on site) from +9 to +12.
- Access to Reset Skill Tree.
- Access to Increase ADD Option.
- Limit of Market items raised to 25 items / day.
Stage 2.1 - 15rr - Mini Stage:When you have 15 resets and level 1 the Stage 2.1 will start and it will have 20% exp from the normal exp, linear exp, no matter the level. After the first 3 players will reach level 400 and 15 resets the Stage 2.1 will be over and the stage exp will be back to normal exp (same as 14th reset) for everyone and the 3rd newbies exp boost will be released for 0-13 resets.
The first 3 characters that will end the stage will also win 7 VIP-Days (Professional).
Each character that progressed through the mini-stage (including the 3 players that finished it) will receive a reward based on their stage progress as following:
Having 15 resets and level 300-329 when stage is over will grant you 6x Jewel of Harmony.
Having 15 resets and level 330-354 when stage is over will grant you 10x Jewel of Harmony.
Having 15 resets and level 355-374 when stage is over will grant you 15x Jewel of Harmony.
Having 15 resets and level 375-389 when stage is over will grant you 20x Jewel of Harmony.
Having 15 resets and level 390-400 when stage is over will grant you 25x Jewel of Harmony.
The Stage 2.1 will also unlock GGD's, Doppelganger Event, World Bosses, Maximum ML: 70, Maximum number of players in guild: 27, Maximum number of players at CS: 28.
Stage 3 - 20rr - Big Stage:When you have 20 resets and level 1 the Stage 3 will start and it will have 15% exp from the normal exp, linear exp, no matter the level. After the first 3 players will reach level 400 and 20 resets the Stage 3 will be over and the stage exp will be back to normal exp (same as 19th reset) for everyone and the 4th newbies exp boost will be released for 0-16 resets.
The first 3 characters that will end the stage will also win 7 VIP-Days (Professional) and 1x Dark Elf/Nightmare weapon at your choice (only for the class that finished the stage, not different class) + 11 + luck + 1 option at your choice.Each character that progressed through the stage (including the 3 players that finished it) will receive a reward based on their stage progress as following:
Having 20 resets and level 300-329 when stage is over will grant you 10x Jewel of Harmony.
Having 20 resets and level 330-354 when stage is over will grant you 15x Jewel of Harmony.
Having 20 resets and level 355-374 when stage is over will grant you 20x Jewel of Harmony.
Having 20 resets and level 375-389 when stage is over will grant you 25x Jewel of Harmony.
Having 20 resets and level 390-400 when stage is over will grant you 30x Jewel of Harmony.
Apart from the exp, the BIG STAGE also unlocks new content for all players:
- 70% GLOBAL NORMAL EXP [For 20-25rr, 10-20rr still have 85% and 0-10rr still have 100%].
- Jewel of Creation added in drop from Monsters.
- Maximum of 27.000 points in a single stat (like you can't put more than 27.000 points to ene or vit or str, etc.)
- Maximum ML: 150
- Old Box 5.
- Medusa.
- Selupan.
- Events rewards improvements.
- Maximum number of players in guild: 30.
- Maximum number of players at CS: 30.
- Seeds NPC (so you can craft seeds as well before moving to Genesis).
SITE:
- Limit of items on market per day raised to 40 items/day.
This system will make the game more interesting and more skill/build-based (+long term) and also the entire balance of server (Economy, PvP, PvM,etc.) will be adjusted anytime.
Also, the gap between top 30 characters and the rest of the server will be lower.
Also, any person who wants to start after xx days from server start can recover easily (if he plays a lot).Old Box System & Rare Items
There are 5 boxes (Old Box 1, Old Box 2, etc.)
1 is the weakest, 5 is the best.
Old Boxes can't be: Traded, Moved to Vault, Moved to Store (you can only drop them).
- Each Old Box is dropping 1 part from the Rare Sets - Leather (BK, DL, RF), Pad (DW, MG), Vine (ELF), Mistery (SUMM)
- The Rare Sets can be farmed and obtained ONLY from Old Boxes.
- They will be dropped + 15 + LUCK + ADD16 + 4 RANDOM OPTIONS.
- Each char can drop ONLY his class item from Old Boxes.
Example: If a RF will drop an Old Box he can ONLY get Leather item.
Example2: If a MG will drop an Old Box he can ONLY get Pad item (at full set he can change his set to leather if he wants / 1 change maximum per char).
Rare Items can't be: Traded, Moved to Vault, Moved to Store or Dropped (You can only sell them to shop or deposit on vault).Old Box 1 has 3.5% chance to drop the rare item.
Old Box 2 has 4.5% chance to drop the rare item.
Old Box 3 has 5.5% chance to drop the rare item.
Old Box 4 has 7% chance to drop the rare item.
Old Box 5 has 8.5% chance to drop the rare item.
Old Boxes Drop:Old Box 1: Ring Exc / Wings LvL 1 (+0...+9) / 10x Invitations DS / Demon / Rare Helm.
Old Box 2: Pend Exc / Magic Backpack (Extend Inventory) / 10x Invitations BC / Jewel Bundle (10x Bless/Soul) / Rare Gloves.
Old Box 3: Jewel Bundle (10x Chaos/Creation) / PoH / Wings Level 2 / Ancient Tier 1 / Rare Boots.
Old Box 4: Flame of Condor / Feather of Condor / Jewel Bundle (20x Creation/Gemstone) / Talisman of Chaos Assembly / Rare Pants.
Old Box 5: Old Jewel / Broken Horn / Jewel Bundle (30x Harmony) / Exc. 380 Weapon 1~2 options / Rare Armor.They can be obtained on almost any event from our server (check event rewards on every stage).
Events Info
Note: All Bosses/Mini-Bosses and Goldens give PvM Points for the PvM Rankings. Values can be read on website -> PvM Rankings.
1. Rabbits Invasion:
- Every 6 hours (05:45, 11:45, 17:45, 23:45).
- There are 60 Rabbits / Invasion as following:
15x in Lorencia, 15x in Noria, 10x in Elbeland(1-3), 10x in Devias(1-4) and 10x in Dungeon(1-3).
- Duration of Invasion: 10 minutes.
- Reward: 65% chance for 1x Jewel (Bless/Soul/Chaos/Life/Creation) - 27% chance for 2.500.000 Zen - 8% chance for 1x Reset Fruit.
- You gain 4 CREDITS per kill.2. White Wizards Invasion:
- Every 6 hours (00:30, 06:30, 12:30, 18:30).
- There are 3 White Wizards & 30 Orcs / Invasion as following:
WW: 1x in Elbeland(1-3), 1x in Dungeon(1-3) and 1x in Devias(1-4).
Orcs: 15x in Lorencia, 15x in Noria.
- Duration of Invasion: 10 minutes.
- There are both PvP and Non-PvP Invasions that are alternating each hour (at 00:45 for example it's a PvP WW, at 06:45 is a Non-PvP WW, etc.).
- PvP Invasion: Free PK near WW & Orcs (no penalty for killing), while killed player is respawning close to the WW/Orc.
- Non PvP Invasion: Not possible to kill players during this Invasion, as long as there is still a WW/Orc alive on that map, and for 8 seconds after.
WW Reward: 10x Jewels (Bless/Soul/Chaos/Life) + 15.000.000 Zen + 40% chance for Old Box 2 (as extra drop).
Orcs Reward: 10% chance for Wizard's Ring - 40% chance for 1x Jewel (Bless/Soul/Chaos -double chance than the rest of jewels- /Life/Creation) - 48% chance for 3.000.000 Zen - 2% chance for Old Box 1 [also gives 5 credits].
- You gain 15 CREDITS per WW kill.3. Chaos Castle:
- Every 3 hours (00:00, 03:00, 06:00, 09:00, 12:00, 15:00, 18:00, 21:00).
- You can join only 3 times per day (4 with VIP Dealer/PRO) with the same character.
- You will get points that will be accumulated for WEEKLY CC REWARDS ON SITE (Credits).
- TOP 1 on WEEKLY CC will also win a HoF Badge, apart from Credits.
- There is a decent drop of jewels on CC5, CC6 and CC7.
- Players that win the CC will get rewards:
CC 1: 2x Jewels (Bless/Soul/Life) + 10% chance for Star (Rings/Pends exc) + 50% chance for Low Tier Ancient.
CC 2: 3x Jewels (Bless/Soul/Life/Chaos) + 20% chance for Star (Rings/Pends exc) + 70% chance for Low Tier Ancient.
CC 3: 3x Jewels (Bless/Soul/Life/Chaos/Creation) + 70% chance for Low Tier Ancient - 30% chance for Old Box 1.
CC 4: 4x Jewels (Soul/Chaos/Life/Creation) + 60% chance for Low-Mid Tier Ancient - 40% chance for Old Box 2.
CC 5: 4x Jewels (Soul/Chaos/Life/Gemstone) + 50% chance for Low-Mid Tier Ancient - 50% chance for Old Box 3.
CC 6: 5x Jewels (Soul/Chaos/Creation/Gemstone) + 60% chance for Random Ancient - 20% chance for Old Box 3 (1 before OB3 release) - 20% chance for Old Box 4 (2 before OB4 release).
CC 7: 5x Jewels (Soul/Chaos/Creation/Gemstone) + 60% chance for Random Ancient - 40% chance for Old Box 4.
- Apart from the points gained for killing monsters, you also receive extra points for player eliminations / cc wins for the weekly top.
- Level Entries & Extra Points:
CC 1: Level 50-120 | 800 Points per Elimination | 4000 Points for WIN
CC 2: Level 121-200 | 1100 Points per Elimination | 5000 Points for WIN
CC 3: Level 201-270 | 1400 Points per Elimination | 6000 Points for WIN
CC 4: Level 271-320 | 1700 Points per Elimination | 7000 Points for WIN
CC 5: Level 321-360 | 2000 Points per Elimination | 8000 Points for WIN
CC 6: Level 361-400 | 2300 Points per Elimination | 9000 Points for WIN
CC 7: Level 400 + Q3 (ML ONLY) | 2600 Points per Elimination | 10000 Points for WIN
- You can write /entries anytime in game to see your current event level entry for your character level (updated live as your level progress).
Note: All classes goes on same CC based on their level.4. Blood Castle:
- Every 3 hours (01:15, 04:15, 07:15, 10:15, 13:15, 16:15, 19:15, 22:15).
- You can join only 2 times per day (3 with VIP Dealer/PRO) with the same character.
- You will get points that will be accumulated for WEEKLY BC REWARDS ON SITE (Credits).
- TOP 1 on WEEKLY BC will also win a HoF Badge, apart from Credits.
- You can close the BC only when there are maximum 3 minutes left from event.
- Exp on BC is raised with 40%.
- There is a decent drop of jewels if you stay until the end.
- Players that win the BC will get rewards:
BC 1: 1x Jewel of Bless + 1x BC Ticket (with only 1 entry).
BC 2: 2x Jewel of Bless + 1x BC Ticket (with only 1 entry).
BC 3: 2x Jewels (Bless/Soul/Chaos/Life) + 15% chance for 1x Demon / 1x Guardian Angel + 5% chance for 1x Old Box 1.
BC 4: 3x Jewels (Bless/Soul/Chaos/Life) + 20% chance for 1x Demon / 1x Guardian Angel + 10% chance for 1x Old Box 1.
BC 5: 3x Jewels (Bless/Soul/Chaos/Life/Creation) + 20% chance for 1x Demon / 1x Guardian Angel + 8% chance for 1x Old Box 1 - 8% chance for 1x Old Box 2.
BC 6: 4x Jewels (Soul/Life/Chaos/Creation) + 25% chance for 1x Demon / 1x Guardian Angel + 15% chance for 1x Old Box 2.
BC 7: 4x Jewels (Soul/Life/Chaos/Creation/Gemstone) + 30% chance for 1x Demon / 1x Guardian Angel + 20% chance for 1x Old Box 3 (1 before OB3 release).
BC 8: 5x Jewels (Soul/Life/Chaos/Creation/Gemstone) + 35% chance for 1x Demon / 1x Guardian Angel + 12% chance for 1x Old Box 3 - 8% chance for 1x Old Box 4.
- Level Entries:
BC 1: Level 15-100
BC 2: Level 101-160
BC 3: Level 161-220
BC 4: Level 221-270
BC 5: Level 271-320
BC 6: Level 321-360
BC 7: Level 361-400
BC 8: Level 400 + Q3 (ML ONLY).
- You can write /entries anytime in game to see your current event level entry for your character level (updated live as your level progress).
Note: All classes goes on same BC based on their level.5. Devil Square:
- Every 3 hours (02:15, 05:15, 08:15, 11:15, 14:15, 17:15, 20:15, 23:15).
- You can join only 2 times per day (3 with VIP Dealer/PRO) with the same character.
- You will get points that will be accumulated for WEEKLY DS REWARDS ON SITE (Credits).
- TOP 1 on WEEKLY DS will also win a HoF Badge, apart from Credits.
- You can farm Season 4 Spells (Explosion, Five Shot,etc.) ONLY on DS! (lower DS-es have lower chance).
- Exp on DS is raised with 40%.
- There is a decent drop of jewels if you stay until the end.
- DS 6-7 have chance (25% DS6 & 35% DS7) to give you in inventory at the end a Box of Ancients (that will drop a Random Ancient item).
- Level Entries:
DS 1: Level 35-120
DS 2: Level 121-200
DS 3: Level 201-270
DS 4: Level 271-320
DS 5: Level 321-360
DS 6: Level 361-400
DS 7: Level 400 + Q3 (ML ONLY).
- You can write /entries anytime in game to see your current event level entry for your character level (updated live as your level progress).
Note: All classes goes on same DS based on their level.6. Goldens Invasion:
- Every 4 hours, random minutes (03:xx, 07:xx, 11:xx, 15:xx, 19:xx, 23:xx).
- Duration of Goldens Invasion is 20 minutes.
- There are both PvP and Non-PvP invasions that are alternating each hour (at 3:xx for example it's a PvP invasion, at 3:xx is a Non PvP invasion, etc.).
- PvP Invasions: Free PK near Goldens (no penalty for killing), while killed player is respawning close to the golden.
- Non PvP Invasions: Not possible to kill players during this Invasions, as long as there are still Goldens alive on that map, and 8 seconds after.
- Each BoK has chance to drop higher BoK SET items as following:
BoK+1: 80% chance for BoK+1 item, 12% chance for BoK+2 SET item, 4% chance for BoK+3 SET item.
BoK+2: 80% chance for BoK+2 item, 12% chance for BoK+3 SET item, 4% chance for BoK+4 SET item.
BoK+3: 80% chance for BoK+3 item, 12% chance for BoK+4 SET item, 4% chance for BoK+5 SET item.
BoK+4: 85% chance for BoK+4 item, 12% chance for BoK+5 SET item.
BoK+5: 100% chance for BoK+5 item.
- You gain different amount of CREDITS per kill.
- Box of Kundun + 1: 6 Goblins in Noria, 5 Rabbits in Elbeland, 4 Soldiers in Lorencia [also gives 3 CREDITS + 1kk zen].
- Box of Kundun + 2: 6 Devils in LostTowers, 5 Knights in Dungeon, 4 Titans in Devias, 4 Vepars in Atlans [also gives 4 CREDITS + 1.5kk zen].
- Box of Kundun + 3: 8 Tantalos in Tarkan, 5 Golems in Aida, 3 Crusts in Icarus [also gives 5 CREDITS + 2kk zen].
- Box of Kundun + 4: 5 Satyros in Kanturu, 4 Satyros in Karutan2, 3 Satyros in Karutan1 [also gives 8 CREDITS + 2.5kk zen].
- Box of Kundun + 5: 2 Iron Knight in Raklion, 3 Golden Napins in Swamp, 4 Twin Tale in Relics [also gives 12 CREDITS + 3kk zen].- Special: 1 Budge Dragon in Lorencia, 1 Budge Dragon in Devias,1 Budge Dragon in Noria, 1 Budge Dragon in Elbeland that is dropping Stars (for Rings/Pendants Exc.) [also gives 12 CREDITS + 4kk zen].
- Special: 1 Derkon in LostTower, 1 Derkon in Atlans that is dropping 2x random BoK(+1/+5) + 50% chance for extra 1x random BoK (+1/+3) [also gives 15 CREDITS + 7kk zen].
- Special: 1 GGD in Raklion, 1 GGD in Vulcanus that is dropping 5 boxes +4/+5 [also gives 20CREDITS + 10kk zen].7. Kanturu Event:
- The Event starts every 24 hours after the Nightmare is killed.
- You can see the time left until next Event if you click on the Event entry gate.
- Rewards from Hands: 2 Jewels (Bless/Soul/Life) and 8% chance to drop Old Box 2.
- Rewards from Nightmare (BOSS): 1x Exc. Weapon (Knight Blade, Platina Staff, etc.) + 40% Chance for Old Box 4 (2 before OB4 release).
- You gain 40 CREDITS per Nightmare kill.8. Kundun (BOSS):
- 2 times per day (between 07:00 & 12:59 and between 19:00 and 23:59) - random minute/hour between these hours.
- Duration of Kundun is 30 minutes.
- One Kundun will spawn on Kalima6 (PvP Kundun) and one Kundun will spawn on Kalima7 (Non-PvP Kundun).
- The PvP and Non-PvP spawns are alternating each day (one day PvP is between 07:00 and 12:59, the next day is between 19:00 and 23:59).
- Rewards: 2x Random Mid-High Ancients + 30% chance for Old Box 3 (1 before OB3 release).
- You gain 40 CREDITS per kill.9. Medusa (BOSS):
- Every 12 hours, at 10:45 and 22:45.
- Duration of Medusa is 30 minutes.
- Rewards: 1x Old Box 5, 1x Old Box 4 & 1x Old Jewel.
- There is also a 12% chance to drop an Exc. 380 Weapon (as extra drop) with 1-2 options.
- You gain 55 CREDITS per kill.10. Selupan (BOSS):
- Every 12 hours from when it is killed.
- Rewards: 1x Old Box 5, 1x Old Box 4 & 2x Old Jewel.
- There is also a 12% chance to drop an Exc. 380 Weapon (as extra drop) with 1-2 options.
- You gain 60 CREDITS per kill.11. Bloody Witch Queen (BOSS):
- She spawns 2 times per day, in the darkest holes of Vulcanus, at Random Hour / Minute.
- She spawn at the same time with Cursed Dragon, as following:
1 time between 17:00 and 21:59.
1 time between 08:00 and 12:59.
- Duration of Bloody Witch Queen: 30 minutes.
- She is dropping 2x EXC 380 Set items with 2 options.
- She has 6% chance to drop an Exc. 380 Weapon with 1-2 options instead of the 2nd exc. item.
- She also has a 15% chance to drop Old Box 4 and 5% chance to drop Old Box 5.
- You gain 50 CREDITS per kill.12. Cursed Dragon (BOSS):
- The Dragon is spawning 2 times per day on Elbeland, at Random Hour / Minute.
- He spawns spawn at the same time with Bloody Witch Queen, as following:
1 time between 17:00 and 21:59.
1 time between 08:00 and 12:59.
- Duration of Cursed Dragon: 25 minutes.
- There are both PvP and Non-PvP Dragons that are alternating each hour (at 08:xx for example it's a PvP Dragon, at 17:xx is a Non PvP Dragon, etc.).
- PvP Dragon: Free PK near Dragon (no penalty for killing), while killed player is respawning close to the Dragon.
- Non PvP Dragon: Not possible to kill players during this Dragon, as long as there is still a Dragon alive on that map, and 8 seconds after.
- He is dropping 2x Old Boxes (1-4).
- Bonus Reward: 25% chance to drop 1x Feather / 1x Crest apart from the normal reward.
- Smaller Boxes have a higher chance of being dropped from him than the bigger ones.
- You gain 30 CREDITS per kill.13. CryWolf Event:
- 2 times per week (Wednesday and Sunday at 21:50).
- Balgass drop: 2x Old Box 4 (2 before OB4 release) & 3x PoH that anyone can pick at random locations near Balgass (in 12x12 range).
Bonus Reward: The player (party) with most damage on Balgass will get 1x PoH.
Note: You can't drop items from inventory while Balgass is alive & 15 seconds after he's dead.
- Dark Elves drop: 30% chance to drop Old Box 3 (1 before OB3 release), 30% chance to drop Exc. Weapons (Knight Blade, Platina Staff,etc.), 40% chance to drop 100.000.000 Zen.
- Bonus 15% EXP for ENTIRE SERVER if you finish the Event.
- You gain 25 CREDITS per Dark Elf kill and 80 CREDITS per Balgass kill (for most damage).14. Imperial Guardian:
- It announce every time a boss is killed.
- You can join only 2 times per day (3 with VIP PRO) with the same character.
- The player is required to be in a party. Everyone from party must have at least 250 level & at least 5 rr in order to join the event.
- Everyone from party must have event invitation (Gaion Order - obtained from 5x Suspicious Scrap of Paper) in order to enter event.
- It doesn't have any cooldown.
- Drop Rate of invitation pieces is low and can be dropped from monsters level 90+.
- Event is hard, you need a good party to finish it.
- Bosses are rewarding 3 Jewels (B/S/Life/Creation) + 10% chance for Talisman of Chaos Assembly.
- Reward is delivered to each participant individually, no matter how many players are in the party - everyone gets same reward chances.
- Optional objective: Kill the Statues and get 2~3 extra Jewels that anyone from party can pick.
- Sunday's Final Boss also has a 100% chance to drop Talisman of Chaos Assembly apart from the 3 jewels.
- Competitive Weekly Rankings: based on how fast a party (consisted ONLY from 5 Unique Classes) clears the event.Imperial Guardian Weekly Championship:
- There will be daily awards for best records on the event-clear.
- In order to be eligible for daily records you need to finish the event IN AN UNIQUE FULL PARTY - which means you need to have 5 different classes in your party.
- Every day from week will have its own record for that party / character that finished it.
- Only the best record is registered on each day, which means a character that does the event 2/3 times per day will have only 1 record registered (the best one) with the best party. You don't have to do it with same parties. Record is individual.
- At the end of each day (23:59) TOP10 best records will earn points (this means, every character with the same - best record as others will be registered on each position, TOP1, TOP2, etc. there can be 1-5 chars with same record at each position):
TOP1 = 6 points
TOP2 = 5 Points
TOP3 = 4 Points
TOP4 = 3 Points
TOP5 = 2 Points
TOP6-15 = 1 Point.
- At the end of the week (Sunday at 23:59) all records are reset and there are rewards for based on the points accumulated:
- Rewards:
Having 35+ Points: 10x Jewel of Harmony + 1x TOCA + 1x Old Box 5 (4 before OB5 release and +1 TOCA).
Having 25-34 points: 5x Jewel of Harmony + 1x TOCA + 1x Old Box 4.
Having 15-24 points: 5x Jewel of Harmony + 1x TOCA + 1x Old Box 3.
Having 5-14 points: 5x Jewel of Harmony + 1x Old Box 2.15. Doppelganger Event:
- You can join only 2 times per day (3 with VIP PRO) with the same character.
- The player is required to be in a party. Everyone from party must have at least 250 level & at least 5 rr in order to join the event.
- Everyone from party must have event invitation (Dimensional Mirror - obtained from 5x Sign of Dimensions) in order to enter event.
- It doesn't have any cooldown.
- Drop Rate of invitation pieces is low and can be dropped from monsters level 90+.
- Event is medium, you need a decent party to finish it.
- Duration: 6 minutes (starts directly after you join).
- Doppelganger is the most precious Event in terms of consumables:
Potions:
Antidotes - 50 pots per stack.
Elite SD Potions - 9 per stack, 15% SD Recovery - lower chance.
Scrolls:
Scroll of Wrath: Increase the damage by 200.
Scroll of Wizardry: Increase the wizardry damage by 200.
Duration: 3 hours.
Scroll of Defense: Increases the defense by 250.
Scroll of Health: Increases the HP by 1500.
Duration: 12 hours.
Elite Scrolls:
Scroll of Battle: +12% CRIT Damage.
Scroll of Strength: +8% EDR - lower chance.
Duration: 1 hour.
Elixirs:
Elixir of Strength: +1000 STR
Elixir of Agility: +1000 AGI
Elixir of Vitality: +1000 VIT
Elixir of Energy: +1000 ENE
Duration: 6 hours.
Can't be stacked.
Doppelganger Rewards:
2 random items from normal scrolls and potions, 40% chance for Elixir as extra reward, 15% chance for Elite Scroll as extra reward.
Note: Reward is individual, everyone has the same chances for same reward, make sure to have space!16. Illusion Temple:
- 2 times per day (09:30 and 21:30).
- You can join only 1 time per day with the same character.
- Minimum of Players for Event to start: 4
- You must leave the party in order to be able to join the Event.
- In order to join IT you must have an IT Ticket (not the crafted one) that is dropping with a low drop rate on higher mobs.
- Your level will be changed to 130~180 based on the IT level where you can enter.
- You will get 500 points to all stats + random resets build.
- You can play any build you want during IT, then you'll get back to your level and normal stats.
Winners of IT 1 can win: 53% 10b/10s/10c/10life - 30% Old Box 3 (1 before OB3 release) - 12% Loch Feather - 5% Monarch Crest.
Winners of IT 2 can win: 40% 10b/10s/10c/10life/10creation - 35% Old Box 3 (1 before OB3 release) - 18% Loch Feather - 7% Monarch Crest.
Winners of IT 3 can win: 57% 10b/10s/10c/10gemstones/10creation - 25% Old Box 3 (1 before OB3 release) - 15% Old Box 4 (2 before OB4 release) - 3% Condor Feather.
Winners of IT 4 can win: 53% 10s/10c/10gemstones/10creation - 18% Old Box 3 - 22% Old Box 4 - 5% Condor Feather - 2% Old Box 5.
Winners of IT 5 can win: 49% 10s/10c/10gemstones/10creation - 12% Old Box 3 - 28% Old Box 4 - 8% Condor Feather - 3% Old Box 5.
- Level Entries:
IT1: 30% of TOP1 Reset (rounded down) - 1 +.
IT2: 45% of TOP1 Reset (rounded down) +.
IT3: 60% of TOP1 Reset (rounded down) +.
IT4: 75% of TOP1 Reset (rounded down) +.
IT5: 90% of TOP1 Reset (rounded down) +.
Note: You can join any lower IT than your reset IT if there are no free slots in yours.17. Bonus System:
- The bonuses will start at 08:35 & 17:35 Server Time with the exception of Sunday when Bonus starts at 20:35 (due to CS).
- Bonus System duration is 1:30 hours.
- On weekly days (Monday-Friday) Bonus System will increase normal exp with 50% and ML exp with 25%.
- On weekends (Saturday, Sunday) Bonus System will increase normal exp with 100% and ML exp with 50%.18. Skeletons Invasion:
- 1 time per day (20:40).
- There is one boss (Death King) that is spawning in Lost Tower 1 (always same location, on the bridge to Devias 4).
Note: PK in Death King's 10x10 range is FREE (no outlaw status).
- There are also 3 mini-bosses (Death Bones), each one spawning in one map from Lorencia, Noria and Devias.
- Duration of Skeletons Invasion is 20 minutes.
- Death Bones work differently, you'll have to both "catch" them and kill them, in order to steal their Magic Backpack:
They have a low HP but maximum Defence possible.
They can't be attacked with normal skills (right click), they can only be attacked by normal attack (left click).
They also have a move speed buff.
They will teleport in a random location on their map every 25 seconds (so they only stay 25 seconds on the same position) with the same HP that hey had before teleport.
They can teleport anywhere on the Map, in a "killable" zone.
Note: RF Ignore Buff is deleted as long as they are in the same map with a Death Bone, the Bone from that map is alive and they are in 8x8 of its range.
Note2: Players with +ignore option on Wings does receive Stern effect until they change their Wings with other wings without +ignore (small wings included), or put them off, as long as they are in the same map with a Death Bone, the Bone from that map is alive and they are in 8x8 of its range.
Note3: Elves with bows/crossbows equipped does receive Stern effect until they put off their Bow / Crossbow, as long as they are in the same map with a Death Bone, the Bone from that map is alive and they are in 8x8 of its range.
- Death Bones Reward: 1x Magic Backpack for the player that does the last-hit on them.
- Death King is our first unique boss:
He has maximum Attack Rate.
He has an attack range of 5.
He has an Ice effect on every attack.
He also has the following unique mechanics:
1. Enrage:
Every 25 seconds, Death King becomes Enraged.
During Enrage, he gains a high damage boost.
Enrage duration is 5 seconds.
Example: Basically, out of every 25 seconds, 5 seconds are in Enrage status.
2. Death's Embrace
Every 30 seconds, Death King becomes Immune.
While he has Immune status, he can no longer be attacked (all attacks are "miss").
In order to purge his Immune status, at least 3 players must be killed (by PK, not by the King) in his 10x10 range (from the moment the Immune is up).
After Immune status is purged, it will be triggered again 30 seconds after the last purge.
Death's Embrace duration is 60 seconds.
This means that if there is no purge (by PKs) in 60 seconds after the Death's Embrace started, it is automatically purged (and the timer is reset).
3. Bone Shield
Every 18 seconds, Death King becomes Protected.
While he has Protected status, 85% of the damage towards him is absorbed.
Protected status lasts for 6 seconds.
Notes:
Enrage does not depend on the other 2 mechanics, it can happen during any of them.
While Death's Embrace is "active", the cooldown for Bone Shield is paused, which means they can never happen same time.
While Bone Shield is "active", the cooldown for Death's Embrace is paused, which means they can never happen same time.
Example: If King spawned at 22:40:00, at 22:40:18 he gets his first Bone Shield. While it is active, the timer for Death's Embrace (that would be 18 seconds) will be paused. After Bone Shield is gone, the timer for Bone Shield is reset to 0 and the Death's Embrace timer is (re)starting from where it was paused (18 seconds), so 12 seconds after Bone Shield is gone, Death's Embrace will be up, and the timer for Bone Shield will be paused until Death's Embrace is purged, and so on.
Death King Reward: 1x Magic Backpack and the 2nd drop as: 50% Magic Backpack, 25% OB1, 25% OB2.
Bonus Reward: 50% chance to drop 1x Box of Ancients apart from the normal reward.
- You gain 25 CREDITS per Death King kill.19. World Bosses
Every Tuesday, Thursday and Saturday at 21:45, the new Selupan's Minions (Dark Giant, Dark Mammoth & Dark Iron Knight) will invade our world.
The duration of the invasion is 21 minutes.
The 1st time when the invasion is announced, an Anomaly will hit our server.
The Anomaly is created by World Bosses.
While Anomaly is up, every 15 seconds 2 random players (any player, no matter what he is doing) from sub-server 1 (non-gens) and 1 random player (any player, no matter what he is doing) from sub-server 2 (gens) will be affected by either Cold Aura (10 seconds of Ice that cannot be dispelled) or Disease (5 seconds of Stun).
Entire server must team up in a race versus time to defeat all 3 World Bosses before the time runs out in order to clear the Anomaly.
If all 3 bosses are defeated before they survive (before the time is up), the Anomaly will end when the invasion also ends, and ENTIRE SERVER gets +30% bonus zen gained (multiplicative) until the next World Bosses Invasion.
If any of the world bosses do survive, then the Anomaly will continue to hunt our server for the next 24 hours, and the zen bonus gained is removed.
More info: https://oldsquad.ro/forum/topic/4587-theyre-here-world-bosses-call-to-arms/20. OldSquad Golden Months Competition:
https://oldsquad.ro/forum/topic/1651-osp-weekly-events-monthly-competition-legends-group/
*Notes:
-Regarding BC/DS (and not only): Due to the fact that when you teleport to a specific event/location someone else can request you to trade/party/etc, leading into you not being able to move/interact and thus losing the event, we strongly recommend you to have /re off active before the actual event !
-When you are in 14x14 range of an invasion monster you won't be able to drop items from your inventory (like potions). The permission is given back after you leave the monster's range or when it dies. Currently applying to: Goldens, WW, Cursed Dragon & Kundun.
Spots Info
- Except for Noria, Devias and Elbeland, anywhere you see a mob there is a spot for sure (we deleted extra mobs because we didn't want to have overpowered spots by mistake).
- The number of mobs in spots are 4-8 (the higher the maps the higher the number of mobs in spots).
- All spots are a mass spawn (not a pointed one) so you must have SM/SUM/EMG or any AoE guy in parties to hold the spots.
- All the spots from game have been manually reworked.
- Every map is progressive, this means that the more you move into the map the better the mobs/combinations of mobs will be.
-
Number of mobs in spots is progressive as following:
- Very Low maps (Devias1-4, Dungeon1-3, Kalima1) does have 4 mobs per spot (all spots, same number).
- Low Maps (Atlans1-2, LostTower1-7, Kalima2, Kalima3) does have 4-5 mobs per spot (some spots have 4, others have 5).
- Medium maps (Atlans3, Tarkan1-2, Aida1-2, Kanturu1, Kalima4) does have 5 mobs per spot (all spots, same number).
- Medium-High maps (Crywolf, Kanturu2-3, Kalima5) does have 5-6 mobs per spot (some spots have 5, others have 6).
- High maps (Karutan1-2, Relics, Kalima6) does have 6-7 mobs per spot (some spots have 6, others have 7).
- Highest maps (Vulcanus, Raklion, Swamp, Kalima7) does have 7-8 mobs per spot (some spots have 7, other have 8).
-
Each spot is following a strict pattern of spawn coordonates:
- For low maps the 4 mobs spots are spawning in 6x6 coords and the 5 mobs spots are spawning in 8x8 coords.
-
For medium maps the 5 mobs spots are spawning in 7x7 coords and the 6 mobs spots are spawning in 9x9 coords.
- Exception: Icarus that have only 5 mobs per spot and mobs are spawning on 6x6 coords.
- For high maps the 7 mobs spots are spawning in 8x8 coords and the 8 mobs spots are spawning in 10x10 coords.
- The number of spots with extra mob is between 45% and 50% of spots.
- Mobs can't run from spots for more than 2 coordonates on their own (only if lured by players they can move more).
- Important: There is an anti-lure feature that makes monsters to "teleport" back to their original coordonates after moving more than x coordonates from their original position.
- Almost all mobs from game are included in spots (on almost all maps).
- The distance between spots is minimum of 12 coords (on restricted areas) and minimum of 15 coords on non-restricted areas.
-
All the spots are showing on MINIMAP (TAB)!
-
You can keep the cursor on the spot marked from minimap and it will show you the mobs type from that spot.

-
You can keep the cursor on the spot marked from minimap and it will show you the mobs type from that spot.
Spots distribution:
Lorencia - 4 spots - 1 each entrance (bigger ones) + mobs all over map.
Noria - 3 spots - 1 each entrance (bigger ones) + mobs all over map.
Elbeland1 - 2 spots - 1 each entrance (bigger ones) + mobs all over map.
Elbeland2 - 5 Werewolf spots.
Elbeland3 - 3 Cursed Lich spots, 4 Totem Golem spots .
Total: 11 spots.
Dungeon1 - 3 Skeleton Archer spots, 4 Ghost spots.
Dungeon2 - 3 Hell Hound spots, 4 Hell Spider spots.
Dungeon3 - 9 spots (combinations of monsters).
Total: 23 spots.
Devias1 - 11 Worms spots, 9 Hommerd + Ice Monster spots.
Devias2 - 3 Assasin spots, 8 Yeti spots.
Devias3 - 17 Elite Yeti spots.
Devias4 - 6 Elite Yeti spots, 3 Ice Queen spots.
Total: 57 spots.Atlans1 - 4 Bahamut spots, 5 Bahamut + Vepar spots, 3 Vepar + Valkyrie spots, 2 Valkyrie spots.
Atlans2 - 5 Great Bahamut spots, 4 Silver Valkyrie + Great Bahamut spots, 1 Silver Valkyrie + Hydra spot.
Atlans3 - 11 Lizard spots, 1 Lizard + Hydra spot.
Total: 36 spots.LostTower1 - 5 Shadow spots, 10 Shadow + Poison Shadow spots.
LostTower2 - 11 Poison Shadow spots.
LostTower3 - 4 Cursed Wizard spots, 5 Cursed Wizard + Death Cow spots, 3 Death Cow spots.
LostTower4 - 3 Death Cow spots, 6 Death Cow + Devil spots.
LostTower5 - 2 Death King spots, 7 Death King + Devil spots.
LostTower6 - 8 Death King + Death Gorgon spots.
LostTower7 - 3 Death Gorgon spots, 8 Death Gorgon + Death King spots, 6 Death Gorgon + Balrog spots.
Total: 81 spots.Tarkan1 - 6 Mutant spots, 7 Mutant + Bloody Wolves spots, 3 Bloody Wolves spots, 3 Bloody Wolves + Iron Wheel spots, 2 Iron Wheel spots.
Tarkan2 - 5 Iron Wheel spots, 4 Tantalos spots, 6 Tantalos + Beam Knights spots, 2 Beam Knights spots, 1 Beam Knights + Zaikans spot.
Total: 39 spots.Aida1 - 4 Death Tree spots, 6 Death Tree + Forest Orcs spots, 4 Forest Orcs spots.
Aida2 - 4 Death Rider spots, 12 Death Rider + Blue Golems spots, 6 Blue Golems spots.
Total: 36 spots.Icarus - 4 Alquamos spots, 4 Mega Crusts spots, 4 Queen Rainer spots, 2 Drakan spots, 2 Alpha Crusts spots, 1 Alpha Crusts + Phantoms spot.
Total: 17 spots.Kanturu1 - 7 Splinter Wolves spots, 4 Splinter Wolves + Iron Riders spots, 2 Iron Riders spots.
Kanturu2 - 2 Satyros + Iron Riders spots, 7 Satyros spots, 4 Blade Hunters + Kentauros spots, 4 Gigantis spots, 4 Gigantis + Genociders spots, 2 Genociders spots.
Kanturu3 - 3 Kentauros Warrior + Gigantis Warrior spots, 3 Gigantis Warrior spots, 3 Gigantis Warrior + Genocider Warrior spots, 1 Genocider Warrior spot.
Total: 46 spots.Kanturu Relics - 3 Twin Tale spots, 3 Twin Tale + Persona spots, 4 Persona + Dreadfear spots, 2 Dreadfear spots.
Total: 12 spots.Karutan1 - 6 Venomous Scorpion spots, 6 Venomous Scorpion + Bone Scorpion spots, 2 Bone Scorpion spots, 4 Bone Scorpion + Orcus spots, 7 Orcus + Gollock spots, 6 Gollock spots.
Karutan2 - 4 Crypta spots, 5 Crypta + Crypos spots, 5 Crypos spots, 11 Condra + Narcondra spots.
Total: 56 spots.Raklion - 2 Ice Walker spots, 2 Ice Walker + Giant Mammoth spots, 2 Ice Giant + Collutin spots, 2 Collutin spots, 2 Collutin + Iron Knight spots.
Total: 10 spots.Vulcanus - 8 Zombie Fighter spots, 2 Zombie Fighter + Ressurected Gladiator spots, 5 Ressurected Gladiator spots, 1 Ressurected Gladiator + Ash Slaughterer spot, 6 Ash Slaughterer + Blood Assasin spots, 8 Blood Assasin + Cruel Blood Assasin spots, 6 Burning Lava Giant + Ruthless Lava Giant spots.
Total: 36 spots.Swamp - 1 Sapi-Unus spot, 1 Sapi-Tres spot, 1 Shadow Knight spot, 1 Thunder Napin spot, 1 Sapi-Unus + Sapi-Duo spot, 1 Sapi-Tres + Shadow Pawn spot, 1 Shadow Knight + Shadow Look spot, 1 Thunder Napin + Ghost Napin spot, 1 Sapi-Duo + Blaze Napin spot, 1 Shadow Pawn + Blaze Napin spot, 1 Shadow Look + Blaze Napin spot, 1 Ghost Napin + Blaze Napin spot.
Total: 12 spots (3 on each zone).Crywolf - 4 Werewolf spots, 3 Werewolf + Scout spots, 3 Scout spots.
Total: 10 spots.Kalima(1-7) - 2 Aegis + Rogue Centurion spots, 2 Blood Soldier + Death Angel spots, 2 Necron + Death Centurion spots, 2 Schriker spots.
Total: 56 spots (8 for each kalima).Drop Info & Economy System
Our Drop, PvM & Economy System are encouraging Active Players but they also help AFK/Casual Players to keep up.
We have increased the Excellent Items drops from Monsters (on most of the maps) so everyone can have access to something to invest in, apart from active players that will have extra Exc. Items from Goldens/Bosses but also will find the desired options much faster than the ones that get from monsters.
Jewels drop on maps are based on necessity, which means lower maps/mobs will have lower chance for jewels that aren't needed at that stage while high and end-game maps/mobs will have a higher drop rate on the needed ones and lower on the ones that drop better on lower maps - to reduce the ALTs farm and have a good economy overall.
What you also need to know is that, on Inception, Zen is an important factor for Economy!
Important note: Due to the fact that we reworked entire economy system and because we can't simulate full maps of players to have real values (as you may know, the more mobs are killed on a map, the more drops it will give), we reserve our right to ADJUST anything from economy during gameplay for the sake of keeping a healthy environment for everyone involved.
This is what we consider the 'order of progression':
- Shop Items.
- Hearts/Silver Medal/Gold Medal Items.
- Exc. Items from Mobs / Exc. Items from Goldens / Low Tier Ancients.
- Mid-High Tier Ancients / High-Tier Exc. from Events/BoK+5.
- End-Tier Exc (GD/DM,etc.) / 380 Set.
There are advantages and disadvantages for any choice, based on your goal and your class (PvP/PvM/Hunt,CS,etc.) but this is how the progression should look. Now, the option chances are different from method to method, and we want to present them as well.Items tiers can be seen on the dedicated topic for Ancient/Exc/Medals tiers.
Info about Option Chances:
-
Exc Items (from mobs):
- Level: 0 only.
- Luck: 60% chance.
- Add: Between 0 & 4.
- Excellent Options: 100% for 1 option.
-
Ancient Items (from mobs/events):
- Level: 0 only.
- Luck: 10% chance.
- Add: Between 0 & 8.
- Ancient Options: 80% for +5 stamina, 20% for +10 stamina.
-
Common Items (from mobs):
- Level: Between 1 & 4.
- Luck: 80% chance.
- Add: Between 0 & 8.
-
Box of Kundun Items:
- Level: 0 only.
- Luck: Between 35% & 60% chance based on Box Level (lower boxes have higher chances).
- Add: Between 0 & 8.
-
Excellent Options: Between 15% & 40% for 2 options, based on Box Level (higher boxes have higher chances).
- Note: All BoKs have a 2% chance to drop items with 3 options.
-
Hearts & Medals:
- All items have 30% chance for Luck.
- All items have chance for Add between 0 & 8 (higher add -> lower chance).
-
Levels:
- Hearts: Between 6 & 8 for Set Items, between 7 & 9 for Shield/Weapons.
- Silver Medals: Between 6 & 8 for Set Items, between 6 & 8 for Shield/Weapons.
- Gold Medals: Between 5 & 7 for Set Items, between 5 & 8 for Shield/Weapons.
-
Events Items:
-
Weapons from Nightmare & Dark Elves:
- Level: 0 only.
- Luck: 25% chance.
- Add: Between 0 & 8.
- Excellent Options: 75% for 1 option, 25% for 2 options.
-
Exc. Set Items from Bloody Queen:
- Level: 0 only.
- Luck: 50% chance.
- Add: Between 0 & 8.
- Excellent Options: 100% for 2 options.
-
Rings/Pendants from Stars/Old Boxes:
- Level: Between 0 & 4.
-
Add: Between 0% & 3%.
- Exception1: Ring of Magic can drop from +10% Mana up to +30% Mana.
- Exception1: Pendant of Ability can drop from +10% AG up to +30% AG.
- Excellent Options: 85% for 1 option, 15% for 2 options.
-
Weapons from Nightmare & Dark Elves:
-
Chaos Machine Mixes:
-
Chaos Weapon (for Wings Level 1):
- Level: 0 only.
- Luck: 20% chance.
- Add: 12% chance for ADD+4.
-
Wings Level 1:
- Level: 0 only.
- Luck: 15% chance.
- Add: 0 only.
-
Wings Level 2:
- Level: 0 only.
- Luck: 20% chance.
- Add: Between 0 & 4.
- Excellent Options: 85% for 0 options, 12% for 1 option, 3% for 2 options.
-
Wings Level 3:
- Level: 0 only.
- Luck: 30% chance.
- Add: Between 0 & 8.
- Excellent Options: 75% for 0 options, 20% for 1 option, 5% for 2 options.
-
Guild Master Box:
- Level: 65% for +10, 35% for +11 (or 100% for +0 for 380 Weapon).
- Luck: 25% chance.
- Add: Between 0 & 8.
- Excellent Options: 100% for 3 options.
-
Chaos Weapon (for Wings Level 1):
Info about Economy Drops:
-
High Drops:
- Jewel of Bless - Drop starting from level 18 mobs to all maps. Higher drop in lower maps, lower drop in higher maps.
-
Medium Drops:
- Jewel of Soul - Drop starting from level 44 mobs to all maps. Lower drop in lower maps, higher drop in higher maps.
-
Low Drops:
-
Jewel of Chaos - Drop starting from level 18 mobs to all maps. Constant low-drop across all maps.
- Note: Devias & Elbeland has a lower drop-rate to make space for newbies leveling up.
- Jewel of Life - Drop starting from level 70 mobs to all maps. Higher Mobs = Higher Drop.
- Zen - Drop from: Spot Mobs, Rabbits, Dark Elves, Orcs, etc.
- Gemstone - Drop in Kanturu Relics and Kanturu3 (lower drop in Kanturu3).
- Dark Raven Spirit - Drop only in Kanturu2 (mobs level 85-95).
- Fenrir materials - Drop only in Kalima6 (all mobs).
-
Jewel of Chaos - Drop starting from level 18 mobs to all maps. Constant low-drop across all maps.
-
Very Low Drops:
-
Feather & Crest - Drop only in Icarus (all mobs) and Karutan 1 (all mobs).
- Note: Karutan1 has a slightly higher rate than Icarus.
-
Jewel of Creation - Drop starting from level 100 mobs to all maps. Constant rate.
- Note: Jewel of Creation will be released in Drop from Monsters only after last stage.
- Dark Horse Spirit - Drop only in Kanturu2 (mobs level 85-95).
-
Feather & Crest - Drop only in Icarus (all mobs) and Karutan 1 (all mobs).
-
Lowest Drops:
- Magic Backpack (Extension of Inventory) - Drop only in Karutan2 (all mobs).
- Flame of Condor - Drop only in Swamp (all mobs).
Hearts/Silver Medals/Gold Medals System:-
Heart of Love can be farmed from monsters between Level 18 & Level 54.
- Examples: Devias, Dungeon, Atlans1, LostTower1-4.
-
Silver Medal can be farmed from monsters between Level 55 & Level 72.
- Examples: Atlans2-3, LostTower5-7, Tarkan1, Aida1, Icarus, Kanturu1&2.
-
Gold Medal can be farmed from monsters between Level 73 & Level 120.
- Examples: Tarkan2, Aida2, Kanturu2-3, Karutan1-2, Relics.
- Items tiers from hearts/medals can be seen on the dedicated section for Ancient/Exc/Medals tiers.
Spells Drops:-
Most Important Spells - Fireburst, Twisting Slash, Evil Spirits, Lighting Shock, Dark Side, Dragon Roar:
-
Maps: Any mobs between Level 44 & Level 66.
- Examples: LostTower1-7, Atlans1-2, Dungeon3.
- Drop: Low.
-
Maps: Any mobs between Level 44 & Level 66.
-
Season 4 Spells - Innovation, Ignore, Gigantic Storm, Multishot, Explosion, Flame Strike, Ravens, Wiz. Enchance:
- Maps: ONLY in Devil Square (1-7).
- Drop: Low - DS1-4 have lower drop than DS5-7.
-
Low Tier Spells - Poison, Flame, Teleport, Lightning:
-
Maps: Any mobs between Level 6 & Level 37.
- Examples: Devias(1-4).
- Drop: Medium-High.
-
Maps: Any mobs between Level 6 & Level 37.
-
Low-Mid Tier Spells - Hellfire, Inferno, Aqua Beam, Reflection, Sleep:
-
Maps: Any mobs between Level 39 & Level 60.
- Examples: Dungeon3, Losttower1-3, etc.
- Drop: Medium-High.
-
Maps: Any mobs between Level 39 & Level 60.
-
Mid Tier Spells - Dragon Slasher, Teleport Ally, Greater Fortitude, Electric Spark, Penetration, Rageful Blow, Summon:
-
Maps: Any mobs between Level 62 & Level 76.
- Examples: Losttower7, Tarkan1, etc.
- Drop: Medium.
-
Maps: Any mobs between Level 62 & Level 76.
-
Mid-High Tier Spells - Inc. Health, Berserker, Cometfall, Fire Scream, Death Stab, Ice Arrow, Fire Slash:
-
Maps: Any mobs between Level 79 & Level 88.
- Examples: Tarkan2, Kanturu1, etc.
- Drop: Low-Medium.
-
Maps: Any mobs between Level 79 & Level 88.
-
High Tier Spells - Inc. Block, Weakness, Mana Shield, Ice Storm, Decay, Nova, Critical Damage, Greater Damage, Greater Defence:
-
Maps: Any mobs between Level 90 & 112.
- Examples: Kanturu2 end, Kanturu3, etc.
- Drop: Low.
-
Maps: Any mobs between Level 90 & 112.
Kalima / Events pieces drops:
-
Kalima pieces drops:
- Symbol of Kundun + 1: Any mobs between Level 1 & Level 38.
- Symbol of Kundun + 2: Any mobs between Level 39 & Level 54.
- Symbol of Kundun + 3: Any mobs between Level 55 & Level 65.
- Symbol of Kundun + 4: Any mobs between Level 66 & Level 75.
- Symbol of Kundun + 5: Any mobs between Level 76 & Level 91.
- Symbol of Kundun + 6: Any mobs between Level 92 & Level 106.
- Symbol of Kundun + 7: Any mobs above Level 107.
-
Devil Square pieces drops:
- Devil Eye & Key + 1: Any mobs between Level 1 & Level 49.
- Devil Eye & Key + 2: Any mobs between Level 51 & Level 67.
- Devil Eye & Key + 3: Any mobs between Level 69 & Level 77.
- Devil Eye & Key + 4: Any mobs between Level 78 & Level 89.
- Devil Eye & Key + 5: Any mobs between Level 90 & Level 100.
- Devil Eye & Key + 6: Any mobs between Level 101 & Level 116.
- Devil Eye & Key + 7: Any mobs above Level 117.
-
Blood Castle pieces drops:
- Scroll of Archangel & Blood Bone + 1: Any mobs between Level 1 & Level 41.
- Scroll of Archangel & Blood Bone + 2: Any mobs between Level 42 & Level 55.
- Scroll of Archangel & Blood Bone + 3: Any mobs between Level 56 & Level 65.
- Scroll of Archangel & Blood Bone + 4: Any mobs between Level 66 & Level 77.
- Scroll of Archangel & Blood Bone + 5: Any mobs between Level 78 & Level 89.
- Scroll of Archangel & Blood Bone + 6: Any mobs between Level 90 & Level 100.
- Scroll of Archangel & Blood Bone + 7: Any mobs between Level 101 & Level 116.
- Scroll of Archangel & Blood Bone + 8: Any mobs above Level 117.
- Illusion Ticket (1): Any mobs above Level 80.
- Suspicious Scrap of Paper: Any mobs above Level 90.
- Sign of Dimensions: Any mobs above Level 90.
Other drops:-
Starter Ring Level 40:
- Any set item from Heart of Love +6 -> +8 for the class that drops it.
-
Starter Ring Level 80:
- Random Small Wings.
-
Box of Heaven:
- Bless, Soul, Chaos, Life, Imp, Angel.
-
Non-Exc Rings & Pendants with 2%~4% HP Recovery:
- Any mobs between Level 30 & Level 75.
- Exception1: (Non exc.) Ring of Magic will always drop with +10% Mana
- Exception2: (Non exc.) Pendant of Ability will always drop with +10% AG.
Chaos Machine Info
- Devil Square Ticket 1-4: 80% 5-7: 70%.
- Blood Castle Ticket 1-5: 80% 6-8: 70%.
- Feather of Condor: 1-60% (60% max rate).
- Wings lvl 1: 1-100% (100% max rate).
- Wings lvl 2: 1-90% (90% max rate).
- Wings lvl 3: 1-40% (40% max rate).
-
Item Upgrades (+10 -> +15 without luck):
- +10: 65%.
- +11: 60%.
- +12: 55%.
- +13: 45%.
- +14: 35%.
-
+15: 30%.
-
Luck will add + 20% chance on every upgrade.
- Dealer & Professional VIP will add + 5% chance on every upgrade.
-
Luck will add + 20% chance on every upgrade.
- DL Pets Mix: 75%.
- Piece of Horn: 55%.
- Broken Horn: 45%.
- Horn of Fenrir: 25%.
- Old Jewel Mix: 40%.
- Gemstone Mix: 85%.
- Lower Refine Stone Mix: 25%.
- Higher Refine Stone Mix: 55%.
- Lower Refine Stone in Item: 40%.
- Higher Refine Stone in Item: 75%.
-
Jewels rates:
- Soul: 55%.
- Life: 60%.
- Harmony: 70%.
-
Old Jewel: 100%.
-
Luck will add + 20% chance on Soul.
- Dealer & Professional VIP will add + 8% chance on Soul, Life and Harmony.
-
Luck will add + 20% chance on Soul.
Special / HOT Features that you should KNOW!
Server Features & Commands:
-
Auto Party & Auto Party with Password
- You can set your Character to automatically accept users into your party when you are Party Master.
- The command that you must write is: /re auto
- You can also set a password to your party, so only players using the password will be accepted.
- In order to set the password you must write: /re auto XXX, where XXX = your random password.
-
After you set up your party password, in order for others to join your party automatically they must also write:
-
/re auto XXX where XXX = the same password that you set for your party and then just request party on any user from your party (Pressing D -> Party and right click on Characters from party).
-
/re auto XXX where XXX = the same password that you set for your party and then just request party on any user from your party (Pressing D -> Party and right click on Characters from party).
-
Add Points
-
You can add your free stat points very quickly to any of your stats by writing:
-
/addstr XX or /addagi XX or /addvit XX or /addene XX or /addcmd XX, where XX = the amount of points that you want to add from your free points, and where str = Strength, agi = Agility, vit = Vitality, ene = Energy and cmd = Command.
-
/addstr XX or /addagi XX or /addvit XX or /addene XX or /addcmd XX, where XX = the amount of points that you want to add from your free points, and where str = Strength, agi = Agility, vit = Vitality, ene = Energy and cmd = Command.
-
You can add your free stat points very quickly to any of your stats by writing:
-
Clear Inventory
- If you want to clear (DELETE) your entire inventory (let's say it's full of trash items, and you don't want to waste time selling them to shop/dropping them etc. or you have an item that you can't sell/drop and want to get rid of it) you must write: /clearinv
-
Entire inventory will be cleaned instantly, so use it carefully!
-
Char Info & Items Info
-
Char Info
- In order to check a character details you need to type /info XXX where XXX = name of the character.
-
The command will show you the following details of the character:
-
Basic Info
- Character Level.
- Character Master Level.
- Character Resets.
- Character Total Points.
- Character Points from Fruits.
-
PvP Info
- Character PK Kills.
- Character PK Points.
- Character Gens Family.
- Character Mercenary Squad info (if it does exist).
-
Extra Info
-
Number of Consumables in use.
- Counting: Halloween buffs, all scrolls from Doppelganger, Elixirs.
-
Character Build-Type.
- Note: If it doesn't meet the rules for a main build, it means it's a Hybrid build.
-
Number of Consumables in use.
-
Basic Info
- In order for the info to be shown, the character must be ONLINE and on the same SERVER (1, 2 or 20).
- The command will also let you know if the Character name is invalid, if the Character name does exist, if the Character is offline or if the Character is on another sub-server.
-
Items Info
-
If you want to check the requirements (stats) and damage/defense for each level of an item (Non-Exc) from game you must write: /itemname where itemname = full and correct name of the item.
-
Example: /Dragon Armor
-
Example: /Dragon Armor
-
If you want to check the requirements (stats) and damage/defense for each level of an item (Non-Exc) from game you must write: /itemname where itemname = full and correct name of the item.
-
Char Info
-
Account Lock / Unlock v2
- In order to raise the level of security for your characters, you can 'Lock' them with an extra password.
- While the account is locked, the items from the account can't be traded/sold/dropped etc INGAME.
- This option is really recommended for shared accounts in order to raise the security.
- You can lock your character using /lock XXXX where XXXX = your password.
- Password must have a minimum of 4 digits and a maximum of 20 digits.
- To unlock it you must write /unlock XXXX where XXXX is the pass that you set.
- It will also prevent the locked character to move items (from vault, character equipment / inventory / store, etc.)
-
After you use /lock for the first time it will work like this:
-
The permissions will no longer be disabled when you use /lock, basically nothing will happen in that moment.
- This means that you won't have to use /unlock every time you relog char / move from (to) gens-maps, etc.
- Every time you LEAVE ACCOUNT (select server, x game, dcfriend, etc.) there will be an auto-lock on your account, as long as the /lock was used at least one time.
- The password from the auto-lock is the same password you used last time for the /lock.
- After your account is logged off, the next time you (or someone else) does enter it, it will firstly have to /unlock the account in order to further use it (no matter if you/he change server, relog, etc.), and it is a good def against who wants to use /dcfriend and to access the account.
-
The permissions will no longer be disabled when you use /lock, basically nothing will happen in that moment.
-
Note: From now on, if you choose to use this system (which is highly recommended for those that share their account/pass with others) you will have 95% security to your in-game things.
- The only things that can't be protected with /lock are the items from main-vault (which can be accessed / moved / stolen from website). Everything else (extra wares, equipment, store, inventories, etc.) are protected.
- So in order to bring it to 100% make sure to not store VERY IMPORTANT items on your main-vault (ware 0), while using the new /lock.
-
Note2: IMPORTANT! MAKE SURE TO NOTE YOUR /LOCK PASSWORD EVERY TIME YOU SET/CHANGE IT! IT WILL ALWAYS AUTO-LOCK WITH THE LAST PASSWORD USED ON THE /LOCK!
-
Disconnect or Reconnect a Friend / Own Account
- You can disconnect a friend's account, or your own account connected to another computer.
-
You must write: /dcfriend CharName CharPassword where CharName = name of the character, and CharPassword = password of the account, where the character which you want to disconnect is hosted.
- Example: /dcfriend Gion 123456
- In order for the command to work, the account must be in the same SERVER as you (1, 2 or 20).
- Note: /dcfriend will close the game on the device where the character is connected.
-
If you want to only reconnect a character (disconnect it for 10-20 seconds and have it auto-reconnected) you need to type: /reconnect CharName CharPassword
-
Event Entries
- You can join some of the events only X times in 24 hours with the same character:
-
The entries will reset every day at 23:59 Server Time. You need to relog character after the reset for the update of the entries.
- CC - 8 Times per day - 3 Entries / Day / Character
- BC - 8 Times per day - 2 Entries / Day / Character (3 with Dealer/PRO VIP)
- DS - 8 Times per day - 2 Entries / Day / Character (3 with Dealer/PRO VIP)
- IT - 2 Times per day - 1 Entry / Day / Character
- Imperial Event - 2 Entries / Day / Character (3 with PRO VIP)
-
Doppleganger Event - 2 Entries / Day / Character (3 with PRO VIP)
-
Entries Command
- You can use command /entries to show your current event entries situation.
- It will show how many entries you have left for today for BC, DS, CC, IT, Imperial & Dopple.
- It will also show your current level of invitation needed for BC, DS and IT.
-
It will also show how much time left before the entries reset.
-
Jewel Pack Command
- You can use /pack NAME SIZE where NAME = jewel name and SIZE = 10, 20 or 30.
-
The maximum pack is 30.
- Example of using: /pack bless 10 -> will pack 10 Jewel of Bless.
-
In order to dismantle the packs you can use command /part NAME SIZE where NAME = jewel name and SIZE = 10, 20 or 30.
- Attention: You can play with this commands as it will also transform 30b pack into 20b +10b and any combinations.
- The cost of this command is 1.800.000 zen per use.
-
Name for jewels:
- bless = Jewel of Bless
- soul = Jewel of Soul
- life = Jewel of Life
- creation = Jewel of Creation
- guardian = Jewel of Guardian
- gem = Gemstone
- harmony = Jewel of Harmony
- chaos = Jewel of Chaos
- loref = Lower Refine Stone
-
hiref = Higher Refine Stone
-
Zen Stones
-
We know that you would like to sell Zen as well on Market or to deposit more Zen than your character limit so we've introduced Zen Stones!
- You can type /makestone to create a Zen Stone, it costs 100kk Zen.
-
You can also type /convertstone to convert a Zen Stone in 100kk Zen.
-
We know that you would like to sell Zen as well on Market or to deposit more Zen than your character limit so we've introduced Zen Stones!
-
Illusion Temple Warn System
- Illusion Temple is the second most interesting event after Castle Siege and we want it to be as good as possible.
- Based on your feedback and because the old way of reporting IT Anti-Game/AFK with the video wasn't efficient enough to stop the abusers, now the control is in your hands (just like the MOBAS systems)!
- From now any IT player can warn other teammate using the command /warn CharName.
- The player must be in the same IT like you in order to be able to warn him.
- The warn will be given on both Account & IP.
-
Each warn has its own points:
- Warning a Team Player means giving him 3 points.
- Leaving IT or disconnecting from IT will auto-warn you with 5 points (no matter if you're winning or losing, you need to stay until the end of event).
-
The following punishments will be automatically added for the Account & IP when the sum of ACC+IP points (accumulated) is reaching 10 points:
- 1st Punishment (1st time reaching 10 points) = 4 days ban from IT on both ACC & IP.
- 2nd Punishment (2nd time reaching 10 points) = 7 days ban from IT on both ACC & IP.
- 3rd Punishment (3rd time reaching 10 points) = 10 days ban from IT on both ACC & IP.
- 4th+ Punishment (4th and onwards reaching 10 points) = 14 days ban from IT on both ACC & IP.
- The accumulated punishments are erased monthly.
- Each player does have 3 warns per week on ACC+IP to manage (give) them as he wants that are going to reset a week after the warn was given.
- You can only warn the same Player once per IT Event.
-
The punishments are managed automatically and will show you until what date you're banned from IT when you try to join the Event.
-
Illusion Temple Equalizer
-
Illusion Temple had 2 major flaws:
- 1. The teams were pretty unbalanced, based on luck (3rr teams vs 10rr teams, etc.)
- 2. IT levels were too populated on high ones and not populated on lower ones.
-
Illusion Temple is now reworked into a more fun & balanced version:
- IT Level 6 is out of the game.
- Rewards from IT have been moved with 1 level (IT6 reward is on IT5, IT5 on IT4, etc.).
- IT damage is increased with +18%.
- Now IT levels (1-5) are based on character resets instead of level.
-
Now when you click on IT Npc during IT registration your level & stats will be automatically adjusted:
- Your level will be set based on the IT level you can go based on your resets.
- Your stats will be set to a random chosen reset stat on each IT (currently 0-10 RR stats), with extra 500 STR 500 AGI 500 ENE 500 VIT and extra points to spend based on your class.
- You will be able to make any build you want that can boost your team strategy / winning chances on the IT.
-
Your level & stats will be back to normal in the following scenarios:
- IT Event time is over.
- You leave Elbeland/Noria safe-zone (going anywhere else in game except Elbeland/Noria safe-zone and IT maps).
-
You disconnect/relog your character.
- In all scenarios you will get an automatically character relog, for things to get back to normal.
-
There is also a new feature that will make sure that IT slots are enough even with the reset limits:
- If your current reset IT level is full, you will be redirected to the next IT level that does have a slot for you.
-
Example:
- If I have resets to enter IT5, but there are already 10 players in IT5, 10 players in IT4 and only 6 in IT3, I will be redirected to IT3 if I click the NPC again.
-
Current Resets table:
- Chars with 0-2rr can enter IT1.
- Chars with 3-6rr can enter IT2 & IT1.
- Chars with 7-10rr can enter IT3, IT2 & IT1.
- Chars with 11-14rr can enter IT4, IT3, IT2 & IT1.
-
Chars with 15+ rr can enter any IT.
-
The priority of levels is based on the order of entering the IT (first 10 chars with IT5 resets will go only there, etc.)
-
The priority of levels is based on the order of entering the IT (first 10 chars with IT5 resets will go only there, etc.)
-
Illusion Temple had 2 major flaws:
-
Illusion Temple Queue
- If there are more players that wants to join IT than the slots available, a random pool of maximum players will be chosen for each IT level.
-
How does it work?
- When the message with IT being open does show up (10 minutes before the event actually start) you can click the IT NPC (only 1 time is enough), and you will be registered to the queue.
- The registration on the queue is up for 3 minutes (7 minutes before event does actually start). After those 3 minutes, up to 10 players per IT level will be randomly selected as priority participants, which means they can start entering the event.
- For the next 3 minutes, the chosen players (that have PRIO) are able to join the IT event (and only them).
- In the last 4 minutes before the event actually starts, any player can join the IT (any IT level, based on their character) if there are still slots available, no matter if they have been chosen for priority or not.
- When you register for queue, the IT Ticket is taken from your character. The ticket is given back when the extraction is done (no matter if you have been selected for PRIO or not).
-
Extraction of players does work like this:
- Any player can be extracted at any point during extraction, no matter his IT level, and then it is assigned to his own IT level (if there are still slots) and removed from the queue.
-
If 10 players have been already selected for an IT level, any more players for that IT level will be ignored on extraction.
-
Note: You can be chosen for priority for any level under your maximum IT level, if your maximum IT level is already full.
- Example: If your maximum IT level is 5, during extraction if IT5 is already full you can still be chosen for PRIO in IT4 until it also gets full, then you can be chosen for PRIO in IT3, and so on.
- Note2: If you leave Server 1 after registering to the Queue (either disconnect or warp to gens maps / CS server) you will be removed from the IT Queue (and your IT Ticket will be lost), but you can register back if you want to.
- Note3: If you're not selected for priority you won't get back your IT ticket, basically it will be consumed for the chance for priority.
-
Note: You can be chosen for priority for any level under your maximum IT level, if your maximum IT level is already full.
-
There's a check 3 seconds after the IT event does start that will move the "left-over" players that had Shop (Potion Girl) open when IT did close to their party members
-
Note: It will only move you if there's at least 1 member from your party that didn't had Shop (Potion Girl) open.
-
Note: It will only move you if there's at least 1 member from your party that didn't had Shop (Potion Girl) open.
-
Invasion Normalizer
- The Invasion Normalizer is splitting invasions in 2 types: PvP & Non-PvP.
-
It is applied for the following invasions:
- Goldens Invasion, WW Invasion, Cursed Dragon Invasion & Kundun Invasion.
-
Each time there is a different type of invasion, the order is changed every day.
-
Example:
- If today at 03:xx was PVP Goldens Invasion, at 07:xx will be NON-PVP Golden Invasion, and tomorrow at 03:xx will be NON-PVP Golden Invasion.
-
Example:
-
PvP Invasions:
- If there is a PvP Invasion ongoing, you can kill any player in 16x16 range of the Boss/Golden without getting more than Stage1 PK (after you are Stage1 PK, any other PK will be free).
- The players that are killed in the 16x16 range of the Boss/Golden will also respawn CLOSER to the Boss/Golden after they die, so they can continue fighting.
-
Non-PvP Invasion:
- During Non-PvP Invasions, the option of killing people is disabled in the map where there is still a Golden/Boss alive, and 8 seconds after it dies.
- Note: Non-PvP Invasions are bypassed if both attacker and victim are part of Mercenary Squad.
- Note: Rabbits Invasion is always NON-PVP.
-
IMPORTANT! The system works only for the normal-maps (Gens Maps are excluded as they have their own playstyle).
-
Invasion Info
- You can use command /invasion whenever there is an invasion and you'll get info about monsters alive.
- It works for: Goldens, WW, Rabbits, Medusa, Bloody Witch Queen, Cursed Dragon, Kundun.
- For WW and Rabbits it will show maps where monsters are still alive.
- It is also showing Orcs remaining for the WW invasion, in () after WW counter.
- For Goldens it will show how many are alive from each monster type.
-
It will also show the type of Invasion (for Goldens, Cursed Dragon, Kundun and WW) - PvP or Non-PvP.
-
Zen System
- Normal monsters from the game will no longer "drop" the zen on the floor, instead, the Zen system is replaced from scratch.
-
While leveling you will have a 14%~30% chance of getting Zen after killing (last-hit) a monster.
- Note: Lower maps have higher chance, higher maps have lower chance.
- The Zen will go directly into your Inventory (without you picking anything) and will still notice you on system like it does for the normal zen ("XX Zen Obtained").
- There is a basic value (minimum value per map) and a dynamic value based on the monster level you kill (higher the level of monster, higher the zen) as well as Zen penalty based on the difference of your own level vs map level.
- The EXP you take does no longer matter, neither who does the "last-hit" of the monster. All Zen is now linear and it is calculated for every character.
-
Extra changes related to Zen (for balance purposes with the new Zen System):
- Excellent option (Zen) will now add +10% Zen per item.
- Having Rudolf while farming will now give you +15% Zen.
-
There's also an extra bonus ZEN (compared to normal, solo-player zen) if the party has 4 or 5 people in the same range - +35% for 4 - +50% for 5).
- Keep in mind that on the new System, all the mobs does apply this bonuses, no matter who last-hits the mob.
- Note: Zen Bonuses are additive not multiplicative which means you get separate bonuses based only on the base zen.
-
Examples:
-
Solo case:
-
You will get the base Zen of that map / monster for every kill.
- If you have VIP, you will get the base zen + the bonus from the VIP.
- If you have Items with +Zen, you will get the base zen + the bonus from the Zen Items.
- If you have both VIP and items with +Zen, you will get the base zen + the bonus from the VIP + the bonus from the Zen Items.
-
Example:
- Base zen: 5.000
- VIP bonus: 25%
- 4 items with Zen (4x10%) = 40% bonus Zen from items.
- Final Zen that you get: 5.000 + vip bonus (5.000*0.25) + zen items (5.000*0.4) = 8.250 final Zen that you get, under this conditions.
-
You will get the base Zen of that map / monster for every kill.
-
Party case:
-
Whenever a monster is killed, everyone in the same party with the killer (the one who last-hits) and in the monster's map and 8x8 range (including the killer itself) will get Zen as following:
- All players will receive the same amount of base zen that a solo player would get, for killing the same monster and in same conditions.
- Each player from party will receive INDIVIDUAL Zen bonus based on his own VIP level and his own Items with Zen.
-
Example of party configuration and zen drop:
- 4 Players in party, everyone in range.
- Base zen: 5.000 (the Zen that a solo player would take as well).
- Party bonus: 25%.
- Player 1: NON-VIP
- Player 2: VIP Pro
- Player 3: VIP Dealer
- Player 4: NON-VIP but 3x items with Zen.
-
In this configuration, players will get the following amount of zen on the same monster killed:
- Player 1: 5.000 + party bonus (25%) = 5000 + 1250 = 6.250 Zen received.
- Player 2: 5.000 + party bonus (25%) + vip bonus (15%) = 5.000 + 1250 + 750 = 7.000 Zen received.
- Player 3: 5.000 + party bonus (25%) + vip bonus (25%) = 5.000 + 1250 + 1.250 = 7.500 Zen received.
- Player 4: 5.000 + party bonus (25%) + zen items (3x10%) = 5.000 + 1250 + 1500 = 7.750 Zen received.
-
As you will notice, there are several advantages:
- Each player will have his own bonuses based on what he individually have (no longer shared bonuses between all members).
- The bonuses will be applied no matter who last-hits the monster.
- Farming zen in full party (4/5) will be better than farming zen alone.
-
Whenever a monster is killed, everyone in the same party with the killer (the one who last-hits) and in the monster's map and 8x8 range (including the killer itself) will get Zen as following:
-
Solo case:
-
Zen Table:
-
Lorencia / Noria / Elbeland:
- 30% zen chance.
- Base zen: 100 + MonsterLevel*24 zen.
-
Devias / Kalima 1:
- 24% zen chance.
- Base zen: 600 + MonsterLevel*29 zen.
-
Dungeon:
- 24% zen chance.
- Base zen: 850 + MonsterLevel*34 zen.
-
Atlans / Lost Tower / Kalima 2:
- 20% zen chance.
- Base zen: 1150 + MonsterLevel*39 zen.
-
Tarkan / Aida / Kalima 3 / Icarus:
- 18% zen chance.
- Base zen: 1400 + MonsterLevel*44 zen.
-
Crywolf / Kanturu / Kalima 4:
- 17% zen chance.
- Base zen: 1900 + MonsterLevel*53 zen.
-
Karutan1:
- 16% zen chance.
- Base zen: 2100 + MonsterLevel*56 zen.
-
Karutan2 / Kalima 5:
- 16% zen chance.
- Base zen: 2400 + MonsterLevel*60 zen.
-
Relics / Kalima 6 / Land of Trials:
- 15% zen chance.
- Base zen: 2800 + MonsterLevel*64 zen.
-
Raklion / Kalima 7:
- 14% zen chance.
- Base zen: 3200 + MonterLevel*68 zen.
-
Vulcanus:
- 14% zen chance.
- Base zen: 3600 + MonterLevel*72 zen.
-
Swamp:
- 14% zen chance.
- Base zen: 4200 + MonsterLevel*76 zen.
- Note: Zen is not gained on Events (BC, DS, CC, IT, etc.).
-
Lorencia / Noria / Elbeland:
-
Zen Penalty:
- If you have more than 20 levels over the average level of the map you are currently farming, you will start gaining penalty on Zen.
-
For every 1 level after the first 20 levels difference, you lose 0.5% zen from the Base Zen.
-
Note: The maximum penalty is 50% of Zen.
-
Example: Devias is a level 27 map (average of Devias1-4). After level 47, if you continue to farm in Devias you will get -0.5% base zen for each level over 47, up to a maximum of 50% penalty.
- So, if you farm on Devias at level 147+, you will get only 50% Base Zen.
-
Example: Devias is a level 27 map (average of Devias1-4). After level 47, if you continue to farm in Devias you will get -0.5% base zen for each level over 47, up to a maximum of 50% penalty.
-
Note: The maximum penalty is 50% of Zen.
-
Note: Penalty is also individual, the penalties are for each individual character from a party, based on its level.
-
OFF-Attack
-
Can be used by any player, but limited depending on account level.
- Free: Maximum 5 hours, no auto-pick.
- Hunter: Maximum 10 hours, no auto-pick.
- Dealer: Maximum 5 hours, with auto-pick.
-
Professional: Maximum 12 hours, with auto-pick.
- The Autopick works as you set it on Helper.
- The skill selected works as you set it on Helper.
- The command that you need to write is: /offattack
- It will leave your character to attack on spot while you are OFFLINE.
- The character will attack with the spell & use the buffs that you set on Helper.
-
The character you set on OFF-Attack will share the IP with the rest of your chars.
- That means, with a limit of 2 ACC/IP, you can have 1x OFF-Attack char and 1x Online chars.
-
In order to enter back as ONLINE, you need to write your account once (it will say it is already connected) and then write it again (it will let you connect 2nd time - 1st time is to disconnect it).
-
Can be used by any player, but limited depending on account level.
-
Multi-Chars Multi-Event IP Check
-
You can join an ongoing Event (BC, DS, CC, IT, Arena Tournament, Imperial Guardian & Doppelganger) only with one character per IP.
- That means if you join BC6 for example with a character, you won't be able to join at the same hour (event) with another character on BC1-8.
-
Obs: This feature is added to reduce abusive farming with multiple accounts at least on the same Event, and also to assure main chars does have slots.
-
You can join an ongoing Event (BC, DS, CC, IT, Arena Tournament, Imperial Guardian & Doppelganger) only with one character per IP.
-
Fruits stats bonus
-
If you reach 127/127 extra stats by using the Fruits made from Creations, you'll receive an extra 2000 free points.
- Note: In order to receive the bonus you must have level 400, 127/127 points from fruits and to relog on sub-server 1 (non-gens maps).
- With this addition we aim to both make the normal Fruits usable / worth for high stats server as well as making Creation actually valuable while also increasing the value of Jewel of Chaos for end-game.
-
Note: Command Fruits are automatically changed into another Fruit type (STR/AGI/VIT/ENE) when placed in inventory.
-
If you reach 127/127 extra stats by using the Fruits made from Creations, you'll receive an extra 2000 free points.
-
Maps Limits
-
In order to keep the balance between RF, MG & DL vs rest of classes and to also keep the maps as they were intended (without lower level move from website) we added level-checks:
- DL, RF, MG can stay in low maps with -10 levels than rest, and on rest of maps with -20 levels than rest.
- DL, RF, MG goes on the same BC/DS/CC/Kalimas like rest of characters.
- Also, in order to progress on maps by feet (from kanturu1 -> kanturu2 or atlans1 -> atlans2) you'll have to have the map level (available for all classes).
-
The feature is active only after 1st reset (on 0 resets all chars go on maps as normal).
-
Exception: Until 1st NON-VIP character does reach level 200, MG DL & RF does have restriction on move like rest of chars.
-
Exception: Until 1st NON-VIP character does reach level 200, MG DL & RF does have restriction on move like rest of chars.
-
In order to keep the balance between RF, MG & DL vs rest of classes and to also keep the maps as they were intended (without lower level move from website) we added level-checks:
-
Extra Warehouses
- You are able to access multiple warehouses on the same account.
-
Basically, you will have your *MAIN* warehouse as usually, and you'll gain access to extra (empty by default) warehouses where you can deposit your things:
- Non-VIP characters does have 2 extra warehouses.
- Dealer & Hunter VIP characters does have 3 extra warehouses.
- Professional VIP characters does have 4 extra warehouses.
-
In order to access such extra warehouses you need to write command /ware (0/1/2/3/4) where the number = warehouse number.
- Example: /ware 0 (will switch to your main warehouse, which is always set by default and after each relog).
- Example2: /ware 1 (will switch to your 2nd warehouse).
- Note: Characters that had VIP and it expired will no longer be able to access the extra warehouse(s), but items will not be lost, they can be accessed back after you renew your VIP.
-
Note2: The Game Warehouse from Website does use ONLY the *MAIN* warehouse.
-
Dice
- You can type /dice and it will generate a random number from 1-100, as a system message, that everyone from your range can see it.
-
You can type /dice xxx where xxx = any number < 10000, it will generate a random number from 1 to your number, that everyone from your range can see it.
- Note: There is a 5 seconds cooldown between each use.
-
This idea is borrowed from WoW, let the deathrolls begin!
-
Old Jewel
- Old Jewel is a new mid-late game jewel, a custom one, that can either be mixed on Chaos Goblin or found in Old Box 5, Medusa & Selupan.
- Old Jewel can be used on excellent set items / shields with minimum level of + 11, that have 1 or 2 exc. options.
- Old Jewel will add +1 excellent option to the item (from 1 option to 2 options or from 2 options to 3 options).
- Old Jewel has 100% success rate on items.
-
Old Jewel Mix:
- 30x Jewel of Bless.
- 30x Jewel of Soul.
- 10x Jewel of Chaos.
- 10x Jewel of Creation.
- 5x Jewel of Harmony.
- 300kk Zen.
-
5 exc. set items (no weapons) + add12 (or higher).
- 40% success rate for the mix.
-
The Mix goal is to give new opportunities to spend jewels, zen, and trash exc. items as well as to keep them relevant.
-
Reset ADD from Wings
- You can use the /resetwings command in order to reset the ADD (Jewel of Life) option from your wings.
- It will reset (remove) the life option from the currently equipped wings.
- The wings will be placed back in your inventory (you need to have space for them).
- The cost for the command is 300 credits & 100kk Zen.
Client Utilities:-
Auto Post
- You can automatically send messages on /post while you are AFK.
- The time between the posts is 15 minutes.
-
In order to use this option, you must click on the button on the right side of the Clock In-Game.
- A new window will pop-up up and all you have to do, is write the message that you want to send in the box after 'Message:' and then press on the button 'Enable'.
- Notice that this option will still work if you get reconnected to the game and in some cases, even after disconnect.
-
In order to disable this option just press again on the same button which will now say 'Disable'.
-
Events Time Table & Info
-
You have an In-Game calendar (time table) where you can see the timers for all the events.
- You can see how many days/hours/minutes/seconds left until the event starts, just like the time table from the Site.
- In order to access it you need to click on the Clock (that is showing your local time). You can also press "H" key to access it.
- Notice that in some cases (depending on your countries summer time/winter time), the events can be wrong by +1 hour or -1 hour, from the time shown.
-
Furthermore, you can see all the information about the Events that are listed on the time table, just by clicking on their name (you can see their hours, their rewards, locations, credits, etc.).
-
You have an In-Game calendar (time table) where you can see the timers for all the events.
-
3D Camera & Minimizier
- You can turn the 3D camera ON/OFF by pressing "F10" key.
-
After turning the camera ON you can zoom in/out or even change the camera position by using your mouse wheel.
- If you keep it clicked and move the mouse around the camera, the position will change.
- Also mouse wheel up = Zoom IN, mouse wheel down = Zoom OUT.
- In order to reset the camera position, you must press the "F11" key and it will be restored to the default position.
-
Also, if you want to Minimize the game, just press the "F12" key and it will disappear from screen.
-
To retrieve the window, go to the MU icon near the Windows Clock (on bar) and click on it.
-
To retrieve the window, go to the MU icon near the Windows Clock (on bar) and click on it.
-
In-Game Minimap
- You can press "TAB" key to see the Minimap.
- Minimap does contain all the Spots locations from Server and also the Gates locations between maps.
-
You can also keep the cursor over any Spot from Minimap and it will show you the Monster types from that spot.
- Example:
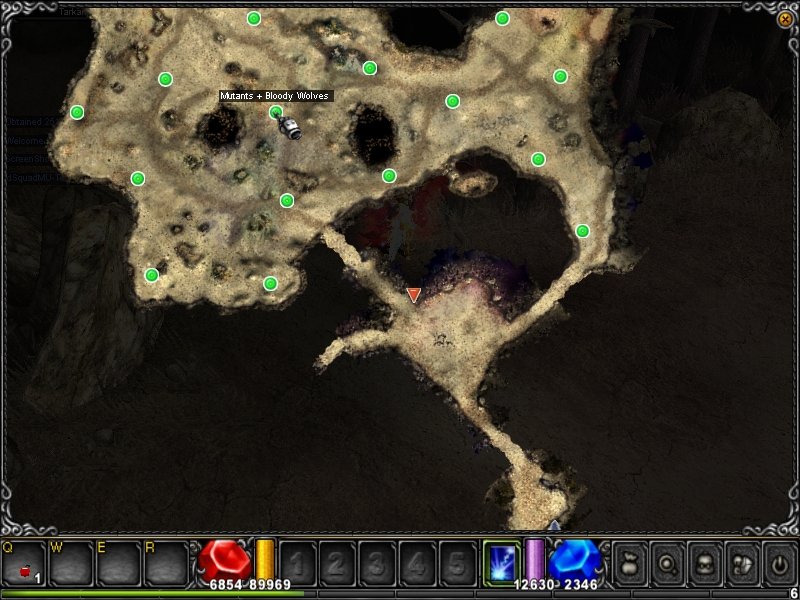
Site Features:-
Web Warehouse
- This feature is just like a Game Warehouse but it is on SITE.
- You can deposit up to 50 items in the Web Warehouse (so use it for extra storage).
- The Web Warehouse is also the bridge between your In-Game items and the Market/Premium Modules.
-
In order to use any of these modules, you must first move your items from Game Warehouse to Web Warehouse.
-
Zen Wallet & Jewel Wallet
- These Wallets are your 'Bank' for Jewels and Zen.
- In order to buy things from the Market, you must deposit the jewels/zen needed for the transaction, in your Wallets.
- Also, when you are selling something in Market, you will receive the jewels/zen in your Wallets.
-
You can have large amount of Jewels and a large amount of Zen in your Wallets, so use them for extra space/zen.
-
Add Luck Feature
-
You can use Credits to Add Luck to an item from your account that doesn't already have it.
- Exception: Wings (Level 1-3). You can't use this feature on them.
- The feature can be used by any player, it doesn't matter if it's VIP or not.
- The price is 500 Credits/Item.
-
In order to use this function you must use the following procedure:
-
1. Adding the item that you want to put Luck on into the Web Warehouse:
- Log IN on SITE ->Go to Game Warehouse ->Left Click on the Item that you want to upgrade ->Click on 'Move to Web'.
-
2. Upgrading the Item using Add Luck feature:
-
Go to Services ->Premium Options ->Blacksmith then press on the button under the 'Add Luck' column, that is in the front of the Item that you want to Upgrade.
-
Go to Services ->Premium Options ->Blacksmith then press on the button under the 'Add Luck' column, that is in the front of the Item that you want to Upgrade.
-
1. Adding the item that you want to put Luck on into the Web Warehouse:
-
You can use Credits to Add Luck to an item from your account that doesn't already have it.
-
Chaos Machine Feature
- You can Upgrade your Items with credits using the Chaos Machine on SITE (100% chance of success and without the jewels).
-
You can only use this function for items with a minimum level of +9 and a maximum level of +12 (based on Stage).
- Exception: Wings Level 2&3. You can't use this feature on them.
- The feature can be used by any player, it doesn't matter if it's VIP or not.
- The price is 180 Credits for +10, 260 Credits for +11, 380 Credits for +12.
-
In order to use this function you must use the following procedure:
-
1. Adding the item that you want to Upgrade the Level on into the Web Warehouse:
- Log IN on SITE ->Go to Game Warehouse ->Left Click on the Item that you want to upgrade ->Click on 'Move to Web'.
-
2. Upgrading the Item using Chaos Machine feature:
-
Go to Services ->Premium Options ->Blacksmith and press on the button under the 'Chaos Machine' column, that is in the front of the Item that you want to Upgrade.
-
Go to Services ->Premium Options ->Blacksmith and press on the button under the 'Chaos Machine' column, that is in the front of the Item that you want to Upgrade.
-
1. Adding the item that you want to Upgrade the Level on into the Web Warehouse:
-
Add Option Feature
- You can Upgrade the +ADD Option of your Items using the Add Option on SITE.
- It will transform any +add option (from +0/+4/+8) into +12 option.
- The feature can be used by any player, it doesn't matter if it's VIP or not.
- The price is 300 Credits/Item.
-
In order to use this function you must use the following procedure:
-
1. Adding the item that you want to Upgrade the +ADD Option on into the Web Warehouse:
- Log IN on SITE ->Go to Game Warehouse ->Left Click on the Item that you want to upgrade ->Click on 'Move to Web'.
-
2. Upgrading the Item using Add Option feature:
-
Go to Services ->Premium Options ->Blacksmith and press on the button under the 'Add Option' column, that is in the front of the Item that you want to Upgrade.
-
Go to Services ->Premium Options ->Blacksmith and press on the button under the 'Add Option' column, that is in the front of the Item that you want to Upgrade.
-
1. Adding the item that you want to Upgrade the +ADD Option on into the Web Warehouse:
-
Market
- You can easily Sell/Buy items from other Players in the Market.
- All the items are added by players from game.
- You need minimum level 100 in order to be able to sell on Market (that can be raised as game progress).
-
Currencies in which you can Sell for, in Market:
- Jewel of Bless
- Jewel of Soul
- Jewel of Chaos
- Jewel of Life
- Jewel of Creation
- Jewel of Harmony
- Zen
-
Credits (Maximum price of 2000 Credits/Item).
- You can make any combination of this currencies to set an offert.
- Note: There's a 10% tax for sales in Credits.
- There is no tax from the price but you will pay 1.000.000 Zen for each item added on Market.
- Any item added to Market will expire after 5 days if it's not bought (will return to your account).
- You can only sell up to 10/20/30 items/day in Market (based on Stage).
-
In order to Sell Items in Market you must use the following procedure:
- Log IN on SITE ->Go to Game Warehouse ->Left Click on the Item that you want to sell ->Click on 'Sell Item' then set the price and click on 'Submit'. You can also sell the item from Web Warehouse.
-
In order to Buy Items from Market you must use the following procedure:
- Log IN on SITE ->Go to Wallets ->Click on Jewels/Zen Wallet ->Deposit the amount of Jewels/Zen needed to buy the items into the Jewels Wallet/Zen Wallet from your Game Warehouse ->Go to Market and buy the items you want.
-
You can filter items by excellent options, class, etc.
-
Character Market
- You can Buy/Sell characters in a 100% safe way, using the Character Market.
- The System works only with Credits (you can only buy/sell for Credits).
- Characters sold must have a minimum of 3 resets.
- There is a Tax of 20% and a Minimum Price of 2000 credits for any Character.
- You must choose on what account the Credits will go after a successful sale (you must write the account where you want them at 'Recipient').
- After a successful sale, the Character that was sold will be automatically transferred into the account that bought it (if there is space for it), and then you can use it.
-
The entire equipment, ranks, stats, etc. will be transferred.
-
Change Avatar
- You can change your Avatar from Rankings (the image shown when somebody keeps the cursor on your name).
- Be creative, be funny, make your name heard on Rankings, you can even use GIFs.
-
In order to Change Avatar you must use the following procedure:
-
Log IN on SITE ->Go to Services ->Go to Character Options->Go to Change Avatar.
- You need to choose the Character you want to add/update avatar.
-
You must follow the next steps in order to add an Avatar:
- Visit https://imgur.com
- Click on 'New post' on top left
- Upload an image you want as Avatar from your PC
- After the upload is over, click on 'Copy link'
- Paste the copied link into the 'Avatar Link' field
- Example: https://imgur.com/aAsa7sC
-
IMPORTANT! The avatar link must follow the structure *https://imgur.com/XXXXXX*, else it won't work!
-
Log IN on SITE ->Go to Services ->Go to Character Options->Go to Change Avatar.
-
Account Logs, Search & Warp Features
-
Account Logs:
- You can see all your Account Logs (everything you did on site, including the IP address accessing your account).
-
In order to access the Account Logs, you need to use the following procedure:
- Log IN on SITE ->Go to Services ->Go to Account Logs.
-
Search:
-
You can find any Player or Guild from Server, just by writing his name on Search Feature.
- After finding it, you can also click on it to see all the info that is publicly available.
-
In order to access the Search feature you need to use the following procedure:
- Log IN on SITE ->Go to Services ->Go to Search Player / Guild.
-
You can find any Player or Guild from Server, just by writing his name on Search Feature.
-
Warp Character:
- You can warp your Character from website to any available maps from the warp feature.
- The feature is especially for PK'ers that want to move to other maps.
- There is a cooldown of 30 minutes to use this feature. Exception: Lorencia that does bypass it.
- Prices for moving to maps from site are much higher than the game-ones.
-
In order to access the Warp Character feature you need to use the following procedure:
- Log IN on SITE ->Go to Services ->Go to Character Options ->Go to Warp Character.
- Attention! The Zen needed for Warp must be deposited into Zen Wallet in order to use the feature!
-
You can also use the Warp Character (for free) to teleport on Lorencia (in case of character stucked).
-
Account Logs:
-
Rankings PvM & OldSquad Golden Months
-
Rankings PvM:
- In this Rankings you can see the best PvM Players & Hunters.
-
You can also check which character killed which boss/mini-boss and for how many times.
- This is helpful when you are looking for specific items (like BoK+2 items, for example).
-
Each boss/mini-boss available on PvM Rankings does give a specific amount of PvM Points on kill:
- Rabbits = 2 Points.
- BOK+1 = 3 Points.
- BOK+2 = 4 Points.
- BOK+3 = 5 Points.
- BOK+4 = 6 Points.
- BOK+5 = 7 Points.
- Budges = 8 Points.
- Derkon = 10 Points.
- WW = 10 Points.
- Cursed = 15 Points.
- GGD = 15 Points Killer & Party Members.
- Witch = 20 Points Killer & Party Members.
- Nightmare = 25 Points Killer & Party Members.
- Kundun = 25 Points Killer & Party Members.
- Medusa = 40 Points Killer & Party Members & Guild Members.
- Selupan = 50 Points Killer & Party Members & Guild Members.
-
OldSquad Golden Months:
- OSGM Ranks are showing the Players that are participating at OSGM Competition.
-
You can see the OSP for each Player and also the Day-Rank:
- No Participation - Player didn't participated at the recent Event.
- 1st Place - Player won 1st Place at the recent Event.
- 2nd Place - Player won 2nd Place at the recent Event.
- 3rd Place - Player won 3rd Place at the recent Event.
- 4th Place - Player won 4th Place at the recent Event.
- 5th Place - Player won 5th Place at the recent Event.
- Consolation - Player got a Consolation at the recent Event.
- The Day-Ranks are having a reset every day at 11:59 Server Time.
-
Rankings PvM:
PvP System - All details & features
-
This is a full PvP Server - that means you can Kill/KS any player, any time, as much as you want, AS LONG AS GAME LET YOU DO IT.
-
Nature of Maps
-
Non-PvP Maps (can't attack players):
-
Kalima1, Kalima2, Aida, Crywolf, Karutan2 and Kalima7 where you can only KS.
-
Punishment: 50% DROP.
- Note: Crywolf is the only Non-PvP map where Mercenaries can safely AFK.
-
Punishment: 50% DROP.
-
Kalima1, Kalima2, Aida, Crywolf, Karutan2 and Kalima7 where you can only KS.
-
Free PvP Zone (can kill players with no punishments):
- Lorencia Circle.
- Selupan's Room.
- Near Medusa.
-
Gens Maps (can attack players from opposite gens with no punishments / can't attack members from same gens):
-
Atlans, Tarkan, Karutan1, Relics and Vulcanus.
- Bonus EXP: + 5% (before Mercenary Squad & Gens Raids release) & + 12% after release.
-
Atlans, Tarkan, Karutan1, Relics and Vulcanus.
-
Normal PvP Maps (can kill players but with punishments):
-
Rest of maps.
-
Rest of maps.
-
Non-PvP Maps (can't attack players):
-
You can Summon your Party in Gens Maps (Vulcanus, Relics) when there is a boss alive (Witch, Nightmare).
-
There is no /pkclear command available.
-
In order to clear your PK you must either wait (a long time for each kill) or to KILL monsters and make the clean process much faster (by gaining PK points).
-
In order to clear your PK you must either wait (a long time for each kill) or to KILL monsters and make the clean process much faster (by gaining PK points).
-
PK Points System
- You gain 3 points per second.
- You gain MonsterLevel/4 points per monster kill.
- Points required to clean PK at Stage1: 8000
- Points required to clean PK from Stage2 to Stage1: 13000
- Points required to clean PK from Stage3 to Stage2: 21000
-
Points required to clean PK for each extra Kill after Stage3: 10000
-
PK Punishments & Allowance
-
If you are PK you can:
- Be summoned by a DL (if it is not on the same IP with you and ONLY if there is an invasion / boss alive in that map).
-
Teleport to most of the Maps via Web Site (But with a much higher cost of Zen).
- Note: There's a cooldown of 30 minutes per warp. Exception is Lorencia where you can warp anytime.
-
Punishments:
- You can't use Shops if you are PK.
- You can be attacked on Non-PvP maps.
- You have specific Kill Limits based on the map where you currently are.
-
You can't join LoT if you are PK.
-
If you are PK you can:
-
When you are in party you can't attack/be attacked by others from the same party (to avoid kills from mates by mistake).
-
Chars Command
- You are able to use command /chars Name where Name = name of an online char (same server with you) that has at least 1 Kill.
- The function will show the first 3 chars from the target IP that have the biggest level, from biggest to lowest.
- If the player doesn't have 3 chars it will show only two, one or none.
- In order for the command to show the chars, the target must have at least 1 Kill or it won't show anything.
-
Feel free to know the killers better from now so you can have your revenge.
-
Kill Limits
-
You aren't able to PK after a certain amount of kills and based on the map you are, until you clear some Kills (but you are able to be killed).
- Lorencia, Noria, Elbeland, Devias, Dungeon -> Max 8 Kills.
- LostTower, Kalima3, Kalima4 -> Max 12 Kills.
- Icarus, Kalima5 -> Max 16 Kills.
- Kanturu, Kalima6 -> Max 25 Kills.
- Raklion, Swamp -> Max 40 Kills.
- The limit is bypassed on a map when there are Goldens/Bosses alive (you can pass the kill limit while the mobs are alive).
- The limit is bypassed when you are attacking a Stage2/Stage3 PK'er (you're not limited).
- The limit is bypassed if both attacker and victim are part of Mercenary Squad.
-
The limit is bypassed if there is a fight for a spot or fight with KS'ers.
- The condition is that the attacker must have a full party (4 or 5 members) and at least 3 other party mates must be in his 6x6 zone (to be marked as eligible).
-
If the conditions are met the attacker can bypass the limit of kills.
-
You aren't able to PK after a certain amount of kills and based on the map you are, until you clear some Kills (but you are able to be killed).
-
Fairness Gaps
- You aren't able to attack or be attacked by players when a fairness gap is touched.
- This feature will disable the option of attacking a player if it's much lower in levels than you.
- The feature is having a vice-versa also, players much lower than you can't attack you.
-
Exceptions:
- Feature is disabled on Gens Maps (Atlans, Tarkan, Karutan1, Relics, Vulcanus) and also on Raklion & Swamp.
- Feature is disabled at CS, LoT, CC, Arena Tournament, IT, Duel Arena and Lorencia Circle.
-
Feature is disabled if you have a party of 4 or 5 players and all of them are on 6x6 range.
- If attacker or the one being attacked does have such party (basically, on a spot), the Fairness Gap is passed and both attacker and the attacked one can attack each other without any gap.
- The feature is similar to the one from Kill Limit (when you can pass Kill Limit while on spot/fights between parties).
- The feature was added in order to 'fix' the cases when low or high players come to a spot just for KS, and can't be stopped due to Fairness Gap, which can now be passed with 4/5 members in party and on spot.
-
The Fairness Gaps are:
- 0-1 resets -> No gap
- 2-3 resets -> 2 resets gap
- 4-5 resets -> 3 resets gap
- 6-7 resets -> 4 resets gap
- 8-9 resets -> 5 resets gap
- 10-11 resets -> 6 resets gap
- 12-13 resets -> 7 resets gap
- 14-17 resets -> 8 resets gap
- 18-21 resets -> 9 resets gap
- 22-25 resets -> 10 resets gap
- 26-30 resets -> 12 resets gap
-
Examples:
- Players with 2 resets can't kill players with 0 resets.
- Players with 3 resets can't kill players with 0-1 resets.
- Players with 4 resets can't kill players with 0-1 resets.
- Players with 5 resets can't kill players with 0-2 resets.
- Players with 6 resets can't kill players with 0-2 resets.
-
Players with 7 resets can't kill players with 0-3 resets.
- ...
-
Players with 17 resets can't kill players with 0-9 resets.
- ...
-
Players with 30 resets can't kill players with 0-18 resets.
-
Mercenary Squad System (V2)
-
Mercenary Squad is a new OPTIONAL PvP System, where anyone who wants more PvP can join.
- You can register into the squad by writing /registerpvp.
- You need at least 3 resets in order to join Mercenary Squad.
- After you join you need to wait at least 6 hours before leaving it.
- In order to leave you need to write /unregisterpvp.
- You can join/leave for any number of times you want.
- There is also a new Ranking tab on Website (Mercenary Squad), reflecting the top for Mercenaries.
-
You will get 1 point for every 7 minutes of ONLINE TIME while you are registered on the squad.
- Note: Only if you are out of safe-zones/events you get the online points.
- The system is active only on normal server (server 2 & 20 excluded) with the exception of Kalimas, where you don't get points or mercenary benefits but you also can't be targeted for mercenary quests.
-
IMPORTANT! If you unregister from the Mercenary Squad you will LOSE all your ACCUMULATED POINTS!
- So, the higher the risk the higher the reward.
-
Features for those that register:
-
There are 3 levels of seals that you get by registering, which will upgrade in time:
- First Seal is automatically given after you register, it will increase your Normal Exp with 5%.
- Second seal will give you 10% exp.
-
Third seal will give you 15% exp.
- All seals will also have a visual effect on your character so people will know that you're part of the Mercenary Squad.
- Seals are disabled on Battle Maps (you already have +12% exp there).
- You will bypass Fairness Gaps versus other Mercenaries.
- You will bypass PK Limit vs other Mercenaries.
- You will bypass Non-PvP invasions vs other Mercenaries.
- You will bypass Non-PvP maps vs other Mercenaries.
- You will bypass Non-PvP aspect of Rabbits invasions vs other Mercenaries.
- When you reach a total of 10 PK kills, you'll no longer gain extra PK kills (levels) vs other Mercenaries.
-
There are 3 levels of seals that you get by registering, which will upgrade in time:
-
Mercenary Quest System:
-
There is also a Mercenary Quest system that can be accessed once every 12 hours with the command /pvpquest.
- Note: If you neither finish your quest nor get repelled you can access the quest after 6 hours instead of 12, for a second chance.
-
This command will assign you an ONLINE player from the Mercenary Squad, using the Quest Normalizer Feature, that you need to kill in the next 15 minutes in order to finish the quest:
-
The Mercenary Quest will first try to assign you targets based on resets interval, as following:
- It will look 10 times for Target with same reset like you.
- It will look 15 times for a Target with -1/+1 reset compared to you.
- It will look 20 times for a Target with -2/+2 resets compared to you.
- It will look 25 times for a Target with -3/+3 resets compared to you.
- It will look 30 times for Target with -4/+4 resets compared to you.
-
It will look 35 times for a Target with -5/+5 resets compared to you.
- If it doesn't find any target during these 135 tries, it will look for a Target with any reset.
-
Also when starting a mercenary quest, you have a 1/3 chance of getting a target in your Mercenary Points interval instead of your Character Resets interval as following:
- It will look 15 times for a Target with -250 Merc Points/+250 Merc Points compared to you.
- It will look 20 times for a Target with -500 Merc Points/+500 Merc Points compared to you.
- It will look 25 times for a Target with -750 Merc Points/+750 Merc Points compared to you.
- It will look 30 times for Target with -1000 Merc Points/+1000 Merc Points compared to you.
- It will look 35 times for a Target with -1500 Merc Points/+1500 Merc Points compared to you.
- It will look 40 times for a Target with -2000 Merc Points/+2000 Merc Points compared to you.
- If it doesn't find any target during these 165 tries, it will look for a Target with any amount of Merc Points.
-
Basically, you'll have a 33.3% chance to get a target based on Merc Points instead of Resets and 66.7% chance to get a target based on Resets, as usual.
- Note: If your Mercenary Points are under 500, you will encounter only players related to your character reset, and not points, in your own quests.
-
Important note: If your target is in a map where you don't have level to access yet you can use /qwarp command to get & stay there during quest duration!
- If you did use the /qwarp command you will receive a Seal of Sustenance, preventing you from getting experience until the quest is over (won/lost/expired/cancelled).
-
The Mercenary Quest will first try to assign you targets based on resets interval, as following:
-
There is a counter-attack function called Repel:
- If the quest targets kill their hunter before being killed, they will receive points and the hunter's reward, and the hunter will fail the quest.
-
The points earned from Quests/Repels are Dynamic:
- Points are received based on the kill type (normal or challenge), repel (normal or challenge) and reset difference.
- Default *Normal* Quest Points reward is 35 Points.
- Default *Challenge* Quest Points reward is 45 Points.
- Default *Normal* Repel Points reward is 45 Points.
- Default *Challenge* Repel Points reward is 65 Points.
-
The formula of points added is DefaultValue +- ResetDifference*2
- Minimum points gained: 10.
- Maximum points gained: 85.
-
You will lose Mercenary Points when you are being killed as Quest Target and from Repel.
-
Formula: 4% of current Mercenary Points.
- Minimum points lost: 20 Points.
- Note: If you already passed the Seal Upgrade requirements you will lose the Upgrade if you go back under Points requirement, so you need to make them back in other to recover your Seal Upgrade.
- Note2: Points lost by dying as quest target/repel or by leaving the Challenge can't go under 0 (minimum points value is 0).
-
Formula: 4% of current Mercenary Points.
-
For Quest Retarget, you have to type again /pvpquest when your target is gone/inaccessible.
- In this way you can choose for how many times you retry.
-
Mute List Feature
- When you start a quest you will receive Mute on characters online & on any new character you try to log in as well as disabling the option to open a store.
- Mute will be removed when Quest is failed, retried, repelled or finished, along with the store access restore.
- This will prevent "friendly quests" as we got used to.
-
Black List Feature
- Whenever you finish a quest with a Target (kill or repel), the target will be added to the blacklist.
- Blacklist targets can't appear as quest targets for up to 7 days since they were added to the blacklist.
-
Challenge Feature
- When you are being targeted in a Quest, you will receive a global message, "You are being Hunted!", every 1 minute, in first 8 minutes from quest.
- During these 5 minutes, you can type /challenge.
- If you do this, you and your Target (which you don't know) will be moved to a Colosseum Arena, each one in a different side.
- The first one that will die will lose (means Target will successfully Repel or Hunter will successfully finish the Quest).
-
Both players won't be able to move from the Map until the "duel" is over, or one of them will exit game.
- If Hunter leave the game before any of them dying, he will fail the quest & lose 120 points and 5% of points.
- If Target leave the game before any of them dying, he will lose 180 and 5% Points and Hunter will get to retry the quest.
- In Colosseum, both Repel points reward and Quest points reward are increased, for the Challenge.
- You won't gain any PK level in the Colosseum.
-
Mercenary Bounty
- Mercenary Bounty can only be gained from Quests & Repels.
-
There are 2 types of Mercenary Bounty:
-
Mercenary Bounty Initiate (available when having < 2500 Points).
-
Reward:
- 90% chance for Soul / Life / Chaos.
- 10% chance for IT Ticket, Scrolls (DEF,DMG,etc.), Antidotes.
-
Reward:
-
Mercenary Bounty Advanced (available when having > 2500 Points).
-
Reward:
- 87% chance for 1x Soul/Life/Chaos/Harmony/Gemstone/Creation.
- 10% chance for IT Ticket/Antidotes/Doppelganger Scrolls.
- 3% chance for TOCA/Flame of Condor.
-
Reward:
-
Mercenary Bounty Initiate (available when having < 2500 Points).
-
Quest extra reward is progressive:
- You gain 0 Mercenary Bounties as extra reward when you have < 500 Points.
- You gain 1 Mercenary Bounty as extra reward when you have between 500 and 999 Points.
- You gain 2 Mercenary Bounties as extra reward when you have between 1000 and 1999 Points.
- You gain 3 Mercenary Bounties as extra reward when you have over 2000 Points.
- You gain +1 Mercenary Bounty for every extra 2000 Points after 2000 (at 4000,6000,etc.).
- Repel extra reward will always be the same amount of Mercenary Bounties that the Hunter would get based on his Points (if target has 0 Bounties as reward Repel will be 0 Bounties, etc.).
-
Seals System:
- You will have both ML Seal & Normal Seal active in the same time.
- Each Seal will show you current seal level & bonuses. Normal 3rd level seal and ML 2nd level seal visuals are different.
- Normal Seal will give you +5%/+10%/+15% EXP based on level.
-
ML Seal has only 2 levels:
- Level 1 = +8% ML EXP, and it is gained when Normal Seal reach Level 2.
- Level 2 = +15% ML EXP, and it is gained when Normal Seal reach Level 3.
- Requirements for Level 2: 1500 Points, 10 Quests & 4 Repels or 1500 Points & 25 Quests.
-
Requirements for Level 3: 3000 Points, 25 Quests & 10 Repels or 3000 Points & 55 Quests.
-
There is also a Mercenary Quest system that can be accessed once every 12 hours with the command /pvpquest.
-
Mercenary Squad is a new OPTIONAL PvP System, where anyone who wants more PvP can join.
-
Gens System
-
Looks like the classic system, with some adjustments:
-
You get 1 Gens point every 3 minutes you stay in a Battle Map and outside of safe-zone, as long as you are not a part of Mercenary Squad.
- Note: Mercenaries do not gain Gens points from online time in Battle Maps but they also can't be targeted for mercenary quests there.
-
There are RAIDS, 3 times per day (20:55, random hour/minute between 01:00 and 07:59, random hour/minute between 10:00 and 16:59).
-
Each lasts for 20 minutes and these are the only Gens events where you can obtain Gens points by killing other Gens clan in battle maps.
- Only first kill on the same person gives points, you can kill any player for how many times you want though.
- If you are being killed during Raid, you won't gain Points by killing the same person.
- During Raids, if you attack a character, both the attacker and the target will have the "warp" disabled for 10 seconds.
-
Raid points gained from kills: 60 +- (ResetDifference)*4.
- Minimum Points gained: 10 Point.
- Raid points lost on death: 12 + (Resets*3).
-
Each lasts for 20 minutes and these are the only Gens events where you can obtain Gens points by killing other Gens clan in battle maps.
- Points are updated only when you switch character / go to crywolf / go from non-gens maps to gens maps.
-
You get 1 Gens point every 3 minutes you stay in a Battle Map and outside of safe-zone, as long as you are not a part of Mercenary Squad.
-
Gens Rewards:
- Twice per month, the players with most gens points (and not only) will be rewarded.
- The Gens reset will happen on 1st day of each month and on 16th day of each month, at 17:00. There will be a disconnect-reconnect for everyone that will be online on gens-maps at that moment. After this disconnect you will be able to get your reward for the previous month by speaking to your (Family) Gens NPC.
- Only players with at least 15 raid kills during the gens season are eligible for rewards!
- You will be able to take your reward for previous month anytime until the next Gens reset.
- There is also a gens contribution reset at the same time.
- In order to take your reward you'll have just to click the Gens NPC for your gens familly. It has a global cooldown of 4 seconds between rewards. Global cooldown means if Player A gets reward now, the others can get the reward 4 seconds later.
-
Gens Rank Rewards:
-
First place from Vanert & Duprian:
- Until Stage 2 is over: 3x TOCA & 30x Jewel of Harmony.
- After Stage 2 is over and until Stage 3 is over: 3x OB4 & 3x TOCA.
- After Stage 3 is over: 3x OB5 & 3x OB4.
- HoF badge
-
2nd place from Varnert & Duprian:
- Until Stage 2 is over: 3x TOCA & 20x Jewel of Harmony.
- After Stage 2 is over and until Stage 3 is over: 3x OB4 & 2x TOCA.
- After Stage 3 is over: 3x OB5 & 2x OB4.
-
3rd place from Vanert & Duprian:
- Until Stage 2 is over: 2x TOCA & 20x Jewel of Harmony.
- After Stage 2 is over and until Stage 3 is over: 2x OB4 & 2x TOCA.
- After Stage 3 is over: 2x OB5 & 2x OB4.
-
4th place form Vanert & Duprian:
- Until Stage 2 is over: 2x TOCA & 10x Harmony.
- After Stage 2 is over and until Stage 3 is over: 2x OB4 & 1x TOCA.
- After Stage 3 is over: 2x OB5 & 1x OB4.
-
5th place from V & D
- Until Stage 2 is over: 1x TOCA & 10x Harmony.
- After Stage 2 is over and until Stage 3 is over: 1x OB4 & 1x TOCA.
- After Stage 3 is over: 1x OB5 & 1x OB4.
-
There are 25(50) extra rewards for top 5~40 players from Vanert and Duprian:
- Until Stage 2 is over: 10x Harmony.
- After Stage 2 is over and until Stage 3 is over: 20x Harmony.
- After Stage 3 is over: 1x TOCA.
- So, choose your gens carefully! If one gens family is lower populated you have more chances to get in top there!
-
First place from Vanert & Duprian:
-
Handicap advantage for Gens Families:
- Based on total number differences of Gens, the gens family with lower number of players will have higher number of total rewards
- Example: If by default there are 30 rewards for Vanert and 30 rewards for Duprian, now based on difference of total players there can be 20-30 rewards for the higher populated gens and 30-40 rewards for the lower populated gens (total number of rewards will always be 60, as default)
- Note: Only TOP 500 characters part of Gens are counted for Gens proportions
-
Handicap intervals:
-
If Difference <= 6% (interval of 50-53% players for one gens or another):
- 30 Rewards - 30 Rewards (both families getting same amount of rewards).
-
If Difference > 6% and Difference <= 12% (interval of 54-56% players for one family or another):
- 28 Rewards for higher population Family - 32 Rewards for the lower population Family.
-
If difference > 12% and Difference <= 18% (interval of 57-59% players for one family or another):
- 26 Rewards for higher population Family - 34 Rewards for the lower population Family.
-
If Difference > 18% and Difference <= 24% (interval of 60-62% players for one family or another):
- 24 Rewards for higher population Family - 36 Rewards for the lower population Family.
-
If Difference > 24% and Difference <= 30% (interval of 63-65% players for one family or another):
- 22 Rewards for higher population Family - 38 Rewards for the lower population Family.
-
If Difference > 30% (66%+ players for one family or another):
-
20 Rewards for higher population Family - 40 Rewards for the lower population Family.
-
20 Rewards for higher population Family - 40 Rewards for the lower population Family.
-
If Difference <= 6% (interval of 50-53% players for one gens or another):
-
Looks like the classic system, with some adjustments:
-
Duel Gamble System
- You can write "/gamble credits/bless amount CharName" to target-gamble a player.
- First argument is either "credits" or "bless", depending on what you want to bet.
- Second argument is the amount of credits/bless you want to gamble.
-
Third argument is the name of the character you're gambling with.
-
Example: /gamble credits 300 Gion
- -> Will start a gamble with Gion for 300 credits.
- Note: You must have the credits / bless in your Website! (for bless it is required to have them in Jewel Wallet).
- Note2: The maximum amount of credits that you can bet is 1000 and maximum amount of bless is 50!
-
Example: /gamble credits 300 Gion
- There is a tax of 2.000.000 Zen for each Gamble (for both players involved)!
- There is a 10% tax for gambles in Credits (from the loser prize).
- After a gamble is asked, the starter will have the values extracted from his account.
- After 10 minutes, if the player is not in the colosseum (basically, the opponent didn't accept the gamble) he will have the credits/blesses returned.
- If the opponent doesn't have the bet you're asking for, you won't be able to start the gamble.
- You can also manually /reject a current gamble (only if you're the one asked) if you want to start another one with someone else.
- After the gamble is asked, the opponent must write /accept in the 10 minutes window.
- If he writes that, both characters will be moved to colosseum without the possibility to move away.
- If any of them is disconnected during the fight, that one will be counted as loser.
-
The gamble is over when first player does kill the other for 3 times (basically, best out of 5).
- Note: After killing an opponent, your SD remains the same - it is not restored like in the normal duel !
- The winner gets his bet back as well as the opponent's bet.
Medals, Excellent (BoKs) & Ancient Tiers
Hearts & Medals Item Tiers
-
Heart of Love
-
Sets:
- Scale
- Brass
- Silk
- Spirit
- Sphinx
-
Weapons:
- Legendary Sword
- Master Scepter
- Light Spear
- Serpent Spear
- Tiger Bow
- Serpent Crossbow
- Gorgon Staff
- Violent Wind Staff
- Double Blade
- Tomahawk
- Elven Axe
- Battle Axe
- Nikea Axe
- Berdysh
-
Legendary Staff
-
Sets:
-
Silver Medal
-
Sets:
- Plate
- Dragon
- Guardian
- Legendary
- Adamantine
- Storm Crow
- Sacred Fire
- Red Wing
-
Weapons:
- Helical Sword
- Rune blade
- Great Scepter
- Bill of Balrog
- Silver Bow
- Aquagold Crossbow
- Crystal Morning Star
- Crescent Axe
- Great Scythe
- Sacred Glove
- Red Wing Stick
- Lighting Sword
- Giant Sword
- Crystal Sword
- Resurrection Staff
-
Book of Neil
-
Sets:
-
Gold Medal
-
Sets:
- Ashcrow
- Eclipse
- Iris
- Valiant
- Dark Steel
- Storm Zahard
- Ancient
-
Weapons:
- Sword of Destruction
- Dragon Spear
- Celestial Bow
- Staff of Destruction
- Lord Scepter
- Saint Crossbow
- Holy Storm Glove
- Ancient Staff
- Book of Lagle
- Sword Dancer
-
Sets:
Excellent Item Tiers
-
Box of Kundun + 1
-
Sets:
- Bronze
- Silk
- Bone
- Scale
-
Weapons:
- Short Sword
- Kriss
- Sword of Assasin
- Katana
- Gladius
- Sword of Salamander
- Small Axe
- Hand Axe
- Double Axe
- Mace
- Morning Star
- Battle Scepter
- Double Poleaxe
- Dragon Lance
- Halberd
- Spear
- Short Bow
- Bow
- Elven Bow
- Crossbow
- Golden Crossbow
- Skull Staff
- Angelic Staff
- Serpent Staff
- Mistery Stick
-
Shields:
- Small Shield
- Horn Shield
- Buckler
-
Kite Shield
-
Sets:
-
Box of Kundun + 2
-
Sets:
- Brass
- Wind
- Spirit
- Sphinx
- Light Plate
- Plate
-
Weapons:
- Rapier
- Falchon
- Serpent Sword
- Blade
- Legendary Sword
- Light Saber
- Tomahawk
- Elven Axe
- Battle Axe
- Nikea Axe
- Flail
- Great Hammer
- Master Scepter
- Giant Trident
- Berdysh
- Serpent Spear
- Light Spear
- Battle Bow
- Tiger Bow
- Arquebus
- Light Crossbow
- Serpent Crossbow
- Legendary Staff
- Thunder Staff
- Gorgon Staff
- Violent Stick
- Book of Sahamutt
-
Shields:
- Skull Shield
- Elven Shield
- Large Round Shield
-
Spiked Shield
-
Sets:
-
Box of Kundun + 3
-
Sets:
- Dragon
- Guardian
- Legendary
- Adamantine
- Red Wing
- Sacred Fire
- Storm Crow
-
Weapons:
- Double Blade
- Lightning Sword
- Heliacal Sword
- Giant Sword
- Sacred Glove
- Rune Blade
- Larkan Axe
- Crescent Axe
- Crystal Morning Star
- Crystal Sword
- Great Scepter
- Bill of Balrog
- Great Scythe
- Silver Bow
- Chaos Nature Bow
- Bluewing Crossbow
- Aquagold Crossbow
- Resurrection Staff
- Chaos Lightning Staff
- Red Winged Stick
- Book of Neil
-
Shields:
- Serpent Shield
- Tower Shield
- Dragon Slayer Shield
-
Plate Shield
-
Sets:
-
Box of Kundun + 4
-
Sets:
- Ashcrow
- Iris
- Eclipse
- Valiant
- Black Dragon
- Dark Steel
- Ancient
- Storm Zahard
-
Weapons:
- Sword of Destruction
- Dark Breaker
- Holy Storm Claw
- Sword Dancer
- Chaos Dragon Axe
- Elemental Mace
- Lord Scepter
- Shining Scepter
- Dragon Spear
- Celestial Bow
- Saint Crossbow
- Great Reign Crossbow
- Dragon Soul Staff
- Destruction Staff
- Ancient Stick
- Book of Lagle
-
Shields:
- Bronze Shield
- Legendary Shield
-
Elemental Shield
-
Sets:
-
Box of Kundun + 5
-
Sets:
- Dark Phoenix
- Divine
- Grand Soul
- Glorious
- Demonic
- Thunder Hawk
- Great Dragon
- Dark Soul
- Red Spirit
- Hurricane
- Dark Master
- Lilium
- Piercing Grove
-
Weapons:
- AA Sword
- DayBreak
- Thunder Blade
- AA Scepter
- AA Crossbow
- Albatross Bow
- AA Staff
- Kundun Staff
- AA Stick
- Demonic Stick
-
Shields:
- Dragon Shield
-
Grand Soul Shield
-
Sets:
Extra Item Tiers
-
Bloody Witch Queen
-
Sets:
- Dragon Knight
- Venom Mist
- Sunlight
- Volcano
- Sylphid Ray
- Storm Blitz
- Phoenix Star
-
Sets:
-
Nightmare & Dark Elves
-
Weapons:
- Knight Blade
- Brova
- Thunder Blade
- Dark Reign Blade
- Piercing Glove
- Great Lord Scepter
- Striker Scepter
- Arrow Viper Bow
- Aileen Bow
- Chromatic Staff
- Platina Staff
- Raven Stick
- Lilium Stick
-
Weapons:
-
Guild Master Box
-
Sets:
- Dragon Knight
- Venom Mist
- Sylphid
- Volcano
- Sunlight
- Storm Blitz
- Phoenix Soul
-
Weapons:
- Bone Blade
- Grand Viper Staff
- Sylphid Wind Bow
- Explosion Blade
- Soleil Scepter
- Storm Blitz Stick
- Phoenix Soul Star
-
Sets:
Ancient Item Tiers
-
Low Tier Ancient
-
Bronze
- Hyperion
- Mist
-
Scale
- Berserker
-
Brass
- Cloud
-
Bone
- Sylion
-
Sphinx
- Minet
-
Silk
- Gaia
- Fase
-
Wind
- Odin
- Elvian
-
Spirit
-
Argo
-
Argo
-
Bronze
-
Mid Tier Ancient
-
Scale
- Eplete
-
Brass
- Garuda
-
Plate
- Kantata
-
Bone
- Evis
-
Sphinx
- Heras
-
Spirit
- Karis
-
Sacred Fire
-
Vega
-
Vega
-
Scale
-
High Tier Ancient
-
Dragon
- Hyon
- Vicious
-
Legendary
- Anubis
- Enis
-
Guardian
- Gywen
- Aruan
-
Adamantine
- Agnis
- Broy
-
Red Wing
- Chrono
- Semeden
-
Plate
- Rave
-
Storm Crow
- Gaion
- Muren
-
Sacred Fire
- Chamereuui
-
Dragon
Castle Siege System V3 - Unique
While our unique CS V2 fixed the most important CS problem - being decided in last minutes, on the default CS system - we decided that it is time to step up our most important Event and make it even more interesting, balanced as well, as less predictable as possible and with a lot of new possible strategies.
Basic Info & Schedule
- Castle Siege is every Sunday at 17:00 Server Time.
-
Registration period is between Monday (00:00) and Wednesday (23:59).
- Note: This is the official registration period that can be made ONLY via NPC from Valley.
-
Sign of Lord period is between Thursday (00:00) and Friday (23:59).
-
In order for an alliance to register Sign of Lord it must meet the following requirements:
- Have at least 15 members in main guild.
-
Have the Average Reset of main guild >= 65% of TOP1 Player level (rounded down).
- Example: If TOP1 Player has 10 resets, the minimum Average Reset of the Main Guild must be 6.
-
Note: Kindly reminder of WebZen System for deciding the 3 attackers from CS:
- Registration Ranking = (Sign of Lord registered * 5) + Number of Guild Members + (Level of Guild Master / 4).
- Note2: Sign of Lord can be farmed on any mobs over level 40.
-
In order for an alliance to register Sign of Lord it must meet the following requirements:
-
Late registration period is between Saturday (00:00) and Saturday (23:59).
- Note: Late registration can only be made on Website by the GM of the alliance.
-
Note2: Guilds that use late registration can't register signs of lord.
- Friendly Fire is active (25% of damage goes to allies also).
-
There is a maximum value of VIT that can be used at CS, depending on stage of the Game.
-
Current Value: 5000 (10000 for Stage 2 and 15000 for Stage 3).
- Exception: VRF.
-
Current Value: 5000 (10000 for Stage 2 and 15000 for Stage 3).
-
After registering the crown, defensive team must go outside of the room and re-enter it
- Note: By doing this you won't have to press CTRL in order to attack.
-
Crown is with accumulated time.
- You won't lose any accumulated time if GM dies or stays outside of room.
-
Every FAIL of accumulating the crown will cost you -2 seconds from the accumulated time.
- Example: You lose a switch, you miss-click again on the crown, etc.
-
Crown switches are not in the center of square so they are harder to be kept.
-
We've introduced a new concept - CS Builds:
- All CS participants can make a free rebuild during each CS (anytime during CS, but you can't stay in Valley without doing the rebuild).
- This means that you can play any build of your character, depending on your guild strategy and what is needed at that CS.
- This also means that Tanks are no longer part of normal gameplay - anyone can play Tank for the Castle Siege, GM's are no longer doomed to make a character only for 2 hours per week of fun, as well as the stampers.
- These builds aren't kept, so at the end of CS you will get back to your previous build.
-
With this change we're aiming to "fix" multiple things:
- Encourage new guilds to participate at CS without the need to depend on random players to sacrifice their gameplay for TANK in order to have any chance at CS.
- Encourage PvM players to take part into CS despite their build being PvM for the rest of the time, increasing number of CS participants.
- Bring a layer of "freshness" on each CS, as strategies can be changed/adjusted after each CS, nothing being "meta" for too long.
-
In order to participate at CS you need to be in the registered alliance and to also write /rebuild before entering in Valley.
- Note: You can write /rebuild anytime starting from 16:45.
- Note2: You have unlimited amount of rebuilds until 17:00, then you can't rebuild anymore.
PRE-Fight Gameplay & Requirements
-
In order to access the CS battle (stay in valley), you need to meet the following requirements:
- Be selected as CS participant (after Signs period).
- Have at least 15 members in main guild.
-
Have the Average Reset of main guild >= 65% of TOP1 Player level (rounded down).
- Example: If TOP1 Player has 10 resets, the minimum Average Reset of the Main Guild must be 6.
- Have at least 10 players from main guild online in either Crywolf or Valley.
-
Have /rebuild already made.
- If any of this requirements fails, you will be moved out from valley when you try to enter during CS.
- Checks are happening every 60 seconds (and you are noticed how many seconds left before next check).
- These requirements will (automatically) make it much harder for people to do "ghost" strategies, but still doable.
-
Alliance GM CS players control:
- There are 2 modes of the limit at CS, that each alliance GM can decide:
-
Free Mode - it is the default mode - this means that any 25 players can be online on CS server anytime, during CS, without restrictions.
- How does it work? When the 40th player enters the Valley, any extra player (41th, for example) will be moved to Crywolf, when trying to enter the Valley.
-
When there are 24 players in Valley, an empty slot is once again free for another extra player, and so on.
- Note: The priority for staying in Valley when there are more than 25 players is based on the order of /rebuilds.
- Example: ADMIN is 1st that did rebuild, Gion is 2nd that did rebuild, Marcel is 3rd that did rebuild. If there are < 25 players on Valley, all 3 can stay in Valley. If there are 25 players already in Valley and ADMIN is not but Marcel is, if ADMIN joins Valley then Marcel is being kicked from Valley and ADMIN can stay.
-
Limited Mode - this means that there's a list controlled by alliance GM with the players who do not have access to CS (any player other than the players from this list can join the CS). GM can add/remove players to/from the list anytime before 15 minutes from start & during CS.
- Note: GM can use the command /blacklist PlayerName in order to blacklist a player from the CS.
- Note2: GM can use the command /delblacklist PlayerName in order to remove a player from blacklist.
-
Note3: Few seconds after blacklisting a player, if he is online in valley he will be moved to crywolf and prevented from joining Valley.
-
Before the fight actually starts, there are 2 Strategies that participants can profit from:
-
Attackers Advantage
- During Sign of Lord period, attackers that are registered at CS must register as many Sign of Lord as possible.
- The team with the highest number of sign of lord registered at the end of Sign period will win the Sign fight, having the opportunity to BAN a BUILD for the incoming CS.
- This means that the banned build can't be used by all participants.
-
Any build from the banned list can be banned including VDL/VBK, depending on everyone's strategy.
- Note: You need to register at least 300 Signs in order to be able to BAN a build, not only being first.
-
Builds that can be banned (banned list):
- ESM, ABK, VBK, EE, AE, SMG, SDL, VDL, ERF, VRF.
-
If a build is banned, characters from that class can't have more than 20% of total points in that stat.
- Example: If EE build is banned, an ELF with 10000 total points can't have more than 2000 ENE at that CS.
- Command for banning a build: /banbuild Build.
-
Period for Build Ban is between Saturday 00:00 and Sunday 16:00.
-
Note: If the highest sign guild doesn't ban a build between this period, no build will be banned for the CS.
-
Note: If the highest sign guild doesn't ban a build between this period, no build will be banned for the CS.
-
Defenders Advantage
- Defenders can repair gates & statues anytime before the next CS.
- In order to repair them you need to invest JoGs and Zen.
-
By repairing the gates & statues you open up 2 advantages:
- 1. You can also defend them during CS to earn extra time, making life harder for attackers to get into room.
-
2. You can reduce your Handicap* points based on the total repairs/upgrades of your gates/statues:
- 4 points for each 1kk HP that you have on gates/statues when CS starts (maximum ~51kk HP).
- 8 points for each Defence upgrade on gates/statues (maximum 30 upgrades).
-
15 points for each Recovery upgrade on statues (maximum 12 upgrades).
-
Formula for points reduction is (Points from HP + Points from Defence + Points from Recovery) * Handicap level (1, 2, 3)
-
Note: Maximum points that can be reduced is 20% of total Handicap points.
- Example: If you are on Easy Handicap (2500 points) you can reduce maximum 500 points from those 2500.
-
Note: Maximum points that can be reduced is 20% of total Handicap points.
-
Formula for points reduction is (Points from HP + Points from Defence + Points from Recovery) * Handicap level (1, 2, 3)
-
Attackers Advantage
New Objectives & Net Worth
-
CS Statues
- There are now 2 statues, one is on the East side outside the room (104x 192y) and one is on the West side outside of the room (77x 145y).
- These Statues are now extra mini-objectives during CS.
- They can be controlled by one alliance at a time.
- In order to control a Statue your alliance must have AT LEAST 2 players in its 5x5 range (the statue zones are marked with 4 guards).
- In order to control a Statue your alliance must have the highest number of players (compared to rest of the alliances) in its 5x5 range.
-
Examples:
- If OldSquad does have 1 player in the 5x5 range of a Statue, and no other Alliance does have any player in the range, then the Statue is in a neutral state (not controlled).
- If OldSquad does have 2 players in the 5x5 range of a Statue, and no other Alliance does, then the Statue is controlled by OldSquad.
- If OldSquad does have 2 players in the 5x5 range of a Statue, and other Alliance does have 1 player in the range, then the Statue is controlled by OldSquad.
- If OldSquad does have 2 players in the 5x5 range of a Statue, and other Alliance does have 2 players in the range, then Statue is controlled by the Alliance that already controlled it.
- If OldSquad does have 2 players in the 5x5 range of a Statue, and other Alliance does have 3 players in the range, then Statue is controlled by the other Alliance.
-
East Statue advantage:
- While holding the East Statue, your alliance will gain +100% (in the first CS hour) / +50% (in the second CS hour) Defense points per second, until the alliance lose the control of the Statue.
-
West Statue advantage:
- While holding the West Statue, your alliance will gain +50% (while a Kill Points modifier is still active) / +100% (while a Kill Points modifier is not active) Kill Points based on the final number of points a killer would normally get.
-
If your alliance holds both statues then the following buff will be up for your alliance until you lose at least 1 Statue:
- GM will gain damage immunity, preventing him from being damaged, while the buff is active.
-
Note: The immunity buff for GM when holding both statues does make him immune from being moved as well.
-
Gigas Golem
- Every 12 minutes after it is killed or it is despawned (starting at 17:30) a Gigas Golem will spawn at 125x 125y on Valley (maximum right side after 1st set of Gates).
- Gigas Golem has 4 minutes duration, then it is auto despawned.
- The Gigas Golem is another mini-objective, but a timed one.
-
The alliance that does the last-hit on the Gigas Golem will put one of the following curses (randomly) on their opponents:
- Points Curse - Stop the points gained from all sources for 3 minutes.
-
Stun Curse - Stun every opponent for 5 seconds every 45 seconds, for 3 minutes.
-
Net Worth
- Net Worth is an accumulation of every CS player activity & performance during each CS.
-
Formula for Net Worth calculation:
-
(Total Kill Points - (Total Feed Points * 0.7)) + Stamp Seconds + Activity Time where:
- Total Kill Points = The amount of Points you personally contributed for you Team.
- Total Feed Points = The amount of Points you gave away to other teams while being killed.
- Stamp Seconds = The amount of seconds you held a Switch.
-
Activity Time = 0.15 Points for every second while a CS Participant is online in Valley during CS.
- This value is raised to 0.4 Points per second if the Player is inside CS room or in 5x5 range of the Statues.
-
Example of Net Worth:
- ADMIN has 1400 Total Kill Points, 420 Total Feed Points, 200 Stamp Seconds, 60 minutes in valley during CS & 50 minutes inside CS room / statues.
- ADMIN's Net Worth is: 1400 - (420*0.7) + 200 + 60*60*0.15 + 50*60*0.4 = 3046.
- Note: Stamp Seconds are updated 1 time per minute.
-
(Total Kill Points - (Total Feed Points * 0.7)) + Stamp Seconds + Activity Time where:
CS Gameplay
- The CS Gameplay is not the usual one (the team that has Defender status at the end of CS does win it), our gameplay is based on Points, so the team with the highest amount of Points at the end of CS does win it (no matter if they are Defenders or not at the end).
-
How to earn Points:
- After first 9:30 minutes of CS the system is initiated & Points can be gathered.
-
Any team that has Defender status during CS will earn Points. Default DEF Points values:
- 1 Point per second between 17:09:30 and 17:34.
- 2 Points per second between 17:35 and 17:59.
- 3 Points per second between 18:00 and 18:24.
- 4 Points per second between 18:25 and 18:44.
- 6 Points per second between 18:45 and 19:00.
-
If Defenders GM is out of room his team will only get half of DEF points per second as long as he is out of room.
- Example: If current DEF points is 3 per second, if GM is outside of room the team will only get 1.5 points per second.
-
If Defenders GM is out of room, but in 5x5 range of the East Statue (DEF Points statue) then his team will get all the DEF Points they would normally get if GM was inside the CS room (no matter who controls the Statue).
-
Apart from DEF Points, teams can also gain points by killing opponents in the Throne Room or in 8x8 range of the West & East Statues:
-
The default kill points value is 8 Points per kill.
-
Killing players in statues range will only give 50% of points that are normally given in Throne Room.
- Example: If a Kill inside the Throne Room would net you 24 points, the same kill in the statues 8x8 range will net you 12 points.
-
Normal kills formula is DefaultValue+-(ResetDifference*1) between targets.
- Minimum value is 5 points in Throne Room / 3 points in Statues range, no matter the type of kill or bonuses.
- There is no maximum value of Points.
- Note: This means that if killer is higher in resets than the target killed, the points will go down with 1 point for each reset difference.
- Note2: If target is higher than killer the, the points will go up with 1 point for each reset difference.
-
The reset difference formulas will always apply before any modifier, in the case of normal kills.
-
Example: If ADMIN kills Gion and ADMIN has 10rr and Gion has 7rr, while Kill Points are 8 then ADMIN gets 8-(1*3) = 5 Points.
- If ADMIN's alliance does control the West Statue then ADMIN gets +50%/100% * 5 Points = 7.25/10 Points on the same kill. If the kill is being made in Statue's range then ADMIN gets 3/4.5 Points.
-
Example: If ADMIN kills Gion and ADMIN has 10rr and Gion has 7rr, while Kill Points are 8 then ADMIN gets 8-(1*3) = 5 Points.
- GM points is 4x default kill points (can't be lowered with ResetDifference).
-
TANK points is 2.5x default kill points (can't be lowered with ResetDifference).
- Note: TANK is considered ANY character (except of RF and ELF) that has AGI+VIT higher than 65% of Total Points.
-
Apart from reset difference & special roles, we also have extra points gained per kill based on the current total points of the target:
- You gain an extra 10% (inside CS room) / 5% (in Statues range) of the target total points per kill.
-
The extra points are going directly towards your Alliance and are not counted to your own points/performance, as well as not counted for the target feed points.
-
Example: If ADMIN kills Gion inside CS room and Gion has 1000 kill points, then:
- ADMIN gets the normal points it would get based on bonuses.
- Gion gets feed points equal to the points ADMIN did get.
- ADMIN's alliance gets a bonus 100 points for the kill.
-
Example: If ADMIN kills Gion inside CS room and Gion has 1000 kill points, then:
-
Killing players in statues range will only give 50% of points that are normally given in Throne Room.
-
Default kill points will be raised randomly during CS time (it will announce when it changes).
- This anomaly can happen only between 17:30 and 18:30.
- There will be minimum 2 changes and maximum 4 changes during this hour.
- First change will happen at 17:30.
- Duration of a change is between 10 minutes and 20 minutes but at 18:30 points will get to normal no matter how much time left from last change.
- The value of points will always be between 10 and 18 during change.
- It will be announced to participants when Kill Points are updated.
- IMPORTANT! If you kill a player from your own Guild inside Crown room your team will lose full Points for the kill (based on Normal/Tank/GM/Special role type).
- IMPORTANT! If you disconnect / select server / switch character inside Crown room your team will lose 2.5x Points equal of being killed (based on Normal/Tank/GM/Specail role type).
-
The default kill points value is 8 Points per kill.
- Important note about kill points: Only guilds that have at least 300 points gathered can "feed" points to other participants. If your team doesn't have 300 points yet you won't give any points to your killers, but you can get points by killing them if they have over 300 points.
-
The points earned / bonuses, etc. are not rounded up / down. They are given as float values unless it is specified that something is rounded up/down (for example, avg. reset requirement for CS).
-
The final Points / Scores / etc. are counted as integers.
- Example: If DEF points are 3 per second and you get + 50% DEF Points with the statue, then you'll get 4.5 Points instead of 4 or 5 Points.
- Example2: If you get 25% more points as a BM and you kill a target that would give you 11 points, you'll get 13.75 Points instead of 13 points or 14 points.
-
Example3: If your alliance total points is 5563.60, you'll actually have 5563 Points. If your final NetWorth is 1120.7, then your NetWorth is 1120.
-
The final Points / Scores / etc. are counted as integers.
-
We also have special roles at CS, GAs & BMs, that have special roles during CS:
-
Guild Assistants are able to use /assist in 3 different ways:
- /assist -> Will teleport the assistant to the GM.
- /assist east -> Will teleport the assistant to the East Statue, if the guild is currently controlling the East Statue.
-
/assist west -> Will teleport the assistant to the West Statue, if the guild is currently controlling the West Statue.
- Cooldown for the command is 90 seconds.
-
Battle Masters gain + 25% points per kill for any normal target kill (that does not have any special role).
-
Apart from that, they have access to AoE stun skill (Stern).
-
Stern will stun players in AoE for 7 seconds.
- Extra effect: Players under stun can't use potions.
- Stern does require 8 kills (per use) in order to be used.
-
Stern will stun players in AoE for 7 seconds.
-
Apart from that, they have access to AoE stun skill (Stern).
- GAs will feed 1.5x normal points when they are killed (if they are not tanks, else they feed 2.5x).
- BMs will feed 2x normal points when they are killed (if they are not tanks, else they give 2.5x).
- Note: Both GA & BMs are set in the moment when CS preparation starts (16:45), any further change during CS won't change the effects to other players. So make sure to set them / update them before 16:45!
-
Note2: Only GA & BMs from main guild have special roles!
-
Guild Assistants are able to use /assist in 3 different ways:
-
In order to help the lowest Points teams from each CS, we've introduced a new feature:
-
Every Alliance GM that is part of CS will get a Life Stone every 15 minutes (starting at 17:30) as long as his Alliance isn't currently having the most points at CS.
- Note: The previous, unused Life Stones will be deleted when a new one is generated.
- Note2: If Alliance GM does switch / reconnect / leave CS server, the Life Stone is deleted.
- Note3: The Life Stone is gained only if the GM is online and on Valley at the moment when Life Stones are delivered.
- Life Stone can be used by dropping it on the ground.
- After dropping it, it will take 1 minute for it to become "active".
- While a life stone is active, people that die from that guild will respawn from the place where the Life Stone is placed.
- Life stone can be destroyed by opponents (before the activation minute as well).
-
Life Stones have the maximum possible Defense but a HP of 140k.
-
Note: This means that no matter how many stats a character does have, it will do similar damage to Life Stones (50-300) so in order to kill them faster you need more people attacking them (no matter their total stats).
-
Note: This means that no matter how many stats a character does have, it will do similar damage to Life Stones (50-300) so in order to kill them faster you need more people attacking them (no matter their total stats).
-
Every Alliance GM that is part of CS will get a Life Stone every 15 minutes (starting at 17:30) as long as his Alliance isn't currently having the most points at CS.
-
We also want to reduce the time spent as CS winners for the same alliances, so the Handicap System* was introduced:
- After each CS win, the winners will get a handicap for the upcoming CS.
-
There are 3 Handicap levels as following:
- Easy - 2nd CS after winning the CS: The team starts with -2500 points.
- Medium - 3rd CS after winning 2 CS in a row: The team starts with -6000 points.
-
Hard - 4th CS after winning 3 CS in a row and onwards: The team starts with -10000 points.
-
Score Command
-
CS Participants can type /score during CS. It will show the following info:
-
On global (middle screen):
- Alliances score as usually + Players in valley for each alliance.
- Current DEF Points / Kill points as usually.
- Time left for the next Gigas golem spawn / ALIVE status.
- West Statue & East Statue controllers (if any).
-
On system chat (top left side):
- Your current Kills, Deaths, Kill Points, Feed Points, Net Worth.
- The current Banned Build.
-
On global (middle screen):
-
CS Participants can also type /score +Name of a CS player and it will show the same info of the player that /score would show for you.
-
CS Participants can type /score during CS. It will show the following info:
-
Winners Restrictions
-
After winning a Castle Siege, the players that were part of the CS (used /rebuild) and part of the winning alliance can only join the next CS with their winning Alliance.
- Example: ADMIN is part of OldSquad, went to CS last CS with his guild and was part of CS. OldSquad won the CS. ADMIN can only join next week's CS with OldSquad guild.
- Example2: OldSquad is in alliance with ADMINS, ADMIN is part of OldSquad and Gion is part of ADMINS. OldSquad alliance wins the CS. Next week both ADMIN & Gion can join CS only with OldSquad alliance (as main alliance guild).
- Note: This is made to avoid cases of winning Guilds remaking their guild / join another guild for CS just to get rid of Handicaps.
-
After winning a Castle Siege, the players that were part of the CS (used /rebuild) and part of the winning alliance can only join the next CS with their winning Alliance.
- Extra restriction: You can play the CS only with the guild/alliance that you started with when you did /rebuild. You can't join other guilds/alliances during CS.
CS Rewards
-
For Winners:
-
Discordian Apple
- You gain access to a single spot in LoT where a party can safely EXP.
- The spot has mobs with the same level of Relics.
- The spot has +15% exp (3% higher than relics as gens map and same exp rate as a seal level 3 mercenary).
- The mobs from spot have -20% power in terms of HP & DMG compared to Relics.
- The spot has normal item drops for the monsters level, no special extra drops.
- LOT minimum level to enter is 250.
-
Test of Humility
- There are 7 mobs that spawn across the LoT (Queen Bees).
- They have a respawn time of 2 minutes.
- They will drop 100% a Jewel of Guardian that can be used to upgrade Gates & Statues.
- You also have access to Senior that can upgrade statues & gates as well as setting up taxes for chaos machine, that will go to Senior budget which can be retrieved by the GM.
- You get 4% of Zen from Market transactions, into Senior, that can be retrieved and used by the alliance.
- Note: There's no "Senior Mix", the NPC can be used only for upgrades & zen.
-
Test of Mobilization
- There is a Erohim that spawns 1 time per day, randomly between 19:00 and 22:59.
- It stays only 20 minutes alive.
- It will drop 1x random ancient item for each player (from main CS guild) that is in his range when he does die.
- Maximum of 10 ancient items can be dropped even if there are more than 10 players.
-
Test of Collaboration
- Instead of Lord Mix, the winners will get 7x Guild Master boxes at the end of CS.
- Guild Master Box can be traded, and based on which character is dropping it, it will drop 1x 380 exc. item (DK, VM, etc. based on the class, +10~11 with chance for luck and 3 options). 380 Weapons included.
-
Note: This Guild Master box is 'forcing' GM's to make choices based on CS performances of their players, so they can choose who to receive what directly, instead of pure luck with 5x elf items in a row wasting jewels and etc.
-
Example: If a BK will drop the Game Master box, he will receive DK item, DL will receive Sunlight item, etc..
-
Example: If a BK will drop the Game Master box, he will receive DK item, DL will receive Sunlight item, etc..
-
GLORY!
-
Discordian Apple
-
For Losing Side:
-
1x Guild Master Box for every 2500 points they made at CS.
- Note: The boxes goes to GMs if they are online on CS server at the end of CS.
-
Maximum of 4 GM Boxes can be earned by each losing team, no matter their points.
-
1x Guild Master Box for every 2500 points they made at CS.
-
For Any Participant:
-
Every Guild Master that has a guild with over 6000 points gathered at the CS will win 7x VIP Days.
- Note: VIP is automatically added at the end of CS if the GM is online, either extension to current one or a new last VIP level.
-
Individual Net Worth Reward
-
There's an individual reward based on Net Worth for any CS Player:
- Minimum Points that your alliance must have gained at CS in order for the players to be eligible for individual rewards: 1500 Points.
- Minimum Net Worth to be eligible for individual reward: 1000.
- Current Default Reward: 10% chance for 1x Old Box / 90% chance for 10b/10s/10c/10life.
- The Net Worth will dictate the % chance for getting the Old Box as reward, as following:
-
(NetWorth/100)% = Old Box chance.
-
Examples:
- Having 1000 NetWorth = 10% chance for Old Box.
- Having 1200 NetWorth = 12% chance for Old Box.
- Having 2450 NetWorth = 24.5% chance for Old Box.
-
Having 5500 NetWorth = 55% chance for Old Box.
- The rest of the chance is for guaranteed the 10x Jewels.
-
Old Box Type based on Stages:
-
Before Stage 2 is over:
- Old Box 2.
-
After Stage 2 is over and until Stage 2.1 is over:
- Old Box 3.
-
After Stage 2.1 is over until Stage 3 is over:
- Old Box 4.
-
After Stage 3 is over:
- Old Box 5.
-
Before Stage 2 is over:
-
Examples:
- Bonus Reward: Players with 3000+ Net Worth will also win 2x VIP Days.
- Note: Net Worth reward is given only to players that are ONLINE on CS server when CS does end!
-
There's an individual reward based on Net Worth for any CS Player:
-
Every Guild Master that has a guild with over 6000 points gathered at the CS will win 7x VIP Days.
Rewards progression:
CS [1]: Discordian Apple + Test of Humility for winners + Net Worth rewards & GMs Reward.
CS [2]: Test of Mobilization for winners.
CS [3]: Test of Collaboration for winners & Losers GMB rewards.
Note: Until Stage 2 is over, 380 weapons from GMB are disabled.LOT Permissions
- Players can no longer enter LoT via the NPC at the entrance.
- In order to enter LoT you need to have permission from the GM that owns the Castle.
- Any player (with or without guild) can join LoT as long as he have permission.
- In order to grant permission to someone, the GM must write /grant CharName 1.
- In order to remove permission, the GM must write /grant CharName 0.
- In order for the granted player to enter LoT, he must go in the NPC zone (near LoT entrance) and write /lot.
-
GM can give LoT access without the need of characters to be online/same server, only to exist.
- Note: It doesn't matter how you write the name in terms of upper and lower cases, just to be correct.
- Exception: GM doesn't need permission to use /lot.
-
When you remove permission in LoT from a player, if he is in LoT he will be moved outside of LoT.
- Note: Permission can be removed only if GM is on CS server (crywolf/valley/etc.)
Extra Info
- Teleport of SM is disabled near Switch Crowns (5x5 space).
- Mana Shield, Sweal, Reflect, Fitness, DSR buff, etc. have a standard duration of 90 seconds (ONLY on CS server).
- EE buffs have a standard duration of 120 seconds.
- Both Attackers & Defenders can spawn after dying anywhere before the first gates of CS & before the second gates of CS (60x - 95y -> 130x - 150y).
- DL with Dark Horse can't be moved while registering the Crown.
- Summon has 80 seconds cooldown.
- ERF can have a maximum of 5000 energy.
-
Summoner Sleep at CS works differently:
- Sleep hit chance on CS server is 80%.
-
Players that are under Sleep effect on CS server can't be damaged.
- The immunity gained by a player under Sleep effect does make him immune from being moved as well.
-
Sleep duration on CS server:
- Under 12000 ENERGY => Sleep is blocked.
- 12000 - 24000 ENERGY => Sleep duration is 2 seconds.
- 24000 ENERGY+ => Sleep duration is 3 seconds.
- Maximum accounts online per IP on CS server is 1 (not 2).
- You can't move from CS Crown room (using M).
- You can't trade / drop items inside CS Crown room.
Arena Tournament V3 - Most Complex PvP Event
-
General Info
- Arena Tournament features 7 different rounds, each round taking place 1 time per week, at 19:45 Server Time.
- There are 2 different Event Types: Team-KotH - Kings of the Hill & LL - Last Laugh.
- Team-KotH have 2 different Specials, more info below.
- In order to register to Arena Tournament you must type /joinarena when the event is popping (and before it gets closed).
- You need to have at least level 200 to join the event.
- After the event is closed, it will start in 1 minute.
- You can't attack other players before the event does start.
- Maximum 60 players (Team-KotH) / 42 players (LL).
- Minimum 16 players (Team-KotH) / 10 players (LL) in order for the event to start.
- Maximum duration is 20 minutes for Team-KotH. No maximum duration for LL.
- Teleport (SM) & Ice Arrow (AE) can be used only during the Team-KotH rounds and also during Last Laugh - Round 2 (KotH round).
- After every death, you are immune to magic damage for 7 seconds (after you respawn).
- You can't join while being in a party.
- If you join a party anytime during the event both chars will be stunned while they are in party and for 15 seconds after they leave it.
- You can't join the event with antidotes / sd pots.
- Any consumables buff (bless/soul pots, doppel scrolls, halloween, etc.) are deleted every second during the tournament.
- You get a full clear off existing buffs when you enter the tournament.
- You can't have other buffs outside of your own class buffs during the tournament.
- You can't move items (for example from store) during the tournament.
- You can't trade items during the tournament.
- You are Muted during the tournament.
- You can't drop items during the tournament.
- You can't move to other maps during the tournament.
- You get PK Stage 2 during the tournament (to use only right click to attack, without CTRL).
-
At the end of the tournament you get back to your previous pk level / pk kills / pk timer.
-
Info about Team-KotH (Kings of the Hill)
-
The schedule for Kings of the Hill is the following:
- Monday - Team-KotH Special 1.
- Tuesday - Team-KotH Special 1.
- Wednesday - Team-KotH Special 2.
- Thursday - Team-KotH Special 1.
- Friday - Team-KotH Special 1.
- Saturday - Team-KotH Special 2.
-
How does this new game-mode works?
- Well, on every round, we randomly split the registered players from the Event in teams (each team having its own visual skin).
-
Based on total players of an event, we start with 4 randomly made teams (5v5v5v5,6v6v6v6, etc. up to 15v15v15v15).
- In case there are uneven numbers, we can have like 5v6v6v5, and so on.
-
Every 4 minutes, one team is eliminated, and the rest of players are split again in new teams.
- Example: Round 1 is starting with 4 teams. After 4 minutes, the team with least Points is eliminated. Remaining players are randomly split again in 3 new teams, and so on, until 1 team remains alive.
- After each team elimination, teams points are reset to 0. Players keep their own personal points, though.
- You're earning 10 points for your team whenever you kill a player from another team.
- The 2nd time you kill the same character (in the same teams-round) you will earn 8 points, 3rd time 6 points, and so on until you'll get only 2 points for killing the same character (and the value will stay at 2 points, no longer decreasing).
-
You're losing 2 + 5% of your current personal points per death (but your team is not losing anything).
- Example: If you make 100 points Round 1 and 80 points Round 2, in Round 3 you're losing 2 + 0.05*180 = -11 points per death.
- At the end of the event your personal score will reflect the score with the kills + deaths.
- You can't attack players from your own team.
-
After 3 rounds of Team-KotH, all players from the team left alive does enter the LMS round (last round):
- In this round, everyone plays for himself (FFA). The winners of the Arena Tournament are the last to remain alive.
- Everyone starts with 4 lives. Killing a player does remove 1 life from him.
- For every 3 lives taken you gain an extra life.
- If you reach 0 lives, you are eliminated.
-
You can also take only x lives from the same player as following:
- If there are >= 12 players remaining in the LMS round, you can only take 1 life from the same player.
- If there are 9-11 players remaining in the LMS round, you can only take 2 lives from the same player.
- If there are 6-8 players remaining in the LMS round, you can only take 3 lives from the same player.
- If there are <= 5 players remaining in the LMS round, there is no restriction.
-
Amount of winners per Event are also based on the number of players that started the LMS round:
- Starting players <= 5 => maximum 2 winners.
- Starting players = 6 or 7 => maximum 3 winners.
- Starting players = 8 or 9 => maximum 4 winners.
- Starting players = 10 or 11 => maximum 5 winners.
- Starting players > 11 => maximum 6 winners.
-
If the event isn't over before its maximum duration, then the remaining players will be selected as winners based on their total points contribution during Team-KotH stage.
- In case of a tie, the order is decided based on Lives Taken during the LMS round.
- Note: Winners can't join other tournaments from the week, outside of the Last Laugh (that is available only for weekly winners).
- Note2: Due to the nature of Team-KotH, disconnecting during the event / leaving the event after it already started will ban you from Arena Tournament for 3 days. This is only for disconnecting during Team-KotH rounds (Last Laugh / LMS rounds are excluded).
- Note3: There is an AFK-check during the KotH rounds, if the AFK check is triggered, the player will be disconnected (and banned for 3 days from AT, as in the disconnect case).
-
Specials:
-
1 - Normal -> Everyone plays with the characters as they are.
-
Note: In order to join any of the Arena Tournament - Special 1 events (Normal), your character must have at least 50% Resets (rounded down) of the TOP1 character.
- Example: If TOP1 character has 15 resets, only characters over 7 resets can join Arena Tournament.
-
Note: In order to join any of the Arena Tournament - Special 1 events (Normal), your character must have at least 50% Resets (rounded down) of the TOP1 character.
-
2 - Free STATS -> Everyone receives the same level and the same amount of stats, based on a randomly picked level stats (for everyone) and their class.
- Note: The randomly picked level stats can be between 2 resets and 20 resets.
- Note2: Everyone is set to level 200.
-
Note3: Special 2 is free for all (doesn't matter your character level, as long as it is over 220).
-
1 - Normal -> Everyone plays with the characters as they are.
-
The schedule for Kings of the Hill is the following:
-
Info about LL (Last Laugh)
- Last Laugh is the final Tournament, where the prizes from the current week are also given.
- Last Laugh is held on Sunday.
- Only winners of Team-KotH from that week can join the Last Laugh.
-
TOP10 Points (personal score farmed during Team-KotH rounds) that didn't win any of the daily tournaments are qualified for Last Laugh, as extra slots.
- Which means do your best during the week and during all Team-KotH rounds because even if you don't win any of the daily rounds, you can still qualify for Last Laugh!
-
If you have lower reset than the highest reset player from the LL, you will receive extra stat points to add for the tournament based on the difference of resets between you and highest reset player, and also based on your class.
The points are added when the Arena is closed, so you have 1 minute to use them. - Everyone is set to level 200 during LL.
- There is no settled duration for the LL but there are 3 rounds:
-
Round1: LMS Round
- During this round you need to eliminate players while surviving.
-
The round is over when there are X amount of players left in the Tournament, as following:
- If there >= 36 participants, Round1 is over when there are 26 players left.
- If there >= 30 participants, Round1 is over when there are 20 players left.
- If there >= 26 participants, Round1 is over when there are 18 players left.
- If there >= 22 participants, Round1 is over when there are 16 players left.
- If there >= 18 participants, Round1 is over when there are 14 players left.
- If there >= 14 participants, Round1 is over when there are 12 players left.
- If there >= 12 participants, Round1 is over when there are 10 players left.
- If there >= 10 participants, Round1 is over when there are 9 players left.
- Everyone starts with 6 lives. Killing a player does remove 1 life from him.
- For every 4 lives taken you gain an extra life.
- If you reach 0 lives, you are eliminated.
-
You can also take only x lives from the same player as following:
- If there are >= 26 players remaining in the LMS round, you can only take 1 life from the same player.
- If there are < 26 players remaining in the LMS round, you can only take 2 lives from the same player.
-
Round2: KotH Round
- During this round you need to farm as many Points as possible within 10 minutes.
- You're earning 10 points whenever you kill a player.
- The 2nd time you kill the same character you will earn 9 points, 3rd time 8 points, and so on until you'll get only 2 points for killing the same character (and the value will stay at 2 points, no longer decreasing).
-
You're losing 2 + 8% of your current points for each of your deaths.
- Example: If you have 120 points, if you die you lose 2 + 10 (8% of 120, rounded) = 12 points.
-
After 10 minutes, TOP8 characters with most Points will be qualified for the last round (3), the rest of players being eliminated.
- In case of a tie the order is based on Lives Taken.
-
Round3: Last Laugh - Final Round
-
A virtual bracket will be generated for the 8 players left, it will be based on the Points gathered during round 2 as following:
- TOP1 points will play vs TOP8 points.
- TOP3 points will play vs TOP6 points.
- TOP4 points will play vs TOP5 points.
- TOP2 points will play vs TOP7 points.
-
Then each character will be moved to a different Arena cage where the matches are being played.
- In cages you are playing 1v1 with your opponent.
- Both chars start as "chained" and the game is starting in 5 seconds.
- The first character to kill the other for 2 times will advance in the bracket (Best of 3).
- You do receive a clear of all buffs/effects after a kill and you start from different corners again.
- SD is not restored during the match.
- After winning a match you advance in bracket and either wait or face your next opponent from Winner bracket.
- After winning/losing a game you will be redirected to a new cage.
- After each finished game, if your SD is not full, you will receive a Complex Potion that you can use ONLY before the start of the next game, to restore your SD to full. You need to be fast!
- Players that lose in the Winner bracket are being sent into Loser bracket where they face other bracket losers.
- Games on Loser bracket are the same as on Winner bracket (Best out of 3).
- If you lose a game on Loser bracket you are eliminated from the Tournament, if you win you advance in the Loser bracket up until Grand Finals.
-
Grand Finals are BO5 (Best out of 5).
-
A virtual bracket will be generated for the 8 players left, it will be based on the Points gathered during round 2 as following:
-
Rewards System
-
There are 3 types of rewards that Arena Tournament is offering:
-
Participation reward
-
Everyone that does participate at an Arena Tournament event (except of Last Laugh round) will receive a Gladiator's Pride buff.
- Note: Leaving the event or disconnecting during the event before it is over or before you are eliminated won't grant you the buff!
- Gladiator's Pride will increase the NORMAL bonus EXPERIENCE granted by the Perfect Party with +20%.
-
Gladiator's Pride will increase the MASTER bonus EXPERIENCE granted by the Perfect Party with +20%.
- Example: Your current Perfect Party does grant you +5% NORMAL EXP, if you get Gladiator's Pride, the buff is raised from +5% to +25%.
- Example2: Your current Perfect Party does grant you +7% MASTER EXP, if you get Gladiator's Pride, the buff is raised from +7% to +27%.
-
The duration for the Gladiator's Pride is based on your event performance and it does work in all places where you are in a Perfect Party:
- Duration: 2 hours if you are eliminated after 1st Team-KotH round.
- Duration: 2.5 hours if you are eliminated after 2nd Team-KotH round.
- Duration: 3 hours if you are eliminated after 3rd Team-KotH round.
- Duration: 4 hours if you are eliminated during 4th Team-KotH round (LMS round).
-
Note: Because winners from each day aren't able to participate to the rest of the Arenas from that week, being part of the winners of an Arena will grant you access to Gladiator's Pride buff every day starting from the day you've won the Arena up until the Saturday's Arena (included).
- This means that if you will be ONLINE on normal maps (Server 1) every day at the start of the Arena Tournament you will get 4 hours of Gladiator's Pride as if you were a participant in the last Team-KotH round.
- Note2: Not being online and on normal maps (Server 1) when Arena Tournament does start won't grant you the buff!
-
Everyone that does participate at an Arena Tournament event (except of Last Laugh round) will receive a Gladiator's Pride buff.
-
Weekly win reward
- The winners (and only the winners) from each Arena Tournament round will win access to the Sunday's round (Last Laugh).
- The Last Laugh does also have a separate guaranteed reward for the participants (as long as you just join the Event and you stay until it is over / you are eliminated).
-
Current Last Laugh guaranteed reward is: 5x Jewel of Harmony, 5x Jewel of Chaos, 30kk zen + 30% chance for Old Box 2~5 (based on game progress - including TOP3).
- Note: Leaving the event or disconnecting during the event before it is over or before you are eliminated won't grant you the guaranteed reward!
-
Old Box type based on Stages:
-
Before Stage 2 is over:
- Old Box 2.
-
After Stage 2 is over and until Stage 2.1 is over:
- Old Box 3.
-
After Stage 2.1 is over until Stage 3 is over:
- Old Box 4.
-
After Stage 3 is over:
- Old Box 5.
-
Before Stage 2 is over:
-
Last Laugh performance reward
-
Based on your performance at Last Laugh, the following rewards will be given:
-
Performance reward is 1x Jewel of Creation for every player eliminated before you & 1x Jewel of Harmony for every 2 players eliminated before you. You also get a 3% increase for your Old Box chance for each player eliminated before you.
- Example: 20 players at LL - 10th place gets 10x Jewel of Creation, 5x Jewel of Harmony & 60% chance for Old Box as performance reward.
-
TOP3 extra rewards:
-
Winner of Last Laugh: 1x Golden Fenrir with 5 days duration, 1x HoF + Legends Group (forum) + 3x Piece of Horn + 1x Old Box 2~5 (based on game progress).
- Note: The Legends Group is active only for the duration of the edition, not permanent.
- Note2: Winning 3x Arenas during the edition will grant you permanent Legends Group.
- 2nd place of Last Laugh: 1x HoF + 2x Piece of Horn + 1x Old Box 2~5 (based on game progress).
- 3rd place of Last Laugh: 1x HoF + 1x Piece of Horn + 1x Old Box 2~5 (based on game progress).
-
Old Box type based on Stages:
-
Before Stage 2 is over:
- Old Box 2.
-
After Stage 2 is over and until Stage 2.1 is over:
- Old Box 3.
-
After Stage 2.1 is over until Stage 3 is over:
- Old Box 4.
-
After Stage 3 is over:
- Old Box 5.
-
Before Stage 2 is over:
-
Winner of Last Laugh: 1x Golden Fenrir with 5 days duration, 1x HoF + Legends Group (forum) + 3x Piece of Horn + 1x Old Box 2~5 (based on game progress).
-
Final example of Last Laugh winner full reward (with an example of 30 participants):
- 5x Jewel of Harmony (guaranteed reward) + 5x Jewel of Chaos (guaranteed reward) + 30kk Zen (guaranteed reward) + 1x Old Box (100% chance from guaranteed + performance reward) + 29x Jewel of Creation (performance reward) + 14x Jewel of Harmony (performance reward) +1x HoF (TOP3 reward) + 5 days Golden Fenrir + Legends Group (forum) + 3x Piece of Horn & 1x Old Box (TOP1 reward).
-
Performance reward is 1x Jewel of Creation for every player eliminated before you & 1x Jewel of Harmony for every 2 players eliminated before you. You also get a 3% increase for your Old Box chance for each player eliminated before you.
-
Based on your performance at Last Laugh, the following rewards will be given:
-
Note: Jewels that are part of rewards will go into Jewel Wallet in order to avoid "space problems".
- You still need to have space for the items outside of Jewels, in game.
-
If you leave / get disqualified / get disconnected from LL round you won't win anything.
-
Participation reward
-
There are 3 types of rewards that Arena Tournament is offering:
-
Arena Tournament Rankings
- Daily Winners - only winners from each day recorded.
- Daily Participants - Only non-winners (participants) recorded.
-
Last Laugh - Only Last Laugh participants recorded.
- Daily Winners & Daily Participants rankings are reset on every Sunday at 23:58.
- Last Laugh rankings are reset on every Sunday at 19:25.
- Which means during the week you can see the Last Laugh rankings from previous Sunday & the current winners / participants of the week.
Extra Info Topics:
Server RULES: Click Me
Info about CREDITS: Click Me
Everything about Characters Builds, Info & Buffs Formulas: Click Me
Test Server Commands: Click Me+ Many, many, many other things!
Let's bring MU Online to the next level! -
- Please provide screenshot or video of the hacking attempt.
- Please provide the character name of the suspicious player when posting.
Notes:
- Report without enough proof information such screenshot or a video will be closed.
- We allow only screenshots of the full chat log and the prints must be made in game, not in windows.
- The title of a complaint will be of the form [<violated rules>] - <Name Accused>. You will not post any "Sub-Title". Complaints that do not observe this pattern will not be taken into account and will be closed.
Example :
- [BL] - Name
- [Language] - Name
- [Cheating] - Name
etc ...
-
If what you are reporting is in another language than English, you must provide a full translation.
1 warning = 1 day Mute
2 warnings = 2 days Mute
3 warnings = 1 day Ban
Upload Screen Shot:
- Please upload photos on one of the sites mentioned above to not create any problem related to their display. You can also use one of the first two links that were generated.
-
Here will be posted all the warnings that players have.
RushPower - 1 warn - https://oldsquad.ro/forum/topic/2679-language-rushpower/
CyXou - 2 warns -Krass - 2 warns --->
Anarchist -----> 1 warn, https://oldsquad.ro/forum/topic/2928-language-anarchist/?tab=comments#comment-29002
-
-

OldSquadMU - NonReset Info
⇓
Why to choose US ?
- This is a REAL STABLE SERVER - In 1 year I don't know if there were more than 3-5 downtimes apart from updates.
- This is a REAL LONG TERM SERVER - Proved on both Max30RR & NonReset editions that lasted almost 1 year each.
- This is a REAL PLAY2WIN SERVER - I didn't really saw until now any top server that doesn't sell items (webshop) or have cashshop for 3x seals (like 400% exp), panda pets and other shits. And when I say PLAY2WIN, many top players can confirm if they spent more than first VIP donations to be on top - Credits are very easy to be farmed without donating anything but again, you must PLAY for that.
- This is a REAL PROFESSIONAL SERVER - Minimum level of bugs, configured in a Smart & Professional way with a lot of unique features.
- This is a REAL DEDICATED PROJECT - Yes, we aren't here for money, we are here to make a REAL COMMUNITY for this shitty game that eaten our childhood. We aren't opening and closing servers each month just for money, we aren't changing the name of servers just to "refresh" reputation. We are OldSquad. We are here to stay.
- This is one of the very few servers where the Administrator (in this case, me ) is actually supporting any player with any request in the fastest time possible (starting from instant to maximum 1 day - there are some exceptions when I am very busy or I am not home at all but meh).
- This is one of the very few servers where the Administrator (in this case, me) is actually listening to players suggestions/opinions and is fighting hard to touch anything (good) that players are coming with.
- This is the ONLY SERVER where you find an UNIQUE GAMEPLAY - apart from all the normal boring gameplays - that is constantly improving and adjusting to players needs.
- This is one of the very few servers that DOESN'T HAVE FAKE ONLINE players: If you check many top servers, they don't even show online players on rankings tab, neither entire top 100 players. This is because they are using artificially online count that is boosted into the website, and they don't show online players so people can't check if it's real or not. Almost all top servers are doing that just to attract players.
- Furthermore, this is one of the few servers that doesn't run OFF-ATTACK/OFF-STORES just to increase the player count with BOTS and also one of the few servers that have a limit of ACC/HWID (3).
Basic Info
- Season 6 Ep. 3 CUSTOM.
- Dynamic Low Exp [5-15x].
- Newbies boosts including exp boosts.
- Master EXP: Dynamic 3-5x
- 35% Drop.
- Party Exp System (Solo = 100%, 2 Players = 90%, 3 Players = 95%, 4 Players = 106%, 5 Players = 112%, Perfect Party = +3% exp).
- All events working with nice rewards.
- No alliances.
- Max 20 players in a guild for all classes.
- Maximum 2 guilds in alliance -> but only main guild can join the CS, 2nd guild only for alts/small friends, etc.
- Elf Soldier buff until level 300.
- Maximum of 2 accounts on same HWID.
- Shops for a low exp server.
- Maximum of 9 HP pots stack and 50 mana pots stack (for PvP and PvM experience).
- Create Guild at level 150.
- Create DL, MG, RF at level 200.
- Reconnect system fully working.
- No Web-Shop, no Cash-Shop, only VIP System (without VIP Server) & Web-Credits for Premium Modules.
- Helper from level 1.
- Max ADD on Items: 28.
Gameplay Info
OldSquad is going to offer you a nice & unique experience with build-base, very interesting PvM and equilibrated PvP for all classes, that can satisfy any kind of player (passive, farmer, pvp-lover, afk-er, competitive, etc.).
We are introducing for the 4th time into MU Online World a brand new GAMEPLAY based on a progressive style with 3 BIG STAGES!
There will be a LONG-TERM Gameplay (just like in WoW, there will be players, pvp's, gears at every stage, you don't even have to be "MAX", you can 'casual play' and be the best player level 1-300 stage, or things like that).
Some bonus gameplay info:
- First 100 levels are easier to encourage the new players then the Dynamic Exp is playing it's role by decreasing/increasing exp.
- Quest have low drops and Quest level 3 is really hard.
- There is no reset stats on web! So be careful with how you add your points! You can only reset stats with reset fruits farmed ingame.
- 5 NON-PVP maps: Aida(1,2), Karutan1, Kalima5, Kalima7 and Crywolf (later stage) where you can only KS.
- 4 GENS maps: Atlans, Vulcanus, Raklion and Swamp.
- All other maps are 100% PVP, with free KS (no ban), free PK (no ban).
- PK clear is off, so if you want to PK you must also wait 20-60 minutes to clear and/or you must kill mobs.
- Swamp is a level 395+ map designed only for Master Level.
- You can also make ML on mobs over level 115 (like condras / relics mobs).
- ML Exp is decreasing with % on each of the next master levels: 51+, 101+, 151+, 181.
- Kalimas are populated!
- There is no ARENA (forget about leveling on the same place for 3 months, that's not how MU is supposed to be).
- Exp will be raised for lower levels anytime we consider (to encourage new players).
Because this is a non-reset style where things are very close to each other we have improved the stages system in a different way than on Max30RR:
There are 3 STAGES (At level 220,315,385). When they are finished, each of them will bring some new content to the table but also will boost the newbie exp overall.
The EXP stages are between level 220-240, 315-330 and 385-395 where EXP will be 5% of total EXP (very very low).
When first player from server reach level 241,331,396 the STAGE is officially completed and the stage exp and the previous stages exp will raise.
When 1st Stage is completed by first player, the Stage 1 exp will be doubled for the rest of players.
When 2nd Stage is completed by first player, the Stage 1 will be removed and Stage 2 exp will be doubled for the rest.
When 3rd Stage is completed by first player, the Stage 2 exp will be removed and the Stage 3 exp will be doubled for the rest.
Also the player that will complete the stage first will win VIP for 7 days.What else are unlocking / giving the stages when completed?
Stage 1 (240)
- Old Box 3
- Goldens for Box of Kundun + 3
- +1 Golden Budge Dragon
- Chaos Machine (on site) until +11
- Access to Add Luck (on site)
+ other thingsStage 2 (330)
- Old Box 4
- Goldens for Box of Kundun + 4 & + 5
- +1 Golden Budge Dragon
- Improve all Events rewards (as game progress)
- Improve Crywolf Event - Balgass HP
- Release Crywolf with mobs as a Non-PvP map
- Release Silver VIP
- Release Character Market
- Chaos Machine (on site) until + 12
+ other thingsStage 3 (395)
- Old Box 5
- Improve all Events rewards (as game progress)
- Improve Crywolf Event - Balgass HP
+ other thingsThis system will make the game more interesting and more skill/build-based (+long term) and also the entire balance of server (Economy, PvP, PvM,etc.) will be adjusted anytime.
Also, the gap between top 30 characters and the rest of the server will be lower.
Also, any person who wants to start after xx days from server start can recover easily (if he plays a lot).
Old Box System & 380 Items
There are 5 boxes (Old Box 1, Old Box 2, etc.)
1 is the weakest, 5 is the best.Old Boxes can't be: Traded, Moved to Vault, Moved to Store (you can only drop them).
380 Items can only be farmed on events and from Old Box 4/5:
- Kundun have a chance to drop 380 Weapons.
- Medusa is dropping 1x 380 Weapon.
- Dark Elves (CryWolf Event) have a chance to drop 380 Gloves.
- Bloody Queen (Vulcanus) is dropping 1x 380 Boots.
- Nightmare (Kanturu Relics) is dropping 1x 380 Helm.
- Selupan (Raklion) is dropping 1x 380 Pants.
- Balgass (CryWolf Event) is dropping 2x 380 Armor.
- Old Box 4 have 15% chance to drop 380 Pants.
- Old Box 5 have 15% chance to drop 380 Armor.What Old Boxes are dropping:
Old Box 1: Ring Exc / 1 Harmony / 1 Creation / 1 JoG / Magic Backpack (Extend Inventory) / 10x Invitations Kalima / AGI+VIT Reset Fruits.
Old Box 2: Pend Exc / Demon / Angel / Wings LvL 1 (+0...+9) / 10x Invitations DS / STR+ENE+CMD Reset Fruits.
Old Box 3: Horn Fragment / Feather / Crest / Jewel Bundle (10x Bless/Soul) / Talisman of Chaos Assembly / Sphere5 / 10x Invitations BC.
Old Box 4: Ancient Tier 1 / Flame of Condor / 10x Gemstones / 20x Life / 20x Creation / Talisman of Chaos Assembly / Broken Horn / 380 Pants.
Old Box 5: Seeds (DD, HP, REF, EDR, CRIT) / Wings LvL 3 (Lowest Chance) / Feather of Condor / 20x Harmony / 380 Armor.- They can be obtained on almost any event from our server (check event rewards on every stage).
Events Info
1. Rabbits Invasion:
- 3 times per day (07:00, 15:00, 23:00)
- 20 rabbits per map on: Atlans (1-3), Dungeon (1-3), Elbeland (1-3), Devias (1-4)
- 50% chance to get: 1 Bless / 1 Soul / 1 Chaos
- 50% chance to get: 3.000.000 zen
- You gain 2 CREDITS per kill.2. Arena Tournament:
- Every day at 19:15, each day have a limit (Level 150-320, 321-379, 380-399, 400+)
- Schedule:
Level 150-320: Thursday & Sunday (you must write /warp pvparena1 to join this one)
Level 321-379: Wednesday & Saturday (you must write /warp pvparena2 to join this one)
Level 380-399: Tuesday & Friday (you must write /warp pvparena3 to join this one)
Level 400+: Monday (you must write /warp pvparena4 to join this one)
- Minimum of 3 players to start, maximum of 40 players to play.
- After 40 deaths you will be eliminated.
- One kill = 10 points, one death = -5 points.
- Fight for 10 minutes and then get ranked + rewarded.
- You will be PK Stage level 2, you can't leave map, you can't make parties, you can't buff other ppl.
- You will respawn on random coords after death.
- After 10 minutes you will be ranked and automatically rewarded with:
1st place: 150 credits + HoF Badge
2nd place: 125 credits
3rd place: 100 credits
4th place: 85 credits
5th place: 70 credits
6th place: 50 credits
7th place: 35 credits
8th place: 20 credits3. White Wizard Invasion:
- Every 6 hours (00:45, 06:45, 12:45, 18:45)
- They will spawn on Devias, Noria, Lorencia and Elbeland.
- WW drops 4 random Jewels (Bless/Soul/Life) + 20% chance to get Old Box 1 and 10% chance to get Old Box 2 between the Jewels.
- Orcs have a chance to drop ring of wizard / jewels (B/S).
- You gain 10 CREDITS per kill.4. Chaos Castle:
- Every 3 hours (00:15 03:15 06:15 09:15 12:15 15:15 18:15 21:15)
- You can join only 3 times per day with the same character.
- You will get points that will be accumulated for WEEKLY CC REWARDS ON SITE (Credits).
- There is a decent drop of jewels on CC5, CC6 and CC7.
- Players that win the CC will get rewards:
CC 1-3: 2 Jewels (Bless/Soul/Life) + 15% chance for Random Ancient.
CC 4: 40% chance to get Old Box 1, 60% chance to get Random Ancient.
CC 5: 25% chance to get Old Box 2, 75% chance to get Random Ancient + Random Jewels from mobs.
CC 6: 20% chance to get Old Box 4, 30% chance to get Old Box 3, 50% chance to get 20b/20s + Random Jewels from mobs.
CC 7: 30% chance to get Old Box 4, 20% chance to get Old Box 3, 50% chance to get 20b/20s + Random Jewels from mobs.5. Blood Castle:
- Every 3 hours (02:30 05:30 08:30 11:30 14:30 17:30 20:30 23:30)
- You can join only 3 times per day with the same character.
- You will get points that will be accumulated for WEEKLY BC REWARDS ON SITE (Credits).
- You can close the BC only when there are maximum 3 minutes left from event.
- Exp on BC is raised with 100%.
- There is a decent drop of jewels if you stay until the end.
- Players that win the BC will get rewards:
BC 1-3: 3 Chaos
BC 4: 4 Jewels (Bless/Soul/Life) + 10% chance to get Old Box 1 between 4 Jewels.
BC 5: 4 Jewels (Bless/Soul/Life) + 10% chance to get Old Box 2 between 4 Jewels.
BC 6: 5 Jewels (Bless/Soul/Life) + 15% chance to get Old Box 2 between 5 Jewels.
BC 7: 40% chance to get 10b/10s, 35% chance to get Demon, 15% chance to get Angel, 10% chance to get Old Box 3.
BC 8: 40% chance to get 10b/10s, 35% chance to get Demon, 5% chance to get Angel, 10% chance to get Old Box 3, 10% chance to get Old Box 4.6. Devil Square:
- Every 3 hours (01:15 04:15 07:15 10:15 13:15 16:15 19:15 22:15)
- You can join only 3 times per day with the same character.
- You will get points that will be accumulated for WEEKLY DS REWARDS ON SITE (Credits).
- You can farm Season 4 Spells (Explosion,Five Shot,etc.) ONLY on DS! (Lower DS-es have lower chance).
- Exp on DS is raised with 100%.
- There is a decent drop of jewels if you stay until the end.
- DS 5-7 have a low chance to drop Ancient items.
- DS 7 have a low chance to drop Sphere Lvl. 5.7. Golden Invasion:
- Every 4 hours, random minutes (2:xx, 6:xx, 10:xx, 14:xx, 18:xx, 22:xx)
- You gain different amount of CREDITS per kill.
- Box of Kundun + 1: 10 Goblins in Noria [also gives 1 CREDIT]
- Box of Kundun + 2: 5 Titans in Devias, 6 Devils in LostTowers [also gives 2 CREDITS]
- Box of Kundun + 3: 6 Tantalos in Tarkan, 4 Golems in Aida, 3 Crusts in Icarus [also gives 3 CREDITS]
- Box of Kundun + 4: 3 Satyros in Kanturu and 4 Satyros in Karutan1 [also gives 4 CREDITS]
- Box of Kundun + 5: 3 Iron Knight in Raklion, 2 Twin Tale in Relics [also gives 6 CREDITS]- Special: 1 GGD in Raklion, 1 GGD in Vulcanus and 1 GGD in Karutan2 that is dropping 5 boxes +4/+5 and 15 CREDITS.
- Special: 1 Budge Dragon in Lorencia, 1 Budge Dragon in Noria and 1 Budge Dragon in Elbeland that is dropping Stars (for Rings/Pendants Exc.) and 10 CREDITS.8. Kundun (BOSS):
- Every 18-24 hours, between 18:00 and 00:00 (random minute/hour between this 6 hours).
- Rewards: 3 Random Ancients + 30% chance to drop 380 Weapon between 3 ancients.
- You gain 35 CREDITS per kill.
- There will be spawned an Illusion of Kundun also 1 time per day in Lorencia Circle (Full PvP, no punishments for PK) - JUST FOR FUN - Kill anyone on the small circle even if it's your guild mate and be the lucky one who gets the loot at the end.
- The Illusion of Kundun will drop 1 random ancient.
- It will spawn 1 time per day and have the same window of 18:00 - 24:00.9. Kanturu Refinement Tower:
- Rewards from Hands: 3 Jewels (Bless/Soul) and 10% chance to drop Old Box 2 between 3 Jewels.
- Rewards from Nightmare (BOSS): 2 items - Exc. Weapons (Knight Blade, Platina Staff, etc.) + 380 Helm + Chance for Old Box 4 .
- You gain 30 CREDITS per Nightmare kill.10. Medusa (BOSS):
- Every 12 hours, at 11:00 and 23:00
- Rewards: 2 Socket Weapons with 4/5 slots (or PSS exc for RF) + 1 Weapon Level 380 + 30% chance for Old Box 5.
- You gain 50 CREDITS per kill.11. Selupan (BOSS):
- Every 12 hours from when it is killed
- Rewards: 4 Socket Set Items (Helm,Armor,Gloves,Boots,Pants) & Shields (or PS exc for RF) with 4/5 slots + 380 Pants + 50% chance for Old Box 5.
- You gain 50 CREDITS per kill.12. Erohim (BOSS):
- Every 25-35 hours
- Rewards: 25% chance to get 1 Hyon Sword / Gywen Bow (for W3) and 75% chance to get 10b / 10s.13. CryWolf Event:
- 2 times per week [Wednesday and Sunday at 22:30]
- Balgass drop: 2x 380 Armors + 50% chance for Old Box 4 / 50% chance for 1 PoH (Piece of Horn, Fenrir item)
- Dark Elves drop: 15% chance to drop Old Box 3, 35% chance to drop Exc. Weapons (Knight Blade, Platina Staff,etc.), 25% chance to drop 380 Gloves, 25% chance to drop 20kk ZEN.
- Bonus 10% EXP for ENTIRE SERVER if you finish the Event.
- 2 Bless/Soul for each finalist.
- You gain 20 CREDITS per Dark Elf kill and 75 CREDITS per Balgass kill.14. Imperial Guardian:
- It announce every time a boss is killed.
- You can join only 5 times per day with the same character.
- It doesn't have any cooldown.
- Drop Rate of invitation pieces is low.
- Bosses are dropping 4 Jewels (B/S/Life/Chaos).
- Sunday events are dropping 4 Jewels per Boss, 3 Bosses per event.
- Sunday's Final Boss also have a 30% chance to drop Talisman of Chaos Assembly.15. Doppelganger Event:
- You can join only 3 times per day with the same character.
- Drop Rate of invitation pieces is low.
- Silver Chest is dropping 1x Scroll/Elixir.
- Golden Chest is dropping 2x Scrolls/Elixirs.16. Illusion Temple:
- 2 times per day (09:00 and 21:00)
- You can join only 1 time per day with the same character.
- Minimum of Players for Event to start: 4
- You must leave the party in order to be able to join the Event.
Winners of IT 1 can win: 25% 10b/10s 75% Demon/Angel.
Winners of IT 2 can win: 75% 10b/10s 25% Demon/Angel.
Winners of IT 3 can win: 50% Old Box 3 50% 10b/10s.
Winners of IT 4 can win: 60% Old Box 3, 5% Feather of Condor, 35% Old Box 4.
Winners of IT 5 can win: 60% Old Box 4, 10% Feather of Condor, 25% Old Box 3, 5% Old Box 5.
Winners of IT 6 can win: 60% Old Box 4, 10% Feather of Condor, 25% Old Box 3, 5% Old Box 5.17. Bloody Witch Queen (BOSS):
- She spawns in the darkest holes of Vulcanus, 2 times per day at Random Hour / Minute as following:
1 time between 17:00 and 21:00.
1 time between 03:00 and 07:00.
- She will stay 30 minutes after she spawn.
- She is dropping 1x EXC Last tier Items (GD, DS,etc.) with 1-2 options and 380 Boots.
- She have a low chance to drop Old Box 4 and a very low chance to drop Old Box 5.
- She is a BOSS, so expect High HP / DMG.18. Cursed Dragon Revenge (BOSS):
- The Dragon is respawning 4 times per day on Elbeland at Random Hour / Minute as following:
1 time between 00:00 and 05:59
1 time between 06:00 and 11:59
1 time between 12:00 and 17:59
1 time between 18:00 and 23:59
- He is dropping only Old Boxes (1-5).
- Smaller Boxes have a higher chance of being dropped from him than the bigger ones.
- Because he was cursed to have 2 heads, the dragon lost his attack-power so even if he is a BOSS, he have a very low attack but it is compensated with a big pool of HP.
- He stays 1 hour after he is spawned.
19. Death King Invasion:
- Death King (Boss) and his Slaves (Death Bones) will invade Lorencia 2 times per day (12:00 and 00:00)
- There are 2 Bosses per Invasion and 10 Slaves.
- Both Bosses and Slaves have a low HP pool and a easy-medium damage.
- If you are PK (Stage1 / Stage2) and you're killing a Boss you will be completely cleaned of your PK.
- If you are PK (Stage1 / Stage2) and you're killing a Slave you will clean 2 kills.
20. Bonus System:
- The bonuses will start at 18:00 Server Time with the exception of Saturday when Bonus starts at 19:30 (due to CS).
- On weekly days (Monday-Friday) Bonus System will increase normal exp with 50% and ML exp with 25%.
- On weekends (Saturday, Sunday) Bonus System will increase normal exp with 100% and ML exp with 50%.
21. Quiz Event:
- The role of this Quiz Event is to encourage players to read and learn about what OldSquad can offer and to learn precious info that can help in their journey here (all info topics).
- The Quiz Event will start randomly 1 time per day between 10:00 and 23:59.
- There are 18 questions per day which can't repeat on the same day but they may appear into other day.
- The question will repeat every 20 seconds, for 3 times, if there is no correct answer after 1 minute it will be canceled and the next question will appear.
- The questions are made by us and are 100% from information of our servers (events,drops,mobs,credits,etc.) - so read everything in order to raise your chance to win on this event.
- The answers are mostly simple and they can be either a number, a word, 2 words, yes, no or name of an object from game.
- In order to answer at the quiz you need to write /ans xxx where xxx = the answer that you think the question have.
- You need to write the exact answer in order to win (example 2 resets is different than 2 rr even if it means the same).
- The capital letters doesn't matter so you can write either EViL spIriT or Evil Spirit which will be right in both ways.
- The questions poll is around 200 for the moment but we'll keep adding questions until we reach around 400-450 unique questions.
- For the moment rewards are 1x Jewel of Bless for each correct answer.
- At the end of the Quiz Event there is also a ranking with Top3 players with the most correct answers at that round.22.Royal Rumble Event:
- Every Sunday.
- Registrations between 21:15 and 21:30.
- Event starts at 21:31 and it is over when there is only 1 character left at it.
- Maximum of 40 participants.
- You have 3 lifes (so you can die 2 times but the 3rd time you die you will be eliminated).
- The last man standing will win (and only him) a prize (at beginning 1x Feather 1x Crest).
- How to register at event:
- You need to have Level 1 (new character).
- The character MUST be only DK.
- You must write /register between 21:15 and 21:30 to register it to event.
- Everything else is checked and set automatically (moving your char, deleting inventory, buffs, etc.)
- Anyone can participate doesn't matter resets/levels on his main character (equal chances for everyone).
Spots Info
- Except for Noria, Devias and Elbeland, anywhere you see a mob there is a spot for sure (we deleted extra mobs because we didn't want to have overpowered spots by mistake).
- The number of spots in every map is 20-40 (differs from map to map).
- The number of mobs in spots are 7-8 (some spots have 7 mobs, other spots have 8 mobs).
- All spots are a mass spawn (not a pointed one) so you must have SM/SUM/EMG or any AoE guy in parties to hold the spots.
Drop Info
- Our PvM & Economy System are encouraging Active Players but they also help AFK Players with Helper.
- Jewels drop on maps are based on Monster levels, which means lower maps/mobs will have really low chance for jewels while high and end-game maps/mobs will have a high drop rate.
Economy Drops:
- Web Credits: Medium [Obtained from: Votes, Exchange Online Hours, Weekly Tops, Events, Bosses, Goldens, WW, Rabbits, Arena Tournaments, etc.]
- Jewel of Guardian: Medium [Drop only in LoT]
- Jewel of Bless: Medium-Low [Drop starting from Devias to all maps]
- Jewel of Soul: Medium-Low [Drop starting from Devias to all maps]
- Jewel of Chaos: Low [Drop starting from Devias to all maps]
- Zen: Low [Obtained from : Mobs, Selling Items, etc.]
- Gemstone: Low [Drop in Kanturu Relics and Kanturu3]
- Dark Raven Spirit: Low [Drop only in Kanturu2]
- Sphere Level 4: Low [Drop only in Vulcanus]
- Feather & Crest: Very Low [Drop only in Icarus]
- Jewel of Life: Very Low [Drop starting from Tarkan to all maps]
- Jewel of Creation: Lowest [Drop starting from Tarkan to all maps]
- Sphere Level 5: Lowest [Drop only in Vulcanus and DS7]
- Dark Horse Spirit: Lowest [Drop only in Kanturu2]
- Magic Backpack (Extension of Inventory): Lowest [Drop only in Karutan2]
- Flame of Condor: Lowest [Drop only in Swamp]
Heart/Silver/Gold system:
- Heart of Love can be farmed on maps from Devias until LostTower3.
- Silver Medal can be farmed on maps from LostTower3 until Tarkan.
- Gold Medal can be farmed on maps from Tarkan2 until higher maps.
- Heart of Love: Items like Sphinx,Plate,etc. +7 -> +11 ; Weapons/Shields from +7 -> +13.
- Silver Medal: Items like Dragon,Legendary,etc. +7 -> +11 ; Weapons/Shields from +7 -> +13.
- Gold Medal: Items like Black Dragon,Grand Soul,Ashcrow,etc. +6 -> +12 ; Weapons/Shields from +6 -> +13.
Spells drops:
- The most important spells are farmed from LostTower1 and Atlans until Losttower3 and Atlans2/3 + Dungeon3 with a medium drop:
Fireburst, Twisting Slash, Evil Spirits, Lighting Shock, DarkSide, Dragon Roar.
- Innovation,Ignore Parchment and all the Season 4 Spells (Gigantic Storm,Multishot,etc.) can be farmed ONLY in Devil Square (1-7), with a low drop, DS1-4 have lower drop than DS5-7.
- Mana Shield, Death Stab, Rageful Blow, Berserk, Critical Dmg can be farmed from LvL 70 mobs until LvL 83 mobs (like Tarkan1,Tantalos from Tarkan2,etc.).
- Ice Storm, Decay, Reflect, Summon and maybe I am missing something are farmed after LvL 84 mobs (starting from Kanturu2 and places like that).
Other drops:
- Starter Ring Level 40: Any item from Heart of Love +7 -> +11.
- Starter Ring Level 80: Small Wings for all classes.
- Box of Heaven: Bless, Soul, Chaos, Life, Imp, Angel.
Chaos Machine Info
- Devil Square Ticket 1-4: 90%; 5,6: 85%; 7: 80%.
- Blood Castle Ticket 1-5: 90%; 6,7: 85%; 8: 80%.
- Illusion Temple ticket 1-5: 80%; 6: 70%.
- Feather of Condor: 1-60% (60% max rate).
- Wings lvl 1: 1-90% (90% max rate)
- Wings lvl 2: 1-90% (90% max rate)
- Wings lvl 3: 1-40% (40% max rate)
-
Item Upgrades (+10 -> +15 without luck):
- +10, +11: 50%.
- +12: 55%.
- +13, +14: 60%
- +15: 65%
- Luck will add + 20% chance on every upgrade.
- Socket Items have -5% chance on any mix.
- Fruits Mix: 75%.
- Pets Mix: 80%.
- Piece of Horn: 60%.
- Broken Horn: 50%.
- Horn of Fenrir: 30%.
- Gemstone Mix : 85%.
- Lower Refine Stone Mix: 35%.
- Higher Refine Stone Mix: 60%.
- Lower Refine Stone in Item: 40%.
- Higher Refine Stone in Item: 80%.
-
Jewels rates:
- - Soul: 60%.
- - Life: 50%.
-
- Harmony: 75%.
- Luck will add + 20% chance on Soul and Life.
Wings Level 4 SystemWings Level 4 Lore:A long time ago the MU Land was ruled by 2 significant names, Balgass and Kundun, who joined forces with only one objective: Destroying anyone in their path who tried to stand in their way.
But things weren't as simple as they seemed, on paper they should have ruled supreme, but our MU citizens proved to be resourceful in overcoming the threat of these two cruel rulers.
After being defeated multiple times, Balgass decided that Kundun's help alone was not enough for their plans to succeed, so they summoned from the underworld a new and bigger threat than themselves, to aid them in their quest for domination: Selupan
Time passed and Selupan realised that he was much stronger than both Kundun and Balgass, he decided to leave their alliance and create his own. That was the moment when Medusa joined him as a partner, their new goal: Destroying OldSquad World.
But just like Balgass had his own army and Kundun to help him, Selupan had a thirst for power and wanted an army of his own, he used his slaves from Raklion and Medusa's slaves from the Swamp. Then he created 2 new minions to add power to his own army: So came into being the Bloody Witch Queen and the Cursed Dragon which were sent to fight with MU citizens and attack our world while Selupan and Medusa were gathering enough energy and strength to join the battle.
As good always finds a way to triumph over evil, both of their minions were defeated multiple times by our defenders. This couldn't pass unnoticed by Balgass so he realised that Selupan was vulnerable, and he saw his opportunity to regain the throne of Evil had come. As their forces weren't enough to face Selupan alone, they made a compromise and asked our MU citizens for a colaboration.
This colaboration has lead to a pact between Balgass and them, where upon Balgass will summon a new minion called 'Wings Protector' which contains an old and lost artifact that can be used in forging a new tier of Wings for our MU citizens that can help them to finally defeat Selupan forever and grant Balgass and Kundun their supremacy of Evil.
OldSquaders were clever enough to accept and to sign this pact, because they knew that Balgass and Kundun are the lesser of the two evils and would be much easier to defeat in the future, should they attack them again, it made sense to join forces and defeat Selupan and his army. So they signed it and the new Wings tier entered our world!
But, what they didn't know when they signed it, is that it gives both Balgass and Kundun a long period to get stronger than ever, and it's very possible that Balgass and Kundun have a surprise in store for the MU citizens, after the OldSquaders have forged the first wings and defeated Selupan...Wings Level 4 System:
To upgrade your Wings level 3 to Wings level 4 you have to pass a kinda big challenge.
Firstly, just like for wings level 3 with feather of condor, you need to mix a special item before mixing the wings level 4 themselves.
There are 3 special items: Goat Statue, Hawk Statue and Oak Charm.
Goat Statue is needed if you want to upgrade Wings level 4 for: BK,SM,MG
Hawk Status is needed if you want to upgrade Wings level 4 for: DL and RF
Oak Charm is needed if you want to upgrade Wings level 4 for: ELF and SUM
How you can make this special items?You need to mix the following things at Chaos Goblin in Noria:
- 1x Old Box 3
- 1x Old Box 4
- 1x Old Box 5
- 1x Chaos
- 5x Creation
- 1x 30b Bundle
- 1x 30s Bundle
- 1x Weapon 380 +13 +Add16 (No Explosion Blade / Sylph Wind Bow)
- 400kk zenThis item can be transferred to another character only via personal store, for now !
You have 50% chance to obtain a random special item (from Goat Statue, Hawk Statue and Oak Charm) and 50% to fail and lose everything.
After you acquire the idol/charm that you are interested for your own upgrade the next hard part is coming:
You need to acquire a Talisman of Luck, which is an old artifact that is dropped by the new minion Wings Protector.
Wings Protector is a kinda-weak minion from the new army of Selupan and Medusa (even weaker than Cursed Dragon) but it's a sneaky one!
He is spawning ONLY 1 time per day and ABSOLUTELY random as time (but 70% of times from 12:01 PM 23:00 PM and 30% of times from 23:01 PM to 11:59 am).
It will always announce when it is spawning and also when it is killed / when he retreat.
It will stay 1 hour after he is spawned.
He can spawn on both Vulcanus and Raklion and it won't be specified on the announcement with a random spawn on one of the maps.After you defeat him and acquire your Talisman of Luck you can proceed with the next and last step which is the Wings Level 4 Upgrade Mix.
You need to mix the following things at Chaos Goblin in Noria:
- Idol/Charm (depends on what wings level 4 you want).
- Wings Level 3 +13 +Add16 (your class wings, if you mix SUM wings3 you will get SUM wings4, if you mix ELF wings3 you will get ELF wings4, etc.)
- 2x 30b Bundle
- 2x 30s Bundle
- 1x 30harmony Bundle
- 1x Chaos
- 1x 10creation Bundle
- Talisman of Luck
- 1000kk zenYou have 100% chance to succeed with the upgrade!
!!! Talisman of Luck and all Wings Level 4 are not tradeable/usable into web warehouse -> Personal work and 'achievement'.
Attention again:
If you mix Charm and W3 Elf + 13 you will gain W4 Elf.
If you mix Hawk Idol and W3 RF you will gain W4 RF.
Conclusion: It's an upgrade of your old wings.Info about Wings Level 4:
- W4 can be equipped only by chars with Quest level 3 made and MINIMUM 100 MASTER LEVEL (It won't show the ML requirement on the client but it's needed to equip them).
- W4 starts with 60% dmg and 60% absorb at +0 and grows only by 1% per level (at +9 are the same as W3 + 15).
- Currently, you can't upgrade W4 more than + 9 but we'll add the option in the future if we'll consider to (so at +15 would be +6% dmg and abs compared to W3).
- Increase defense by Level * 10 compared to W3 of Level * 4 and starting with 15 bonus def (at +9 it have 150 def compared to 126 of W3 + 15).
- Options from life are +6 +12, +18, etc. compared to +4, +8, +12 of W3 (dmg, wizz and deff bonuses only - recovery is the same).
- W4 have +2% chance for Ignore, Ref and Complete Life compared to W3's 5%.
- W4 will always come with at least 1 option of this 3 on any MIX, with a maximum of 2 options (75% for 1 option, 25% for 2 options).Castle Siege System (Unique System)- Castle Siege is every Sunday at 17:00 Server Time.
- Register period is between Monday and Wednesday (at 00:59).
- Sign of Lord period is between Wednesday (at 01:00) and Friday (at 01:00).
- You can register both ingame (on Valley of Loren) or on SITE (as GM of the alliance).
- Friendly Fire is active (10% of damage goes to allies also).
- After registering the crown, defensive team must go outside of the room and re-enter it (so you don't have to press CTRL to attack).
- Crown is with accumulated time.
- Every 3 seconds while the GM is outside of the room he will lose 1 second from the accumulated time.
- Every FAIL of accumulating the crown (Example: You lose a switch, you miss-click again on the crown, etc.) will cost you -1 second of the accumulated time.
- DL with Dark Horse can't be moved while registering the Crown. Also all classes on Fenrir can't be moved while registering the Crown.
- Sleep duration is maximum 5 seconds.
- Elf buff duration is 90 seconds.
- Crown switches are not in the center of square so they are harder to be kept.
- Minimum requirements in order to have a chance at CS: GM-TANK + 2 TANKS for SWITCHES.
- Normal CS gameplay is the same (get switches, register crown, etc.) but the CS is won by the Team with the most Points at the end of CS (doesn’t matter if the Team is attacking at the end, it will still win the CS).
- 15 minutes after CS starts (at 17:15) the initialization of the system will start. Starting from 17:15, the Team that is having the Defender status at CS will get 1 Point every 2 seconds (points are getting faster as CS time goes on). If the defenders lose the crown to attackers, the new defenders will start to earn Points. Basically any Team that have Defender status will earn 1 Point every 2 seconds (or more). The only rule to earn the points is that ALLY GM must be ONLINE and on CS map, else the Points won’t raise.
-
Apart from the Defender Points, killers can also contribute to their team by KILLING enemies on the crown room (ONLY crown room and only enemies - allies kills won’t give you points -):
- TANK kill (char with more than 40% of points into VIT) = 5 Points
- Ally GM kill = 15 Points
- Rest of players = 2 Points
- Every 3 minutes a global message will show up to announce current Points for all Teams involved at CS. Players can also use /score command anytime they want to check the Points situation.
-
At the end of the CS, the Team with the most Points accumulated will be the winners, doesn’t matter if they are attackers at the end.
- Other CS Info:
- Teleport of SM disabled near Switch Crowns (5x5 space).
- Dark Horse skill cooldown reduced to 6 seconds.
- Mana Shield, Sweal, Reflect, Fitness, DSR buff have a standard duration of 60 seconds (ONLY on CS server).
- Defenders spawn location is between the end of the bridge and middle of 1st gates and 2nd gates.
- Summon cooldown increased to 45s.
-
Battle Master skill (stun) duration increased from 15s to 20s
- For winners:
- Land of Trials access where Ancients are dropping (low rate) and JoG's are dropping (medium rate).
- Erohim access.
- Lord mix access (1 per day, Last tier item exc (GD, DM, etc.) - with 3-4 options).
- Entrance level in Valley: 200 lvl.
- Good exp spots: Fire Golems (for level 280-330/350).
- GLORY!
+ Many, many, many other things !
Let's bring MU Online to the next level ! -
-
Welcome !

-
- Popular Post
- Popular Post
I will present the new organisation of our staff that will guarantee you SAFE, FUN and CLEAR stay on our community!
@ADMIN - Administrator + Game Designer & Tech - PM me for things like: Technical problems, host/site/forum problems, gameplay problems, complicated reports, good ideas for our community (promote ideas, settings ideas, etc.), staff applications, reporting higher staff (game managers), and donations.
@Gion - Administrator + Community Manager - PM him for things like: Server events, ingame support, ingame questions, bug reports, public relationships
@Legion - Casual Helper - PM him for things like: Forum support, forum events/suggestions, forum requests, server events. (ingame support optionally)
Enjoy your stay and help us to grow up!
-
Dubios like-ul ala =)
-
-
Hello and welcome !
Enjoy your stay
-
-
De cand astepta Tsu sa intrebi asta
) -
-
-
-
da era mai frumos pe alb dar merge si asta plus ca ne lipsesc functiile am spamat atata degeaba deja trebuia sa am statusul de "sef la bataie" 300+
Aveti posibilitatea sa schimbati inapoi pe tema veche, un butonas jos cu Change theme
Cat despre "custom title", good to know, daca aveti niste sugestii de custom titles le astept si le introducem
La 500 posturi puteti sa va schimbati singr custom title-ul in ce vreti

-
-
-
Bafta la CS, cea mai buna alianta sa castige !
-
-
-
-


Downloads - NonReset
in Info & Rules
Posted
OldSquadMU - NonReset - Full Client - V1.1 (09 November) (MEGA):
https://mega.nz/#!woBERKDA!GmLgZELgDA6UC1cxKF0Zba6bb_QTn1jPMG9Jr3iCwAw
OldSquadMU - NonReset - Full Client - V1.1 (09 November) (Google Drive):
https://drive.google.com/open?id=1p7y2sqgDcdwpWA_LDT1EXowj-PQzsAL5
Anti-Lag patch (for CS especially - it will reduce all animations):
http://www.mediafire.com/file/s0axl2qvu9yhraf/Anti-Lagg+Patch.rar
Copy the Data folder into your client!
If the game is not working or you have errors follow this steps:
1. START GAME ONLY VIA LAUNCHER (StartGame.exe), ELSE GAME WILL NOT START!!!
2. Install LATEST WinRar version.
3. YOU NEED TO HAVE A CLEAN WINDOWS WITHOUT VIRUSES OR ROOTKITS ELSE GAME WON'T WORK!
To clean your PC fast & efficient use malwarebytes (scan + repair): https://www.malwarebytes.com/antirootkit/
4. IF YOU HAVE MAIN.EXE CRASH ERROR ON START PLEASE DO THE FOLLOWING THINGS:
a) Right click on main.exe -> Properties -> Compatibility ->
-> Check on 'Run this program in compatibility mode for:' -> select Windows XP (Service Pack3) from list
-> Check on 'Run this program as an administrator' -> Press Apply.
b) Right click on My Computer -> Properties -> Advanced System Settings -> Advanced -> Press on 'Settings' from 'Performance' tab ->
-> Data Execution Prevention -> Check on 'Turn on DEP for all programs and services except those I select:' ->
-> Click on 'Add...' -> Select the OldSquadMU Folder -> Select main.exe and press on ADD, repeat procedure for Launcher (StartGame.exe) also ->
-> Press Apply.
c) Disable any ANTIVIRUS/Firewall/Anti-Malware that you have running before trying to open the game (Eset,Avira,Windows Defender,AVG,etc.).
5. IF GAME IS NOT STARTING (YOU PRESS START AND NOTHING HAPPENS)
PLEASE GO TO RUN->CMD AND WRITE netstat winsock reset -> PRESS ENTER AND RESTART PC! IF STILL NOT WORKING THEN RESTART INTERNET / TRY TO CHANGE IP ADDRESS!
6. ATTENTION! ALL THE TIME SEARCH FOR MAIN.EXE / LAUNCHER.EXE IN PROCESSES AND END THEM!
7. Install everything you can from the folder FixGameCrash.
After every step check if it's working.
It should work 100% if you follow all the steps!
You can also ask for support anywhere (facebook/skype/forum).
Enjoy!